
Minecraft
Modding Guide

TABLE OF CONTENTS
The Basics 3
What is Modding? 3
What is This Guide For? 3
Mod Your World with Tynker 4
Types of Mods Supported 4
What’s Included 4
Required Tools 5
For Creating Resources and Mods 5
For Deploying Resources and Mods 5
Modding for Different Minecraft Versions 6
Tynker Courses for Minecraft 7
Modding with Minecraft Java Edition (PC/Mac) 8
Create a Parent-Verified Student Tynker Account 8
Set Up Your Server 8
Invite Friends to Your Server 9
Understand Server Time Limits 10
Designing and Deploying Resources 10
Building and Deploying Mods 12
Managing Your Mods in your Private Server 12
Publish and Remix 12
Modding with Minecraft Win10 and Pocket Edition 13
Create a Parent-Verified Student Tynker Account 13
Designing Resource Packs 13
Creating Behavior Packs 14
Installing Resource Packs and Behavior Packs 15
Installing Skins 15
Coding Mods for Minecraft Windows 10/Pocket Edition 16
Minecraft Modding FAQs 18
Any questions? We’re here to help! 21
© Tynker 2018 2
The Basics
Minecraft is an expansive sandbox game that is incredibly popular among kids and adults alike,
in large part because of its flexibility. It’s often compared to LEGO®, and if you play Minecraft,
you’ll see why. Players can truly build anything that’s in their heads. The open-endedness of the
game has created a culture of makers who dream up new things to make and then persevere to
bring them to life.
What is Modding?
Modding is just jargon for modifying or altering the game in some way. For example, if you want
a block to look like a magic carpet and float like one, you can do that. Modding can involve
superficial changes, like making rainbow-colored chickens, or deeper changes where you
program rules that govern the behavior of actors or even procedurally generate worlds.
What is This Guide For?
This guide will help you:
● Set up your parent-verified Tynker account
● Verify device requirements for modding and publishing
● Understand Tynker’s modding tools and services
● Learn what each Minecraft version supports
● Set up your Java Minecraft server
● Add friends to your server
● Design custom skins, mobs, blocks, and items
● Build mods with the Mod Designer
● Publish and remix in the Tynker community
● Create and publish mods for Minecraft on PC/Mac
● Create and publish mods for Minecraft Windows 10
● Create and publish mods for Minecraft on tablets
● Learn what else you can do with a Tynker subscription
© Tynker 2018 3

Mod Your World with Tynker
Welcome to Minecraft modding with Tynker! It’s easy to get set up and start creating mods,
skins, and more.
Types of Mods Supported
Here are the types of changes that you can make using Tynker:
Skins: Alter what you look like when you play Minecraft. Get creative with the
Resource Editor and our set of starter skins.
Items: Customize Minecraft items that you use. You can create a rainbow-colored
version of a sword, for example, using the Resource Editor.
Blocks: Design your own special blocks. For example, make the grass block and
sand block look like cakes to turn your whole world into a cake world.
Mobs: Dress up your Minecraft animals and make them your own. Add sunglasses
for the pig, recolor the horse, or even make zombies less scary.
Mobs with code: Change the look and behavior of these mods. You can transform
a wolf to a dinosaur and then modify its behavior with drag and drop block coding.
Server Mods: Create a mod and deploy it on your own Private Minecraft Java
Server. Build complete multiplayer games like spleef or soccer, or even construct
mazes and cities. Server mods can only be deployed on a PC or Mac computer.
Client Mods: Program a mod with code in Tynker and deploy it in your Windows 10
Edition or Pocket Edition(iOS/Android) of Minecraft. This uses a socket
connection in the newer Minecraft clients. These mods do not require a server.
What’s Included
Tynker includes the following tools for Minecraft modding:
● Tynker Workshop/Mod Designer: Create custom mods using drag-and-drop blocks
and deploy them as server- or client-side mods in Minecraft.
● Tynker Resource Editor: Draw your own skins, items, mobs, and blocks and deploy
them as resource packs in Minecraft.
● Tynker Behavior Editor: Define mob behaviors and deploy them as behavior packs in
Minecraft.
© Tynker 2018 4

● Tynker Java Server: A private server for Minecraft classic (PC/Mac) users who want to
test their mods and play with friends.
● Tynker Websocket Server: A tynker-hosted Websocket server for Minecraft Windows
10 and Pocket Edition users who want to create their own commands using the
“/connect” or “/wsserver” commands.
Required Tools
For Creating Resources and Mods
Resources and mods can be created on tynker.com with your free parent-verified account
using a desktop, laptop, netbook (such as Chromebook), or the Tynker app on iPads. We do
not support creating resources and mods on the Android Tynker app or on mobile phones.
For Deploying Resources and Mods
To deploy Minecraft mods and resources made with Tynker, you must have one of the following
versions of Minecraft installed on your computer, iOS, or Android device:
● Minecraft for PC/Mac (also referred to as classic or Java Edition)
● Minecraft for iOS (also referred to as Pocket Edition)
● Minecraft for Android (also referred to as Pocket Edition)
● Minecraft for Windows 10 Edition
● Minecraft: Education Edition
You will have to purchase Minecraft separately. Note that Minecraft is not currently supported
on Chromebooks. Our tools and courses are version specific, so please check what is
compatible using the following table:
Minecraft
Java
(PC/Mac)
Minecraft
(Win 10)
Minecraft
(Pocket
Edition)
Minecraft:
Education
Edition
(PC/Mac)
Tynker Resource Editor
✓
✓
✓
Tynker Behavior Editor
✓
✓
Tynker Mod Designer
✓
✓
✓
Tynker Workshop
✓
✓
✓
Minecraft Code Connection
✓
© Tynker 2018 5

Modding for Different Minecraft Versions
Although Tynker supports modding on different Minecraft versions, not all forms of modding are
supported on all versions. Please review the following table to understand the different types of
resources and modding that you can perform with Tynker, based on the specific Minecraft
platform version that you are using.
Minecraft
Java
(PC/Mac)
Minecraft
(Win 10)
Minecraft
(Pocket
Edition)
Minecraft:
Education
Edition
(PC/Mac)
Tynker Tools and
Services
Blocks
✓
✓
✓
N/A
Tynker Resource
Editor
or
Tynker App
Skins
✓
✓
✓
N/A
Items
✓
✓
✓
N/A
Mobs
✓
✓
✓
N/A
Mobs with code
N/A
✓
✓
N/A
Tynker Behavior
Editor
Mods
✓
✓
✓
✓
Tynker Mod
Designer
or
Tynker App
Private Server
✓
N/A
N/A
N/A
Tynker Private
Server Cloud
You DO NOT need the Java Server if you are using the Windows 10 or Pocket Edition of
Minecraft. Instead you can directly deploy Resource Packs and Behavior Packs into your
Minecraft client.
Mobs with code are only supported on Minecraft Windows 10 Edition and Minecraft Pocket
Edition.
© Tynker 2018 6

Tynker Courses for Minecraft
We have a range of Minecraft courses for home, school, and camp use; not all courses are
supported on all versions of Minecraft. Please review the following table to see what course you
can start with. For example, if you are a home user with Minecraft on the iPad, you can use
Mythicraft and Mind Crafters on the Tynker App on the iPad.
Minecraft
Java
(PC/Mac)
Minecraft
(Win 10)
Minecraft
(Pocket
Edition)
Minecraft:
Education
Edition
(PC/Mac)
Mod Starter Pack
✓
Mod Design 1
✓
Mod Design 2
✓
Game Design 1
✓
Game Design 2
✓
Mind Crafters *
✓
✓
Mythicraft *
✓
✓
Add-On Tutorial Pack *
✓
✓
Mod Tutorial Pack *
✓
Mod Design Studio
✓
Game Design Studio
✓
Mythicraft
Coming
Soon
Mindcrafters
Coming
Soon
Mod Tutorial Pack *
✓
Agent Trials
✓
* Available in the Tynker iPad app
© Tynker 2018 7

Modding with Minecraft Java Edition (PC/Mac)
Create a Parent-Verified Student Tynker Account
To get started with Tynker Minecraft modding, you need a parent-verified student Tynker
account.
Here’s how to create a Tynker account if you don’t already have one:
1. Go to www.tynker.com and click “Join for Free.”
2. Choose the “Student” option. Minecraft is only available for students.
3. Create a screen name and password, or choose the “Join with Google” option if you
have a Google account.
4. Enter your name and a valid parent email address. Your parent will be sent an email to
verify your account.
5. Remind your parent to click the link in the email to verify your account.
Here’s how to verify your account if you already have a student account that your teacher
created for you:
1. Log in to your account and click on your avatar in the top left.
2. Click on Minecraft Java Server at the top.
3. Enter your enter your parent’s name and email address in the box next to “Almost
there!”. Your parent will be sent an email to verify your account.
4. Remind your parent to click the link in the email to verify your account.
When your parent approves your account, you’ll have access to a private Minecraft server for 60
minutes/month. For additional access, talk to your parent about getting a Tynker subscription.
Set Up Your Server
If you have not already done so, purchase Minecraft Java Edition for PC/Mac separately. Note
that there are two Windows versions of Minecraft – one for Windows and one for Windows 10.
© Tynker 2018 8

Both versions will work on a Windows 10 computer, but the Java Edition of Minecraft can be
found under link titled Windows. If you already have Minecraft installed on your computer, verify
that it is the Java Edition by looking at the title page. You should see Java Edition under the title.
1. Log in to your student Tynker account and click on your avatar in the top left. Click
Minecraft Java Server at the top and then click “Set up now.”
2. Enter your Minecraft username. This is the username that you created when you
purchased Minecraft. If you don’t know your username, you can find it by logging into
Mojang. You can also change your profile name on Mojang’s site. You can only register
your Minecraft username with one Tynker account at a time.
3. Enter your world name. It can include upper- and lower-case characters, underscores,
and dashes, but it cannot have any spaces. Your world name can’t be the same as
anyone else’s.
4. Open Minecraft and choose the Multiplayer option on the main screen.
5. Click “Add Server” and type in Tynker for the name and mc.tynker.com for the address.
Make sure you set “Server Resource Packs” to Prompt or Enabled. This will allow you to
download the items, blocks, mobs, and mods that you create in Tynker. Then join the
server.
6. When you enter the server, you’ll be in Tynker’s lobby. From here, enter your own server
by typing “/join ” with your world name after the join. The first time you do this, it may
take up to a couple of minutes to load your world. If you chose Prompt for the “Server
Resource Packs,” make sure you allow them to be downloaded.
Then, you will be in your own private Tynker server. Any mods or resources you create and
deploy or activate on Tynker will be available in this world.
Invite Friends to Your Server
Your friends do not need to have a Tynker account to join your server, but if they set up an
account, they’ll be able to host their own private servers.
1. Log in to your Tynker account click on your avatar in the top left. Click on Minecraft Java
Server at the top.
2. Go to the “Friends” section and add your friend’s Minecraft username. From this screen,
you can also delete any friends you no longer want to have access to your server.
© Tynker 2018 9

3. Tell your friend to add the Tynker server in the same way you did (in Minecraft, choose
the Multiplayer option and add the Tynker server with mc.tynker.com as the address).
From the lobby, they can type “/join ” followed by your world name to enter your world.
They will only be able to access your server when you are already on the server.
Understand Server Time Limits
If you have a Tynker web subscription, you’ll have more server time, more courses, and more
mod templates to make. You will also be able to invite more friends to join you on your private
server.
FREE
PREMIUM
Server Time (mins/month)
No Tynker Account: 30
Free Tynker Account: 60
Annual Plan: 480
Lifetime Plan: 960
Friends
10
20
Modding Tutorials
5
50+
World Size
Small
X-Large (16x)
Server
Shared
Private
With a Tynker subscription, you’ll also have unlimited access to 20 web programming courses
and 11 iPad courses in which you make games as you learn to code.
Designing and Deploying Resources
With Tynker’s Minecraft Resource Editor, you can create custom skins, items, blocks, and
mobs.
1. Log in to your Tynker account and go to the Projects tab.
2. Under the My Projects tab at the top, select Minecraft Mods and click Create.
3. Select what type of resource you want to create.
4. Select Minecraft Java Edition at the top and choose a template to start with.
5. Name your new creation by typing in the field at the top right of the screen.
6. Start drawing and editing.
a. On the left, you can choose a color from the palette or create your own palette.
© Tynker 2018 10

b. At the top, you have an undo and redo button to undo or redo recent changes.
c. At the top, you have the five drawing tools. From left to right, they are:
i. Pencil: Paint a solid color one block at a time.
ii. Texture Brush: Paint one block at a time while slightly changing the color
to give you the “Minecraft” look.
iii. Eraser: Erase what you’ve made.
iv. Paint Bucket: Fill in solid areas with a single color.
v. Eyedropper: Select a color that’s already on the skin, which you can then
use to paint.
d. For skins and mobs, the block diagram on the right allows you to make one part
of the skin or mob temporarily invisible so that you can paint behind it. For
example, if you want to paint the side torso of your skin, you can make one of the
arms temporarily invisible by clicking the arm on the diagram. This allows you to
edit areas of the body that are covered by other body parts.
e. You also can pan around your skin or mob to see it from different angles by
clicking and dragging in the white space next to the skin/mob.
7. When you’re happy with your creation, click “Save.”
8. After you save a resource, you will see a green dot on the card in your My Projects tab.
This means that the resource is active and will appear in your Minecraft world after you
connect to the server. You can deactivate the resource by clicking on the three dots in
the top right of the card and selecting “Deactivate.” Note that the resources will all
appear under their original names in Minecraft, not as the name that you created for it.
9. To use a skin, you will need to download the skin and upload it to minecraft.net.
I. Click on the three dots at the top right of the card for the skin and select
“Download.” This will download the file as a .png image.
II. Note whether your skin is an “Alex” or “Steve” template. You can find this
information by clicking on the skin. It will tell you which template you’re using
under the diagram on the right.
III. Go to minecraft.net and log in to your Minecraft account.
IV. Click on your email at the top right of the screen and choose “Profile” from the
drop-down menu. Choose whether you’ve worked from an “Alex” or “Steve”
template. Then click “Choose File” and choose the .png image that you’ve just
downloaded and hit “Upload.”
V. When you go back to Minecraft, your skin will automatically be available. You can
see it in third person with the F5 key.
© Tynker 2018 11

Building and Deploying Mods
You can create custom mods for Minecraft and easily deploy them to your server. If you’re new
to coding, start with one of the Minecraft courses to get introduced to how it works before
creating your own from scratch.
1. Log in to your Tynker account and go to the Projects tab.
2. Under the My Projects tab at the top, select Minecraft Mods and click Create.
3. Select Create Mods.
4. Select Minecraft Java Edition at the top and choose a template to start with.
5. Use the code blocks on the left to program your mod.
6. When you’re done, click “Save” and click “Save and Deploy” in the pop-up dialogue.
That’s it! As soon as you join your server in Minecraft, your mods will be available to use.
Managing Your Mods in your Private Server
Once you’ve made some mods, you may find that you don’t want all of them active at once.
From within Tynker, you can control which mods are active. Go to Projects and then My
Projects. Click Minecraft mods and check which mods are active by looking for the green dot for
each mod. You can always activate or deactivate mods by clicking on the three dots in the top
right of the card for the mod and selecting “Activate” or “Deactivate.” Make sure that you do not
have too many mods active at the same time because they can interact with each other in
unexpected ways.
Publish and Remix
Resource Publishing: To publish a skin or other resource, go to your My Projects page under
the Projects tab. Then, click on Minecraft Mods. Click Publish on the card for each resource that
you want to publish. As long as the resources are appropriate and follow our community rules,
they will be published publicly for others to see and remix.
Mod Publishing: Coming soon!
© Tynker 2018 12

Modding with Minecraft Win10 and Pocket Edition
If you are using Minecraft Windows 10 Edition or Pocket Edition, you do not need to set up a
server. You will be downloading and installing the resources locally to your device using
resource packs and behavior packs. To connect to your mods created in Tynker, you will type a
given command into your Minecraft world.
Create a Parent-Verified Student Tynker Account
To get started with Tynker Minecraft modding, you need a parent-verified Tynker account.
Here’s how to create a Tynker account if you don’t already have one:
1. Go to www.tynker.com and click “Join for Free.”
2. Choose the “Student” option. Minecraft is only available for students.
3. Create a screen name and password, or choose the “Join with Google” option if you
have a Google account.
4. Enter your name and a valid parent email address. Your parent will be sent an email to
verify your account.
5. Remind your parent to click the link in the email to verify your account.
Designing Resource Packs
The editor for Minecraft Windows 10/Pocket Edition is divided into two different views: the
Resource Editor and the Behavior Editor. Skins, items, and blocks can only be edited by the
Resource Editor while mobs with code can be edited by both the Resource Editor and Behavior
Editor.
To get create a resource:
1. Log in to your Tynker account and go to the Projects tab.
2. Under the My Projects tab at the top, select Minecraft Mods and click Create.
3. Select what type of resource you want to create.
© Tynker 2018 13

4. Select Minecraft (Windows 10/Pocket Edition) at the top and choose a template to start
with.
5. Name your new creation by typing in the field next to the save button at the top left of the
screen.
6. Start drawing and editing.
7. If you have any questions about the tools, click the help button in the top right for
more information on how to edit the resource.
8. When you’re happy with your creation, click the save/download button in the top
left.
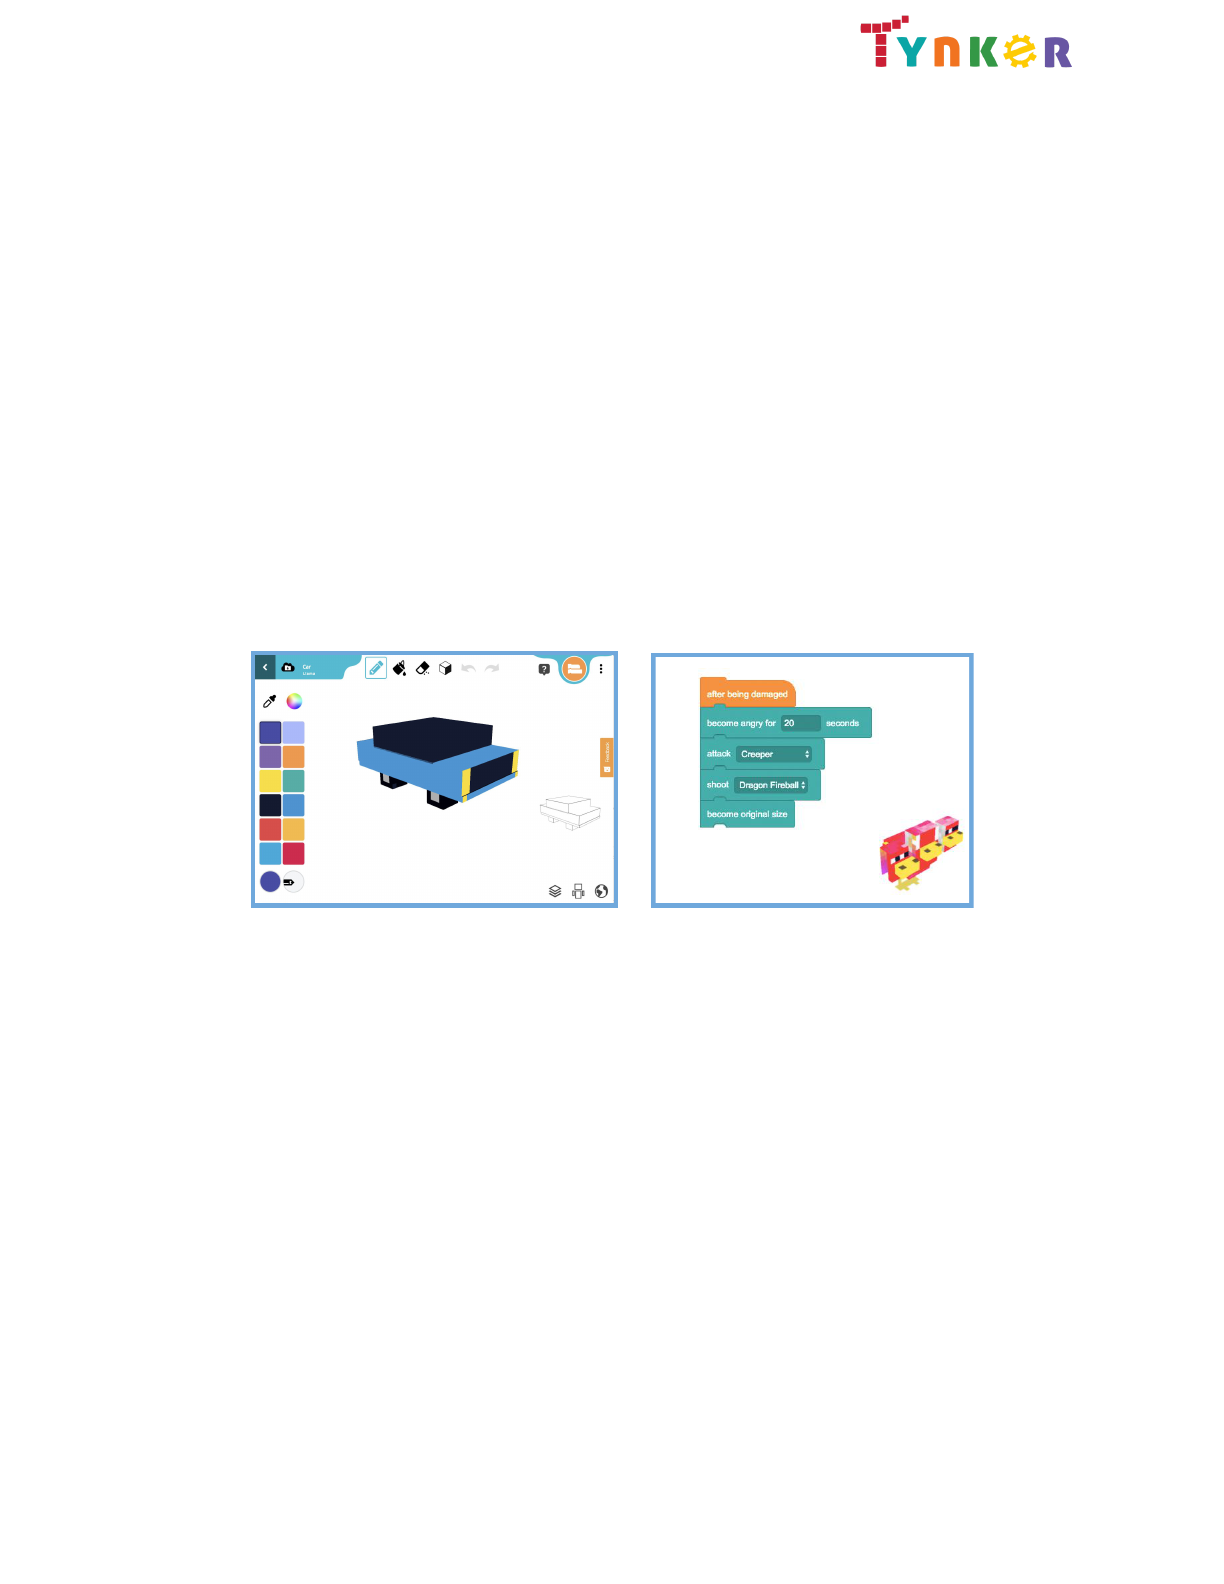
Creating Behavior Packs
The Behavior Editor and Behavior Packs are only available when the resource that is being
created is a mob with code (Add-On). When you're in the Resource Editor you can click the
button to access the Behavior Editor. When you're in the Behavior Editor you can click the
button to access the Resource Editor.
Follow the instructions in the Creating Resource Packs section above to edit the look of your
mob. Make sure you select mob from the list of templates and select Minecraft (Windows
10/Pocket Edition) at the top.
To edit the behaviors of the mob:
1. Switch to the Behavior editor by clicking on the code blocks in the top left in the
Resource Editor.
2. Use the code blocks on the left to program your mob. If you have any questions about
what each block does, click the help button in the top right and go to the
Behaviors section for more information on the behaviors.
3. When you have edited the behaviors to your liking, click the save/download button
in the top left.
© Tynker 2018 14

Installing Resource Packs and Behavior Packs
If you are using tynker.com to create and edit your resources, you will see a pop-up with
instructions for how to download and install the resources into your copy of Minecraft. If you are
using the iPad version of the app, there will be pop-ups that will help you with the process, or
you can view instructions using the help button.
Importing to Minecraft Windows 10 from tynker.com:
1. Click “Download Now” in the pop-up you see after you save the resource.
2. Open the .mcaddon file that you just downloaded and Minecraft will open.
Importing to Minecraft Pocket Edition from tynker.com:
1. Open up a browser in the device that you are using.
2. Go to the link that was provided in the pop up that appeared after saving the resource.
For example, https://www.tynker.com/get/xh089.
3. The .mcaddon file will be downloaded onto your device.
4. Open the .mcaddon file with Minecraft. Minecraft will open on your device.
Importing to Minecraft Pocket Edition on the iPad from the Tynker iPad app:
1. Press the Play button in the bottom left of the screen.
2. Select “Copy to Minecraft” in the menu that pops up. Minecraft will open on your device.
For all devices:
1. Once you see the message that the .mcaddon file has been imported into Minecraft,
click Play.
2. Create a new world and make sure that you enable cheats.
3. Click “Resource Packs” then “+” on the pack that you want to use.
4. If you are importing a mob, click “Behavior Packs” then “+” on the pack that you want to
use.
Installing Skins
Skins will not be downloaded as Resource Packs and will instead be downloaded as .png files.
Importing to Minecraft Windows 10 from tynker.com:
1. Click “Download Now” in the pop-up you see after you save the skin.
2. Make sure that you know which folder the .png file is saved in on your computer.
Importing to Minecraft Pocket Edition from tynker.com:
1. Open up a browser in the device that you are using.
© Tynker 2018 15

2. Go to the link that was provided in the pop-up that appeared after saving the resource.
For example, https://www.tynker.com/get/xh089.
3. You will need to save the photo to your library on the device.
Importing to Minecraft Pocket Edition on the iPad from the Tynker iPad app:
1. Press the Play button in the bottom left of the screen.
2. The image will be automatically saved to your iPad. Make sure to give Tynker
permission to access your photos so that the app can save the image.
Once you have downloaded the image to your device:
1. Open up Minecraft and click the coat hanger button in the bottom right.
2. Click the Custom Skin model (the blank skin in the Default box) and then click the
Choose New Skin button.
3. Select the correct .png file from your device.
4. Pick the Steve or Alex model and click Confirm. Your model is now using your custom
skin!
Coding Mods for Minecraft Windows 10/Pocket Edition
You can create custom mods for Minecraft and easily deploy them to your server. If you’re new
to coding, start with Mind Crafters to get introduced to modding for Minecraft Windows
10/Pocket Edition works before creating your own from scratch.
1. Log in to your Tynker account and go to the Projects tab.
2. Under the My Projects tab at the top, select Minecraft Mods and click Create.
3. Select Create Mods.
© Tynker 2018 16

4. Select Minecraft (Windows 10/Pocket Edition) at the top and choose a template to start
with.
5. Use the code blocks on the left to program your mod.
6. When you’re done, click “Save.”
7. Open up Minecraft either on your computer or mobile device and create a world with
cheats enabled.
8. In Tynker, click the play button for the project. You will see a pop-up with a command to
use to connect to our websocket server (for example /connect m.tynker.co/test).
9. Enter the command in the console of your Minecraft world.
Your mods are now active! We recommend that you do not use the “on start” block for most of
your mods, as that will cause them to deploy each time you connect to the server. If you have a
problem with your mods constantly activating, try to join a random server with the code
“/connect m.tynker.co”. This will disconnect you from your server and your mods. You will have
to reconnect the next time that you want to use your mods.
© Tynker 2018 17

Minecraft Modding FAQs
What do I need in order to use Tynker’s Minecraft modding?
Tynker currently only supports mods in three versions of Minecraft – Minecraft Java Edition
(PC/Mac), Minecraft Windows 10 Edition, and Minecraft Pocket Edition. You will need to own a
copy of one of these versions of Minecraft. If you are using Minecraft Java Edition, you also
need a Minecraft account that you have bought from Mojang.
You can only create Minecraft mods on a desktop, laptop, netbook (such as Chromebook), or
an iPad. If you are using an iPad, you need to have our Tynker app installed. Our courses are
not supported on Android tablets or mobile phones.
Do I need to own Minecraft in order to use Tynker’s Minecraft Modding?
Yes. While you can look at and play with our Minecraft course material without a copy of
Minecraft, you won't be able to test out your creations without your own copy of the game.
Minecraft is sold separately at minecraft.net.
Does Tynker’s Minecraft modding work with Minecraft Pocket Edition/Windows 10
Edition?
Yes, you can create mods through Tynker for both Minecraft Pocket Edition and Minecraft
Windows 10 Edition.
Does Tynker’s Minecraft modding work with Minecraft Console Edition?
Unfortunately, we do not support modding on the console versions of Minecraft.
Where can I find answer keys?
Your parent can access the answer keys for all of your courses by clicking on the "Answer
Keys" tab on their parent dashboard then selecting a course.
Why is there a server time limit for the Java server?
It’s very expensive for us to host servers, so we are unfortunately unable to offer unlimited
server time.
What do I do if I run out of time on my server?
If you run out of time and you have a free account, you can upgrade to a Tynker subscription to
get more server time per month. Lifetime subscriptions provide the most server time each
month. You can see how much time you have each month under the Java Server tab in the
Minecraft section of Tynker.
© Tynker 2018 18

In the meantime, try some coding activities! With a free account, you can access a ton of free
programming games and projects in the Daily Missions section. If you have a subscription, you
can learn to code with our 20 programming courses. Learning to code will make you better at
making Minecraft mods, plus you can make your own games to play!
Why can’t I add the Tynker server?
If you are having trouble adding the Tynker server and get a message like “Unable to connect to
world,” that means you are using the wrong version of Tynker. The server is only supported on
Minecraft Java Edition, not Minecraft Pocket Edition or Minecraft Windows 10 Edition.
Why can’t I get into my server?
You should be able to join your world by going in to the Tynker hub world and then typing “/join”
in to the command line.
If this doesn’t work, check the following things:
1. Do you have a Tynker student account set up? If not, go to Tynker and create one.
2. Has your parent verified your Tynker account? If not, log into your Tynker account, click
on your avatar in the top left, click Minecraft Java Server, click “Activate now!”, and enter
your parent’s email address.
3. Have you connected your Tynker account with your Minecraft account and named your
world? If not, log into your Tynker account, click on your avatar in the top left, and click
Minecraft Java Server. Click “Set Up Now” and enter your Minecraft profile name.
4. Did you misspell your Minecraft username? Go to the Minecraft Java Server tab in
Tynker to check whether you entered your Minecraft username correctly in Tynker. Make
sure the capitalization is correct and you have no extra spaces.
5. Are you getting an error message when connecting? Check to make sure you do not
have any firewalls on your computer that are blocking Minecraft, and reset your router.
Do my friends need to have a Tynker account?
No; to join your server, your friends do not need a Tynker account. They only need a desktop
version of Minecraft that they have bought from Mojang. You can add them to your server from
your Minecraft Java Server tab, then they’ll be able to enter the Tynker server and join your
world.
If your friends want their own Minecraft servers, they can create free parent-verified Tynker
accounts or they can purchase a Tynker subscription.
© Tynker 2018 19

Can I change my Minecraft username and world name in Tynker?
Yes, just log into Tynker and go to your Minecraft dashboard. Go to the Minecraft Java Server
tab and you’ll be able to edit your Minecraft username and world name. Remember that your
Minecraft username must be unique and match your profile name on minecraft.net.
How do I reset my server?
Go to your Minecraft Java Server tab and click the “Reset World” button.
How do I uninvite friends?
Go to your Minecraft Java Server tab. In the “Friends” section, you can remove anyone from
your approved list.
Why can’t I add more friends?
You’ve probably added as many friends as you’re allowed. Go to your Minecraft Java Server tab
to remove friends from your allowed list, and you’ll be able to add more. You can invite up to 10
friends if you’re using Tynker for free and up to 20 friends if you upgrade to a Tynker
subscription.
Why can’t my friend get into my server?
Your friends should be able to join your server by entering the Tynker hub world and typing
“/join YOUR_WORLD_NAME” but if this doesn’t work, try these things:
1. Make sure you’ve added your friend to the approved friend list in your Minecraft
dashboard.
2. Check whether you’ve spelled their usernames correctly (including capitalization,
spaces, and special characters).
3. Make sure they are connecting to the Tynker server correctly.
4. Make sure they are typing in your world name correctly once in the Tynker server
(including capitalization, spaces, and special characters).
Why can’t I summon a customized mob?
Mobs must be summoned by their type, not by the name you have created for them. For
example, if you edited a bat that you named batman, you should use the command “/summon
bat”. Some mobs cannot be summoned and must be spawned.
Why can’t I see my customized items or blocks?
Like mobs, items and blocks will be located under their original name. If you edit a diamond
sword and named it excalibur, look for the sword under the name diamond, not excalibur.
© Tynker 2018 20

Any questions? We’re here to help!
If you have any issues or questions, just send us an email at [email protected].
Tips for contacting support:
1. Let us know what browser, operating system, and machine you’re using.
2. Let us know what version of Minecraft you are using.
3. If your question is about a specific lesson, specify which course and lesson you’re using.
4. If your question pertains to a specific account or project, let us know the username and
project name.
5. Provide us a screenshot of what’s going wrong if applicable.
6. If you’re receiving an error message, tell us what the specific error message is.
Thanks for using Tynker!
© Tynker 2018 21
