
Privilege Management for Windows
24.4 Administration Guide
©2003-2024 BeyondTrust Corporation. All Rights Reserved. Other trademarks identified on this page are owned by their respective owners. BeyondTrust is not a chartered bank or trust company, or
depository institution. It is not authorized to accept deposits or trust accounts and is not licensed or regulated by any state or federal banking authority.
TC:8/27/2024

Table of Contents
Endpoint Privilege Management for Windows administration 11
Define user roles 11
Implement least privilege 11
Known applications 11
Unknown applications 11
Flexible elevation 12
Install, uninstall, and upgrade Endpoint Privilege Management for Windows 13
Requirements 13
Frequently asked questions 13
Can I install the 32-bit client on a 64-bit endpoint? 13
Can I install the 32-bit Endpoint Privilege Management Policy Editor on a 64-bit endpoint?13
Do I need to install the Endpoint Privilege Management for Windows and the Endpoint
Privilege Management Policy Editor together? 13
What distribution mechanisms do you support? 13
What is the update priority for Endpoint Privilege Management GPO edition? 13
Can different versions of the agent coexist? 14
Install the Endpoint Privilege Management Policy Editor 15
Use the Event Import wizard 15
Install Endpoint Privilege Management for Windows 17
Client packages 17
Unattended client deployment 18
Configure an alternate event log location 18
Set the event log location using the installer 19
Change the event log location in Windows Registry 19
Set up agent protection 19
Generate key pairs 19
Enable agent protection 20
Disable agent protection temporarily on one endpoint 20
Disable agent protection on all endpoints 21
Agent protection utility usage and options 21
Upgrade Endpoint Privilege Management for Windows 23
SALES: www.beyondtrust.com/contact
SUPPORT: www.beyondtrust.com/support
DOCUMENTATION: www.beyondtrust.com/docs
2
©2003-2024 BeyondTrust Corporation. All Rights Reserved. Other trademarks identified on this page are owned by their respective owners. BeyondTrust is not a chartered bank or trust company, or
depository institution. It is not authorized to accept deposits or trust accounts and is not licensed or regulated by any state or federal banking authority.
TC: 8/27/2024
PRIVILEGE MANAGEMENT FOR WINDOWS
24.4 ADMINISTRATION GUIDE
This page needed for table of
contents. Do not delete.

Use policy precedence in a migration scenario 23
Recommended steps 24
Endpoint Privilege Management Reporting Console 29
Auditing report 29
Privilege monitoring report 30
Diagnose connection problems 31
Sign Endpoint Privilege Management for Windows settings 32
Endpoint Privilege Management for Windows installation mode parameters 32
Create a PFX file for use with Endpoint Privilege Management for Windows 34
Generate a certificate 35
Use certificate template in a certificate request 35
Microsoft Certificate Services 37
Create an Endpoint Privilege Management for Windows configuration certificate template 37
Issue and distribute the certificate 39
Issue the certificate 39
Distribute public keys 39
Create and edit signed settings 40
Behavior when policy certificate verification fails 42
Manual deployment of Endpoint Privilege Management for Windows 43
Prerequisites 43
Disable ePO mode 43
Launch the Endpoint Privilege Management Policy Editor 44
Navigate the Policy Editor 44
Automatic save 45
Policies and templates 46
Users 46
Policies 46
Edit group policy 46
Endpoint Privilege Management settings 47
Create 47
Delete 48
Export 48
Import 48
SALES: www.beyondtrust.com/contact
SUPPORT: www.beyondtrust.com/support
DOCUMENTATION: www.beyondtrust.com/docs
3
©2003-2024 BeyondTrust Corporation. All Rights Reserved. Other trademarks identified on this page are owned by their respective owners. BeyondTrust is not a chartered bank or trust company, or
depository institution. It is not authorized to accept deposits or trust accounts and is not licensed or regulated by any state or federal banking authority.
TC: 8/27/2024
PRIVILEGE MANAGEMENT FOR WINDOWS
24.4 ADMINISTRATION GUIDE
This page needed for table of
contents. Do not delete.

Import template 48
Digitally sign 48
Save report 49
Set challenge/response shared key 49
Show hidden groups 49
View 49
License 49
HTML report 49
Response Code Generator 51
Templates 52
Windows QuickStart 53
Windows QuickStart policy summary 55
Windows Workstyles 55
Windows Application Groups 58
Windows messages 59
Windows custom token 59
Customize the Windows QuickStart policy 59
Discovery 60
Server Roles 61
Trusted App Protection (TAP) 62
Trusted Application Protection policies summary 62
Trusted Application Protection precedence 64
Modify the Trusted Application Protection policies 64
Trusted Application Protection reporting 65
Trusted Application Protection block list 66
Use advanced parent tracking 66
Endpoint Privilege Management for Windows policies for Windows 68
Policy administration 69
Advanced agent settings 69
Windows Policy configuration precedence 69
Workstyles 71
Workstyle properties 71
Privilege monitoring 71
SALES: www.beyondtrust.com/contact
SUPPORT: www.beyondtrust.com/support
DOCUMENTATION: www.beyondtrust.com/docs
4
©2003-2024 BeyondTrust Corporation. All Rights Reserved. Other trademarks identified on this page are owned by their respective owners. BeyondTrust is not a chartered bank or trust company, or
depository institution. It is not authorized to accept deposits or trust accounts and is not licensed or regulated by any state or federal banking authority.
TC: 8/27/2024
PRIVILEGE MANAGEMENT FOR WINDOWS
24.4 ADMINISTRATION GUIDE
This page needed for table of
contents. Do not delete.

Privilege monitoring events 72
Privilege monitoring log files 72
Create workstyles 73
Disable/enable workstyles 74
Workstyle precedence 74
Workstyle summary 75
Overview 75
Application rules 77
Insert an application rule 77
Application rule precedence 79
Power Rules 80
Power Rules additional guidance 81
Manage scripts 84
Manage rule scripts 84
Import a rule script 84
Add a settings file 85
Export a rule script 85
Delete a rule script 85
Manage audit scripts 85
Create an audit script 86
Import an audit script 86
Export an audit script 86
Delete an audit script 86
On-demand application rules 87
Enable and configure on-demand integration 87
Windows Modern UI 87
Windows Classic Shell 87
Manage languages 88
Create an on-demand rule 88
Content rules 91
Insert a content rule 91
Built-in groups 93
Trusted application DLL protection 94
SALES: www.beyondtrust.com/contact
SUPPORT: www.beyondtrust.com/support
DOCUMENTATION: www.beyondtrust.com/docs
5
©2003-2024 BeyondTrust Corporation. All Rights Reserved. Other trademarks identified on this page are owned by their respective owners. BeyondTrust is not a chartered bank or trust company, or
depository institution. It is not authorized to accept deposits or trust accounts and is not licensed or regulated by any state or federal banking authority.
TC: 8/27/2024
PRIVILEGE MANAGEMENT FOR WINDOWS
24.4 ADMINISTRATION GUIDE
This page needed for table of
contents. Do not delete.

Configure trusted application DLL protection 94
General rules 96
Collect user information 96
Collect host information 96
Prohibit Privileged Account Management 97
Enable Windows Remote Management connections 97
Filters 98
Account filters 99
Configure account filters 99
Computer filters 100
Time range filters 101
Expiry filter 102
WMI (Windows Management Information) filters 103
Application Groups 104
Create Application Groups 104
View or edit the properties of an Application Group 104
Delete an Application Group 104
Duplicate an Application Group 105
Rule precedence 105
Application definitions 106
ActiveX codebase matches 106
ActiveX version matches 106
App ID matches 106
Application requires elevation (UAC) 106
Uninstaller 106
BeyondTrust Zone Identifier exists 107
CLSID matches 107
COM display name matches 107
Command line matches 107
Controlling process matches 107
Drive matches 107
File or folder name matches 108
File hash (SHA-1) matches 108
SALES: www.beyondtrust.com/contact
SUPPORT: www.beyondtrust.com/support
DOCUMENTATION: www.beyondtrust.com/docs
6
©2003-2024 BeyondTrust Corporation. All Rights Reserved. Other trademarks identified on this page are owned by their respective owners. BeyondTrust is not a chartered bank or trust company, or
depository institution. It is not authorized to accept deposits or trust accounts and is not licensed or regulated by any state or federal banking authority.
TC: 8/27/2024
PRIVILEGE MANAGEMENT FOR WINDOWS
24.4 ADMINISTRATION GUIDE
This page needed for table of
contents. Do not delete.

File hash (SHA-256) matches 108
File version matches 108
Parent process matches 108
Product code matches 109
Product description matches 109
Product name matches 109
Product version matches 109
Publisher matches 109
Service actions matches 109
Service display name matches 110
Service name matches 110
Source URL matches 110
Trusted ownership matches 110
Upgrade code matches 110
Windows Store application version 110
Windows Store package name 111
Windows Store publisher 111
Advanced options 111
Insert ActiveX controls 113
Insert batch files 114
Insert COM classes 115
Insert control panel applets 117
Insert executables 119
Insert installer packages 121
Insert Endpoint Privilege Management policy editor snap-ins 123
Insert PowerShell scripts 124
Example PowerShell configurations 125
Insert registry settings 129
Insert remote PowerShell commands 130
Messaging 130
Insert remote PowerShell scripts 131
Messaging 132
Insert uninstaller (MSI or EXE) 133
SALES: www.beyondtrust.com/contact
SUPPORT: www.beyondtrust.com/support
DOCUMENTATION: www.beyondtrust.com/docs
7
©2003-2024 BeyondTrust Corporation. All Rights Reserved. Other trademarks identified on this page are owned by their respective owners. BeyondTrust is not a chartered bank or trust company, or
depository institution. It is not authorized to accept deposits or trust accounts and is not licensed or regulated by any state or federal banking authority.
TC: 8/27/2024
PRIVILEGE MANAGEMENT FOR WINDOWS
24.4 ADMINISTRATION GUIDE
This page needed for table of
contents. Do not delete.

Upgrade considerations 133
Insert Windows services 135
Insert Windows Store applications 136
Insert Windows scripts 137
Insert applications from templates 138
Use the Add Apps to Template menu 138
Use the Template option in matching criteria 138
Windows application templates 138
Insert applications from running processes 140
Insert applications from events 141
Content groups 142
Create content groups 142
Duplicate content groups 143
Target content definitions 143
Insert content 144
Messages 145
Types of messages 145
Create messages 146
Message or notification 146
ActiveX message 146
Set ActiveX message text 148
Multifactor authentication using an identity provider 149
Authentication and authorization groupings in Endpoint Privilege Management 149
Workflow 150
Add an identity provider 150
Add the Endpoint Privilege Management application to Microsoft, Okta, or Ping Identity 151
Create an app registration in Microsoft Entra ID 151
Add Endpoint Privilege Management to Okta 153
Add Endpoint Privilege Management for Mac to Ping Identity 154
Message name and description 155
Message design 156
Design settings 156
Challenge/response authorization 162
SALES: www.beyondtrust.com/contact
SUPPORT: www.beyondtrust.com/support
DOCUMENTATION: www.beyondtrust.com/docs
8
©2003-2024 BeyondTrust Corporation. All Rights Reserved. Other trademarks identified on this page are owned by their respective owners. BeyondTrust is not a chartered bank or trust company, or
depository institution. It is not authorized to accept deposits or trust accounts and is not licensed or regulated by any state or federal banking authority.
TC: 8/27/2024
PRIVILEGE MANAGEMENT FOR WINDOWS
24.4 ADMINISTRATION GUIDE
This page needed for table of
contents. Do not delete.

Shared key 162
Generate a response code 163
Generate a response code from the command line 163
Automating response code generation 164
Message text 165
Languages 165
General 165
Information 166
Publisher 166
User reason 166
User authentication 166
Challenge / response authorization 167
Custom tokens 168
Create custom tokens 168
Edit custom tokens 168
ServiceNow user request integration 172
EPM and ServiceNow integration 172
Deploy Endpoint Privilege Management for Windows policy 173
Deploy Workstyles using GPMC 173
Create Endpoint Privilege Management for Windows settings 173
Endpoint Privilege Management settings scope 174
GPO precedence and inheritance rules 174
Order of processing 174
Exceptions to default order of processing 175
Endpoint Privilege Management settings storage and backup 175
Disconnected users 176
Deploy Workstyles using standalone policy editor 176
Deploy Workstyles using PowerShell API 177
Windows PowerShell execution policy 177
Execute PowerShell configurations 177
Deploy Workstyles using web services 178
Webserver enabled client installation 178
Enable Webserver policy download using the registry 179
SALES: www.beyondtrust.com/contact
SUPPORT: www.beyondtrust.com/support
DOCUMENTATION: www.beyondtrust.com/docs
9
©2003-2024 BeyondTrust Corporation. All Rights Reserved. Other trademarks identified on this page are owned by their respective owners. BeyondTrust is not a chartered bank or trust company, or
depository institution. It is not authorized to accept deposits or trust accounts and is not licensed or regulated by any state or federal banking authority.
TC: 8/27/2024
PRIVILEGE MANAGEMENT FOR WINDOWS
24.4 ADMINISTRATION GUIDE
This page needed for table of
contents. Do not delete.

Configuration precedence 180
Deployment methods 180
Automate the update of multiple GPOs 181
Audits and reports 182
Events 182
Audit with custom scripts 184
Regular expressions syntax 186
Examples 186
Syntax 186
Database sizing and resource consumption 188
Data retention considerations 188
Database sizing 188
Example use case volumes 189
Key considerations 189
Configure remote computer browser 190
Configure the ePO Server 190
Configure a network computer 190
Configure WinRM to allow remote connections 191
Test for a successful connection 191
Troubleshoot 192
Resultant set of policy 192
Group Policy results 192
Check Endpoint Privilege Management for Windows is installed and functioning 192
Check settings are deployed 193
Check Endpoint Privilege Management for Windows is licensed 193
Check Workstyle precedence 193
Windows and macOS OS technical support statement 194
SALES: www.beyondtrust.com/contact
SUPPORT: www.beyondtrust.com/support
DOCUMENTATION: www.beyondtrust.com/docs
10
©2003-2024 BeyondTrust Corporation. All Rights Reserved. Other trademarks identified on this page are owned by their respective owners. BeyondTrust is not a chartered bank or trust company, or
depository institution. It is not authorized to accept deposits or trust accounts and is not licensed or regulated by any state or federal banking authority.
TC: 8/27/2024
PRIVILEGE MANAGEMENT FOR WINDOWS
24.4 ADMINISTRATION GUIDE
This page needed for table of
contents. Do not delete.

Endpoint Privilege Management for Windows administration
Endpoint Privilege Management for Windows combines privilege management and application control technology in a single lightweight
agent. This scalable solution allows global organizations to eliminate admin rights across the entire business.
Actionable intelligence is provided by an enterprise class reporting solution with endpoint analysis, dashboards, and trend data for
auditing and compliance.
Define user roles
Before deploying Endpoint Privilege Management for Windows, you should prepare suitable Workstyles for your users. Implementing
least privilege may require Workstyles to be tailored to users’ roles.
The table below shows three typical user roles, but we recommend you create roles that are tailored to your environment.
Role Requirement for Admin Rights
Standard Corporate User Applications that require admin rights to function, and simple admin tasks.
Laptop User Flexibility to perform ad hoc admin tasks and install software when away from the corporate network.
Technical User Complex applications and diagnostic tools, advanced admin tasks, and software installations.
Endpoint Privilege Management for Windows can cater to all types of users, including the most demanding technical users, such as
system administrators and developers.
You should also educate users on what to expect from a least privilege experience, before transferring them to standard user accounts.
This ensures they will report any problems encountered during the process of moving to least privilege.
Note: Contact your solution provider or BeyondTrust, to gain access to templates to cater to more complex use case
scenarios.
Implement least privilege
The first step is to identify the applications that require admin privileges for each of the roles you’ve defined. These can fall into one of
three categories:
1. Known Admin Applications: You already have a definitive list of applications that require admin rights to run.
2. Unknown Admin Applications: You are not sure of the applications that require admin rights to run.
3. Flexible Elevation: The user requires flexibility and can’t be restricted to a list of applications.
Known applications
For this category, you should add the relevant applications to the Endpoint Privilege Management for Windows Application Groups for the
users, which automatically elevates these applications when they are launched. You can then remove admin rights from these users.
Unknown applications
For this category, you have two choices to help you discover the applications that require admin rights:
SALES: www.beyondtrust.com/contact
SUPPORT: www.beyondtrust.com/support
DOCUMENTATION: www.beyondtrust.com/docs
11
©2003-2024 BeyondTrust Corporation. All Rights Reserved. Other trademarks identified on this page are owned by their respective owners. BeyondTrust is not a chartered bank or trust company, or
depository institution. It is not authorized to accept deposits or trust accounts and is not licensed or regulated by any state or federal banking authority.
TC: 8/27/2024
PRIVILEGE MANAGEMENT FOR WINDOWS
24.4 ADMINISTRATION GUIDE

1. Windows specific: Set up Endpoint Privilege Management for Windows Workstyles to monitor privileged application behavior. The
Endpoint Privilege Management for Windows audit logs highlight all of the applications that require admin rights to run.
2. Set up Endpoint Privilege Management for Windows Workstyles to give the user the on-demand elevation facility, and instruct the
user to use this facility for any applications that fail to run after you take the user’s admin rights away. The Endpoint Privilege
Management for Windows audit logs highlight all the applications that the user has launched with elevated rights.
You can use the audit logs to determine the relevant set of applications you want to give admin rights to for these users.
For more information, see the following:
l
"Workstyle properties" on page 71
l
"On-demand application rules" on page 87
l
"Application rules" on page 77
Flexible elevation
For this category, you should set up Endpoint Privilege Management for Windows Workstyles that give the user an on-demand elevation
facility, which allows the user to elevate any applications from a standard user account. All elevated applications can be audited, to
discourage users from making inappropriate use of this facility.
For more information, see "On-demand application rules" on page 87.
SALES: www.beyondtrust.com/contact
SUPPORT: www.beyondtrust.com/support
DOCUMENTATION: www.beyondtrust.com/docs
12
©2003-2024 BeyondTrust Corporation. All Rights Reserved. Other trademarks identified on this page are owned by their respective owners. BeyondTrust is not a chartered bank or trust company, or
depository institution. It is not authorized to accept deposits or trust accounts and is not licensed or regulated by any state or federal banking authority.
TC: 8/27/2024
PRIVILEGE MANAGEMENT FOR WINDOWS
24.4 ADMINISTRATION GUIDE

Install, uninstall, and upgrade Endpoint Privilege Management
for Windows
Requirements
For more information about the installation requirements, see Endpoint Privilege Management Release Notes
at https://www.beyondtrust.com/docs/release-notes/privilege-management/index.htm.
Frequently asked questions
Can I install the 32-bit client on a 64-bit endpoint?
No. The 32-bit client can only be installed on 32-bit endpoints.
Can I install the 32-bit Endpoint Privilege Management Policy Editor on a 64-bit
endpoint?
Yes. The 32-bit Endpoint Privilege Management Policy Editor can be installed on 64-bit endpoints if required.
Do I need to install the Endpoint Privilege Management for Windows and the
Endpoint Privilege Management Policy Editor together?
For standalone installations, you must install both Endpoint Privilege Management for Windows and the Endpoint Privilege Management
Policy Editor. We also recommend that Endpoint Privilege Management for Windows and the Endpoint Privilege Management Policy
Editor be installed together during evaluation, to simplify the evaluation process.
For larger deployments, there is no requirement to install the Endpoint Privilege Management Policy Editor on endpoints.
What distribution mechanisms do you support?
Endpoint Privilege Management for Windows can be deployed using any third party software which supports the deployment of MSI
and/or Executable files, such as Microsoft Active Directory, Microsoft SMS/SCCM, and McAfee ePolicy Orchestrator (ePO).
For silent installations and advanced installations (such as CERT_MODE and EPOMODE), the third party deployment software must also
support the use of command line options.
What is the update priority for Endpoint Privilege Management GPO edition?
The update priority for Endpoint Privilege Management GPO edition is as follows:
1. Event Collector
2. Reporting Database
SALES: www.beyondtrust.com/contact
SUPPORT: www.beyondtrust.com/support
DOCUMENTATION: www.beyondtrust.com/docs
13
©2003-2024 BeyondTrust Corporation. All Rights Reserved. Other trademarks identified on this page are owned by their respective owners. BeyondTrust is not a chartered bank or trust company, or
depository institution. It is not authorized to accept deposits or trust accounts and is not licensed or regulated by any state or federal banking authority.
TC: 8/27/2024
PRIVILEGE MANAGEMENT FOR WINDOWS
24.4 ADMINISTRATION GUIDE

3. Client
4. Management Console
5. Policy
Can different versions of the agent coexist?
Yes. In some estates, a range of different agent versions can exist together. Here are a couple of scenarios where this might occur:
l
An older version of the agent might be needed for an older OS. For example, agent version 22.5 does not support Windows 7, so
an earlier version is required.
l
A company might create a pilot group to run a newer version for agent testing while the rest of the estate runs the older version.
We always retain backwards compatibility for the policies when adding new features. This allows you to configure and use new features in
your policies and use them with newer agents. On any older agents in your estate the new features will be ignored and will not affect the
function of the agents.
SALES: www.beyondtrust.com/contact
SUPPORT: www.beyondtrust.com/support
DOCUMENTATION: www.beyondtrust.com/docs
14
©2003-2024 BeyondTrust Corporation. All Rights Reserved. Other trademarks identified on this page are owned by their respective owners. BeyondTrust is not a chartered bank or trust company, or
depository institution. It is not authorized to accept deposits or trust accounts and is not licensed or regulated by any state or federal banking authority.
TC: 8/27/2024
PRIVILEGE MANAGEMENT FOR WINDOWS
24.4 ADMINISTRATION GUIDE

Install the Endpoint Privilege Management Policy Editor
Using an administrator account, log in to the Windows computer where you want to manage Endpoint Privilege Management for Windows.
Note: Ensure you have the relevant Group Policy management tools installed on the desktop or server where you wish to
install Endpoint Privilege Management Policy Editor.
To install Endpoint Privilege Management Policy Editor, run the appropriate installation package:
l
For 32-bit (x86) systems, run PrivilegeManagementPolicyEditor_x86.exe.
l
For 64-bit (x64) systems, run PrivilegeManagementPolicyEditor_x64.exe.
Install Endpoint Privilege Management Policy Editor:
1. The installation detects if any prerequisites are needed. Click Install to install any missing prerequisites. This may take a few
minutes.
2. Once the prerequisites have been installed, the Welcome dialog box appears. Click Next to continue.
3. After reading the license agreement, select I accept the terms in the license agreement and click Next.
4. Enter your name and the name of your organization, and click Next.
5. If you want to change the default installation directory, click Change and select a different installation directory. Click Next.
6. If you are only managing Windows machines with Endpoint Privilege Management for Windows and want to evaluate it for use with
McAfee ePolicy Orchestrator, check the McAfee ePolicy Orchestrator Integration box. Otherwise, leave it unchecked and click
Next.
7. Click Install to start installing Endpoint Privilege Management Policy Editor.
8. Once installed, click Finish. Endpoint Privilege Management Policy Editor has now been successfully installed.
Use the Event Import wizard
To use the Event Import wizard, the MS OLE DB v19 SQL Database Driver must be installed. The driver has a dependency on both the
X86 and X64 versions of the Microsoft Visual C++ 2015-2022 Redistributable v14.34 (and later). Both components must also be installed.
The Privilege Management Policy Editor EXE installer checks if the correct versions of the MS OLE DB driver and VC++ redistributable
are already installed. If not, the components are automatically installed by the Privilege Management Policy Editor EXE installer.
Visit the following websites to install these components separately.
For more information, see:
l
Download Microsoft OLE DB Driver for SQL Server at https://learn.microsoft.com/en-us/sql/connect/oledb/download-
oledb-driver-for-sql-server?view=sql-server-ver16
l
Microsoft Visual C++ Redistributable latest supported downloads at https://learn.microsoft.com/en-
us/cpp/windows/latest-supported-vc-redist?view=msvc-170#visual-studio-2015-2017-2019-and-2022
The installation of the Microsoft Visual C++ Redistributables can require a reboot. Plan the installation accordingly.
l
If using the Privilege Management Policy Editor EXE to install these components: If a reboot is required, there will be one request
to reboot at the end of the installation.
SALES: www.beyondtrust.com/contact
SUPPORT: www.beyondtrust.com/support
DOCUMENTATION: www.beyondtrust.com/docs
15
©2003-2024 BeyondTrust Corporation. All Rights Reserved. Other trademarks identified on this page are owned by their respective owners. BeyondTrust is not a chartered bank or trust company, or
depository institution. It is not authorized to accept deposits or trust accounts and is not licensed or regulated by any state or federal banking authority.
TC: 8/27/2024
PRIVILEGE MANAGEMENT FOR WINDOWS
24.4 ADMINISTRATION GUIDE

l
If installing the X86 and X64 versions of the Microsoft Visual C++ Redistributables separately: If a reboot is required, there may be
a separate reboot request at the end of each of the installations.
SALES: www.beyondtrust.com/contact
SUPPORT: www.beyondtrust.com/support
DOCUMENTATION: www.beyondtrust.com/docs
16
©2003-2024 BeyondTrust Corporation. All Rights Reserved. Other trademarks identified on this page are owned by their respective owners. BeyondTrust is not a chartered bank or trust company, or
depository institution. It is not authorized to accept deposits or trust accounts and is not licensed or regulated by any state or federal banking authority.
TC: 8/27/2024
PRIVILEGE MANAGEMENT FOR WINDOWS
24.4 ADMINISTRATION GUIDE

Install Endpoint Privilege Management for Windows
Note: Endpoint Privilege Management for Windows requires that Windows short file name creation be enabled.
Client packages
To install Endpoint Privilege Management for Windows, run the appropriate installation package:
l
For 32-bit (x86) systems, run PrivilegeManagementForWindows_x86.exe.
l
For 64-bit (x64) systems, run PrivilegeManagementForWindows_x64.exe.
The installation prompts you to install missing prerequisites.
Endpoint Privilege Management for Windows may be installed manually, but for larger installations we recommend you use a suitable
third-party software deployment system.
Note: There is no license to add during the client installation, as this is deployed with the Endpoint Privilege Management for
Windows Workstyles, so the client may be installed silently.
IMPORTANT!
As of version 5.5, all releases of Endpoint Privilege Management for Windows are signed only with a SHA-256 code signing
certificate. Previous versions were dual signed with SHA-1 and SHA-256 certificates. The decision to drop SHA-1 certificates was
made to avoid weaknesses in the SHA-1 algorithm and to align to industry security standards. For more information, see 2019 SHA-2
Code Signing Support requirement for Windows and WSUS at https://support.microsoft.com/en-us/topic/2019-sha-2-code-signing-
support-requirement-for-windows-and-wsus-64d1c82d-31ee-c273-3930-69a4cde8e64f.
If you intend to deploy Endpoint Privilege Management for Windows 5.5 to Windows 7 or Windows Server 2008 R2 machines, you must
ensure the following KBs are installed prior to installation of this product:
l
KB4490628
l
KB4474419
We strongly recommend you keep your systems up to date with the latest Windows security updates.
Installing this release on a system which does not support SHA-256 code
signing verification results in Bad Image exceptions referring to
PGHook.dll.
SALES: www.beyondtrust.com/contact
SUPPORT: www.beyondtrust.com/support
DOCUMENTATION: www.beyondtrust.com/docs
17
©2003-2024 BeyondTrust Corporation. All Rights Reserved. Other trademarks identified on this page are owned by their respective owners. BeyondTrust is not a chartered bank or trust company, or
depository institution. It is not authorized to accept deposits or trust accounts and is not licensed or regulated by any state or federal banking authority.
TC: 8/27/2024
PRIVILEGE MANAGEMENT FOR WINDOWS
24.4 ADMINISTRATION GUIDE

Unattended client deployment
When deploying Endpoint Privilege Management for Windows with automated deployment technologies, such as System Center
Configuration Manager (SCCM), you can deploy the client silently and postpone the computer from restarting.
To install the client executable silently, without a reboot, use the following command line (the double quotes are required and the syntax
must be copied exactly):
PrivilegeManagementForWindows_x86.exe /s /v" /qn /norestart"
To install the client MSI package silently, without a reboot, use the following command line:
Msiexec.exe /i PrivilegeManagementForWindows_x86.msi /qn /norestart
Note: Endpoint Privilege Management for Windows will not be fully operational until a reboot. To perform an unattended
deployment with a reboot, omit the /norestart switch.
Configure an alternate event log location
You can configure an alternate event log location in the following ways:
l
From the client installer (initial installation or upgrade)
l
In Windows registry after installation
The default location is Windows Logs\Application. The alternate location is Application
and Services Logs\BeyondTrust Privilege Management.
SALES: www.beyondtrust.com/contact
SUPPORT: www.beyondtrust.com/support
DOCUMENTATION: www.beyondtrust.com/docs
18
©2003-2024 BeyondTrust Corporation. All Rights Reserved. Other trademarks identified on this page are owned by their respective owners. BeyondTrust is not a chartered bank or trust company, or
depository institution. It is not authorized to accept deposits or trust accounts and is not licensed or regulated by any state or federal banking authority.
TC: 8/27/2024
PRIVILEGE MANAGEMENT FOR WINDOWS
24.4 ADMINISTRATION GUIDE

Set the event log location using the installer
When running the installer, enter the parameter and value as shown:
msiexec.exe /i PrivilegeManagementForWindows_x64.msi APPEVENTLOGTYPE=1
or
PrivilegeManagementForWindows_x64.exe /v"APPEVENTLOGTYPE=1"
Change the event log location in Windows Registry
If the client is already installed, set the value in the registry.
Note: If agent protection is configured, you must first disable agent protection on the machine before you can change settings
in the Registry Editor.
Run regedit.exe with elevated privileges and navigate to the following key:
HKEY_LOCAL_MACHINE\SOFTWARE\Avecto\Privilege Guard Client
ApplicationEventLogType=1
where:
0: Windows Logs\Application
1: Application and Services Logs\BeyondTrust Privilege Management
You must restart the service after changing the value.
Set up agent protection
Add agent protection to your endpoints to prevent admin users from tampering with the product, including stopping the services running or
deleting its files from the endpoint.
The setup is a two-part process:
l
Generate public-private key pair.
o
The public key is stored in a policy and distributed to all endpoints. The public key is automatically inserted into the policy
when using the Policy Editor to create the key pair.
o
The password-protected private key must be stored securely by the administrator. The private key and private key
password are required when you want to disable agent protection.
l
Enable protection.
Generate key pairs
The key pair can be generated using either Policy Editor or command line.
To generate the key pair in Policy Editor:
SALES: www.beyondtrust.com/contact
SUPPORT: www.beyondtrust.com/support
DOCUMENTATION: www.beyondtrust.com/docs
19
©2003-2024 BeyondTrust Corporation. All Rights Reserved. Other trademarks identified on this page are owned by their respective owners. BeyondTrust is not a chartered bank or trust company, or
depository institution. It is not authorized to accept deposits or trust accounts and is not licensed or regulated by any state or federal banking authority.
TC: 8/27/2024
PRIVILEGE MANAGEMENT FOR WINDOWS
24.4 ADMINISTRATION GUIDE

1. In a Policy Editor:
l
Web Policy Editor: Policies > Edit Policy > Utilities > Agent Protection Settings > Generate Key
l
MMC Policy Editor: Right-click the Privilege Management Settings node, and then select Generate Agent Protection
Keys.
2. Enter a password to encrypt the private key.
3. Click Generate.
4. Navigate to a location to save the private key, and then click Save. The public key is automatically inserted into the policy.
To generate the key pair using the command line (or a tool like PowerShell):
1. From the command line, call AgentProtectionUtility using the command:
GENERATE /PRIVATE <path> /PUBLIC <path>
2. Enter the password at the prompt.
The private and public keys are generated and saved to the designated paths. You must use PowerShell API to insert the public key into
the policy configuration.
For more information about AgentProtectionUtility, see "Agent protection utility usage and options" on page 21.
Enable agent protection
To enable protection:
1. Expand the Endpoint Privilege Management Settings node.
2. Select the Windows node, and then select Advanced Agent Settings.
3. Click Add Value.
4. Select 64-bit Agent Values from the Edit dropdown.
5. Type AgentProtectionState in the Value Name box.
6. Ensure type is DWORD.
7. In the Value Data column, set the value to 1. There are three possible states: 0 = off, 1 = enabled, 2 = disabled.
Agent protection is enabled after the policy is deployed and loaded by the endpoints.
Disable agent protection temporarily on one endpoint
In some cases, there might be a legitimate need to uninstall the agent. You can use the Endpoint Utility to disable the protection.
Disabling the protection on an endpoint is a two-part process:
1. First, a support engineer with the necessary rights uses the Agent Protection Utility, as well as the correct password-protected
private key for the policy, to generate a time-based token.
2. The token is then passed to the end-user computer and used by the Endpoint Utility to temporarily disable the agent protection for
that endpoint.
To disable the agent protection:
SALES: www.beyondtrust.com/contact
SUPPORT: www.beyondtrust.com/support
DOCUMENTATION: www.beyondtrust.com/docs
20
©2003-2024 BeyondTrust Corporation. All Rights Reserved. Other trademarks identified on this page are owned by their respective owners. BeyondTrust is not a chartered bank or trust company, or
depository institution. It is not authorized to accept deposits or trust accounts and is not licensed or regulated by any state or federal banking authority.
TC: 8/27/2024
PRIVILEGE MANAGEMENT FOR WINDOWS
24.4 ADMINISTRATION GUIDE

1. Generate an uninstall token. Use the Agent Protection Utility located in Program Files\Avecto\Privilege Guard Management
Consoles or downloaded from EPM. The token must be generated using administrator credentials. The token is encrypted and is
set to expire after the time you provide passes.
2. From the command line, run the following:
UNINSTALL /EXPIRY <time> /PRIVATE <path> /TOKEN <path>
For example:
UNINSTALL /EXPIRY 30d /PRIVATE priv.txt /TOKEN token.txt
3. Enter the password you set when generating the private key, when prompted. A token file is created at the designated path.
Note: The token file contains a string of characters that is required to disable the endpoint. The token must reside on the end-
user computer where you want to disable protection. Copy the token to that computer before proceeding to step 4.
4. On the end-user computer, disable protection using the Endpoint Utility located in Program Files\Avecto\Privilege Guard
Client.
5. Run the following command:
/ap /t <tokencharacterstring>
A confirmation message indicates agent protection is disabled. The agent protection reverts to the enabled state after the Defendpoint
service restarts.
For more information about Agent Protection Utility, see "Agent protection utility usage and options" on page 21.
Disable agent protection on all endpoints
Note: This procedure permanently disables agent protection on all endpoints on which the policy is deployed.
1. Expand the Privilege Management Settings node.
2. Select the Windows node, and then select Advanced Agent Settings.
3. In the Value Name column, enter AgentProtectionState.
4. In the Value Data column, set the value to 0.
Agent protection utility usage and options
Usage
AgentProtectionUtility GENERATE | UNINSTALL | VERIFY <options>
SALES: www.beyondtrust.com/contact
SUPPORT: www.beyondtrust.com/support
DOCUMENTATION: www.beyondtrust.com/docs
21
©2003-2024 BeyondTrust Corporation. All Rights Reserved. Other trademarks identified on this page are owned by their respective owners. BeyondTrust is not a chartered bank or trust company, or
depository institution. It is not authorized to accept deposits or trust accounts and is not licensed or regulated by any state or federal banking authority.
TC: 8/27/2024
PRIVILEGE MANAGEMENT FOR WINDOWS
24.4 ADMINISTRATION GUIDE

Command Description
GENERATE /PRIVATE <path>
/PUBLIC <path>
Generates encrypted private/public key pair stored at <path> and <path>. The private key is
encrypted with a password entered at the prompt. The password requires at least 12 characters.
UNINSTALL /EXPIRY <time>
/PRIVATE <path> /TOKEN
<path>
Generate a secure token using the private key located at <path> to drop all protection for <time>
days/hours. If the key is encrypted, a password prompt is displayed.
Time format: 0d | 00h | 0d00h (up to a maximum of 30 days).
VERIFY /TOKEN <path>
/PUBLIC <path>
Verify a secure token stored at <path> using public key stored at <path>.
SALES: www.beyondtrust.com/contact
SUPPORT: www.beyondtrust.com/support
DOCUMENTATION: www.beyondtrust.com/docs
22
©2003-2024 BeyondTrust Corporation. All Rights Reserved. Other trademarks identified on this page are owned by their respective owners. BeyondTrust is not a chartered bank or trust company, or
depository institution. It is not authorized to accept deposits or trust accounts and is not licensed or regulated by any state or federal banking authority.
TC: 8/27/2024
PRIVILEGE MANAGEMENT FOR WINDOWS
24.4 ADMINISTRATION GUIDE

Upgrade Endpoint Privilege Management for Windows
Before upgrading any versions of Endpoint Privilege Management for Windows software or existing settings, we recommend you test your
deployment in a preproduction environment. This will help mitigate any unforeseen compatibility issues, and avoid disruption to the
business. In addition, you should export your policies for backup purposes prior to an upgrade.
All Endpoint Privilege Management for Windows MSI and EXE installers automatically remove old versions of BeyondTrust software when
installed. Therefore, it is not necessary to manually remove old versions prior to installation.
If you previously installed Endpoint Privilege Management for Windows with a switch, you must ensure you upgrade Endpoint Privilege
Management for Windows with the same switch. If you do not use the same switch, the new installation parameters apply and any
functionality relating to the previous installation are lost.
Endpoint Privilege Management for Windows guarantees backward compatibility with previous versions, but does not guarantee forward
compatibility.
If you are running Endpoint Privilege Management for Windows 22.7 or higher, and are upgrading to a newer version, then a reboot is not
mandatory and all existing functions will continue to work. New features may require a reboot, so it is still recommended to reboot at your
earliest convenience after an upgrade.
Note: When installing in silent mode, a reboot will occur automatically unless the no restart flag is also used. Therefore, we
recommend that upgrades be performed outside of core business hours, or during scheduled maintenance windows, to avoid
loss of productivity.
Use policy precedence in a migration scenario
During any migration from one Endpoint Privilege Management platform to another, you can use the POLICYPRECEDENCE parameter
to provide policy redundancy. For example, you are migrating from BeyondTrust's ePO platform to BeyondInsight or EPM, and want to
ensure there is zero policy downtime during the migration.
Add the POLICYPRECEDENCE parameter to the client install syntax. Existing policy continues to apply until superseded by the new
platform policy.
GPO clients
POLICYPRECEDENCE="WEBSERVICE,GPO,LOCAL"
ePO clients
POLICYPRECEDENCE="WEBSERVICE,EPO,LOCAL"
BeyondInsight
POLICYPRECEDENCE="WEBSERVICE,BEYONDINSIGHT,LOCAL"
SALES: www.beyondtrust.com/contact
SUPPORT: www.beyondtrust.com/support
DOCUMENTATION: www.beyondtrust.com/docs
23
©2003-2024 BeyondTrust Corporation. All Rights Reserved. Other trademarks identified on this page are owned by their respective owners. BeyondTrust is not a chartered bank or trust company, or
depository institution. It is not authorized to accept deposits or trust accounts and is not licensed or regulated by any state or federal banking authority.
TC: 8/27/2024
PRIVILEGE MANAGEMENT FOR WINDOWS
24.4 ADMINISTRATION GUIDE

WebServer
POLICYPRECEDENCE="WEBSERVICE,WEBSERVER,LOCAL"
Example: The complete install syntax may look something like this:
Msiexec.exe /i PrivilegeManagementForWindows_x.xxx.x.msi IC3MODE=1
POLICYPRECEDENCE="WEBSERVICE,GPO,LOCAL" /qn /norestart
Recommended steps
IMPORTANT!
As of release 5.5, all releases of this product are signed with BeyondTrust Corporation, rather than Avecto, as the software
publisher name. If prior to 5.5 you used the QuickStart Policy Template as a starting point, it is likely that your configuration will
include Application Groups which target our own applications based on a publisher match to Avecto. An upgrade to 5.5 or beyond
requires you to update your configuration so that it continues to match the versions of the applications and tools that you use. We
recommend one of the following two options:
Option 1
Add a copy of any existing application definitions which target Avecto and update those copies to target BeyondTrust Corporation
instead; the presence of both sets of application definitions ensure they continue to match both new and existing versions during the
implementation of 5.5. This option has an advantage over Option 2, in that it also targets any application definitions that you may have
created yourself that target the Avecto publisher.
Option 2
You may copy fragments of the QuickStart policies in version 5.5 to your existing application definitions.
For either option, it is critical that you roll out your configuration changes before you update your Endpoint Privilege Management for
Windows software to version 5.5 or later.
Step 1: Upgrade the Endpoint Privilege Management Policy Editor
For steps to upgrade the Endpoint Privilege Management Policy Editor, see "Install the Endpoint Privilege Management Policy
Editor" on page 15.
SALES: www.beyondtrust.com/contact
SUPPORT: www.beyondtrust.com/support
DOCUMENTATION: www.beyondtrust.com/docs
24
©2003-2024 BeyondTrust Corporation. All Rights Reserved. Other trademarks identified on this page are owned by their respective owners. BeyondTrust is not a chartered bank or trust company, or
depository institution. It is not authorized to accept deposits or trust accounts and is not licensed or regulated by any state or federal banking authority.
TC: 8/27/2024
PRIVILEGE MANAGEMENT FOR WINDOWS
24.4 ADMINISTRATION GUIDE

Step 2: Upgrade application groups to match publisher name BeyondTrust Corporation (when
upgrading to version 5.5)
Option 1 - duplicate application definitions matching Avecto publisher and update to target
BeyondTrust Corporation
1. Locate all Avecto matches:
l
Select the Application Groups node.
l
Type Avecto into the Search applications box to filter.
2. Create a copy of all definitions in each Application Group found that contain a publisher match on Avecto:
l
Copy and paste the existing definitions.
Tip: Rename one of the copies to OLD, so it’s easy to tell which to delete after the new application definitions take effect. OLD
can be deleted once the 5.5 upgrade is complete.
SALES: www.beyondtrust.com/contact
SUPPORT: www.beyondtrust.com/support
DOCUMENTATION: www.beyondtrust.com/docs
25
©2003-2024 BeyondTrust Corporation. All Rights Reserved. Other trademarks identified on this page are owned by their respective owners. BeyondTrust is not a chartered bank or trust company, or
depository institution. It is not authorized to accept deposits or trust accounts and is not licensed or regulated by any state or federal banking authority.
TC: 8/27/2024
PRIVILEGE MANAGEMENT FOR WINDOWS
24.4 ADMINISTRATION GUIDE

3. Update the new application definitions to match publisher BeyondTrust Corporation.
4. Test the updated configuration against the new 5.5 applications.
Option 2 - insert policy fragments into existing application definitions
1. Ensure that Hidden Groups are visible by right-clicking the Endpoint Privilege Management Settings node. Enable Show Hidden
Groups.
2. Copy the following text:
<ClipboardText><ClipboardResources><Config/></ClipboardResources><ClipboardItems><Applicatio
n ID="95402cc1-3301-49ec-8108-7ee359c55018" Type="exe" Description="BeyondTrust Privilege
Management ETW Trace Formatter" OpenDlgDropRights="true" CheckFileName="true"
FileName="TraceFormat.exe" FileStringMatchType="Contains" UseSourceFileName="true"
ProductName="BeyondTrust Privilege Management" ProductDesc="BeyondTrust Privilege Management
ETW Trace Formatter" CheckCertificate="true" Certificate="BeyondTrust Corporation"
CertificateStringMatchType="Exact"/><Application ID="d30f3395-2f7f-4a2e-b8e5-6d3073976dc0"
Type="exe" Description="Performance Log Utility" OpenDlgDropRights="true"
CheckFileName="true" FileName="logman.exe" FileStringMatchType="Contains"
UseSourceFileName="true" ProductName="Microsoft® Windows® Operating System"
ProductDesc="Performance Log Utility" CheckCertificate="true" Certificate="Microsoft
Windows" CertificateStringMatchType="Exact"/></ClipboardItems></ClipboardText>
3. Paste into a text editor and replace new lines with single spaces. Copy the text again.
4. Create an Application Group (Default) Child Processes of TraceConfig.exe.
5. Select the middle pane and paste what you have copied.
6. Right-click the Application Group, select Properties, and check the
Hidden box.
7. Copy the following text:
<ClipboardText><ClipboardResources><Config/></ClipboardResources><ClipboardItems><Applicatio
n ID="511e21b7-b059-42ca-bcfe-03ca4c5ecf58" Type="exe" Description="Privilege Management
Config Capture Utility" ChildrenInheritToken="true" OpenDlgDropRights="true"
CheckFileName="true" FileName="PGCaptureConfig.exe" FileStringMatchType="Contains"
UseSourceFileName="true" ProductName="BeyondTrust Privilege Management"
ProductDesc="BeyondTrust Privilege Management Config Capture Utility"
CheckCertificate="true" Certificate="BeyondTrust Corporation"
CertificateStringMatchType="Exact"/><Application ID="7995df95-0031-460f-a5e3-cfd2b12758d8"
Type="exe" Description="Privilege Management TraceConfig" ChildrenInheritToken="true"
OpenDlgDropRights="true" CheckFileName="true" FileName="TraceConfig.exe"
SALES: www.beyondtrust.com/contact
SUPPORT: www.beyondtrust.com/support
DOCUMENTATION: www.beyondtrust.com/docs
26
©2003-2024 BeyondTrust Corporation. All Rights Reserved. Other trademarks identified on this page are owned by their respective owners. BeyondTrust is not a chartered bank or trust company, or
depository institution. It is not authorized to accept deposits or trust accounts and is not licensed or regulated by any state or federal banking authority.
TC: 8/27/2024
PRIVILEGE MANAGEMENT FOR WINDOWS
24.4 ADMINISTRATION GUIDE
FileStringMatchType="Contains" UseSourceFileName="true" ProductName="BeyondTrust Privilege
Management" ProductDesc="BeyondTrust Privilege Management Config Capture Utility"
CheckCertificate="true" Certificate="BeyondTrust Corporation"
CertificateStringMatchType="Exact" ChildApplicationGroup="a1d8ab16-5b3d-42d1-a90d-
e069d741f7b1"/></ClipboardItems></ClipboardText>
8. Paste into a text editor and replace new lines with single spaces. Copy the text again.
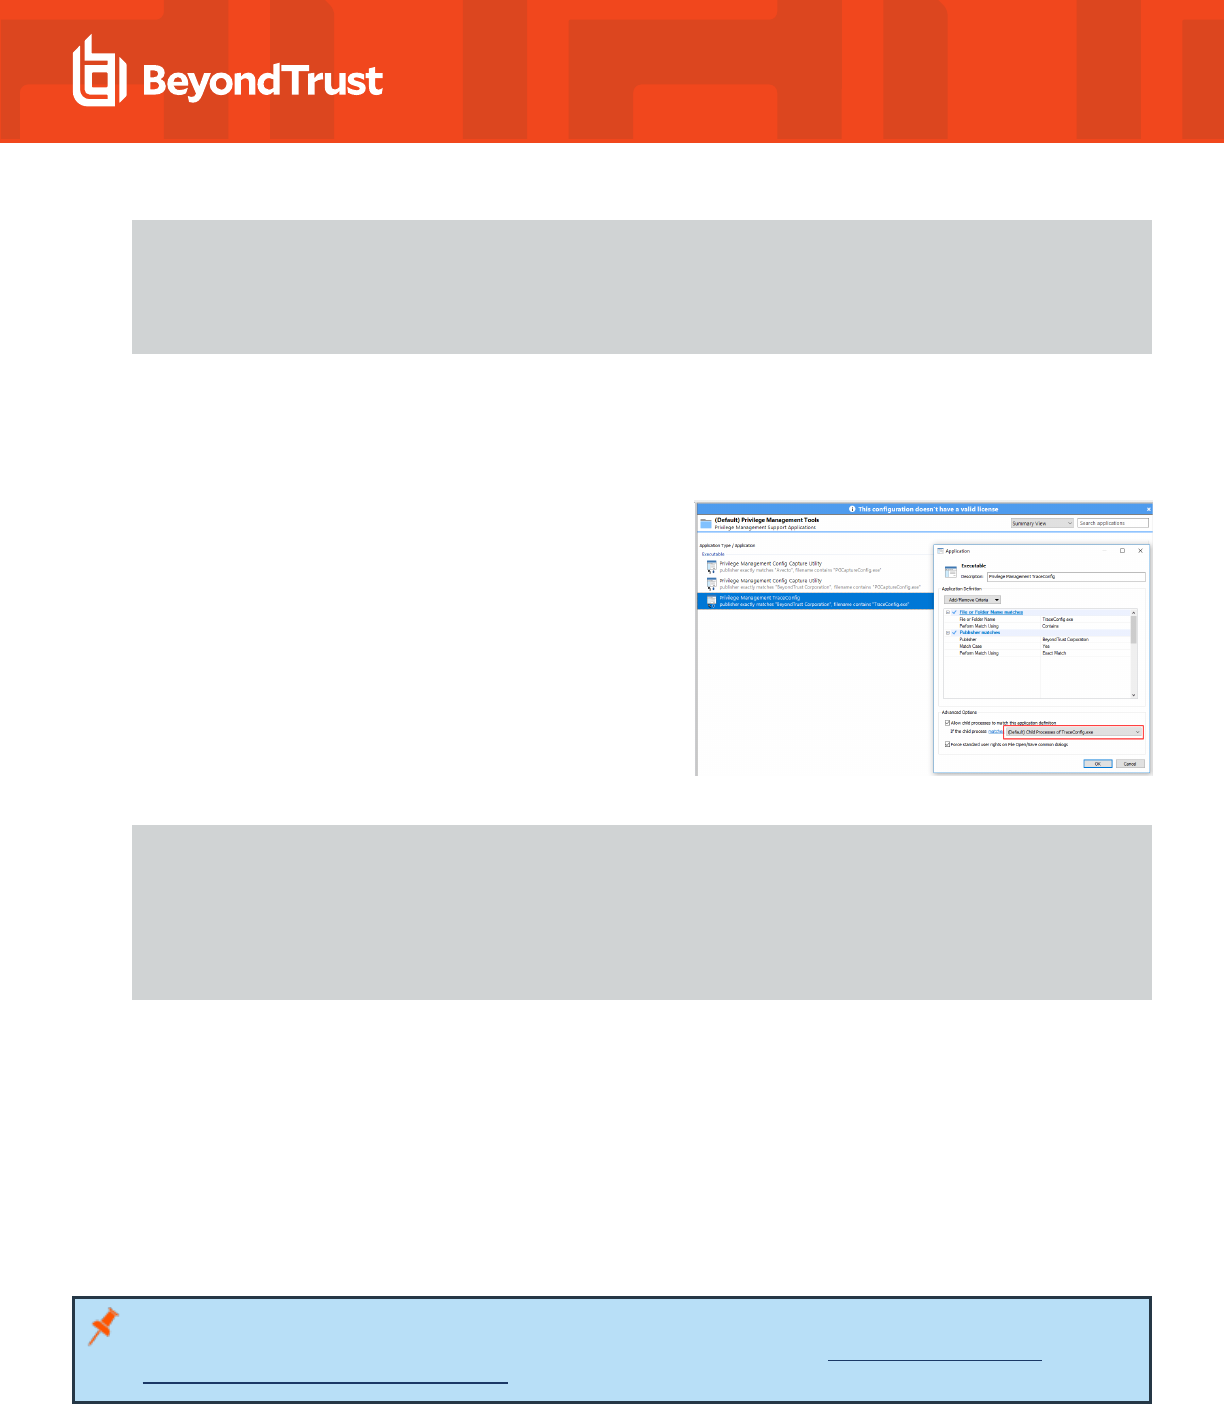
9. Select the Application Group (Default) Privilege Management Tools.
10. Select the middle pane and paste what you have copied.
11. Double-click the Privilege Management TraceConfig application definition..
12. In the Allow child processes to match the application
definition option in the Application dialog, choose (Default) Child
Processes of TraceConfig.exe from the dropdown.
13. Copy the following text:
<ClipboardText><ClipboardResources><Config/></ClipboardResources><ClipboardItems><Applicatio
n ID="52a1ef23-b71b-4c3b-836c-c228a7343e33" Type="msi" Description="Any Privilege Management
Client Installer Package" ChildrenInheritToken="true" OpenDlgDropRights="true" FileName="*"
FilePatternMatching="true" UseSourceFileName="true" CheckProductName="true"
ProductName="Privilege Management" ProductNameStringMatchType="Contains"
CheckCertificate="true" Certificate="BeyondTrust Corporation"
CertificateStringMatchType="Exact"/></ClipboardItems></ClipboardText>
14. Paste into a text editor and replace new lines with single spaces. Copy the text again.
15. Select the Application Group Block - Blocked Apps.
16. Select the middle pane and paste what you have copied.
Step 3: upgrade Endpoint Privilege Management for Windows settings
Once the Endpoint Privilege Management Policy Editor has been upgraded, the final step is to roll out new versions of the Endpoint
Privilege Management for Windows settings. Although Endpoint Privilege Management for Windows is fully backwards compatible with
older versions of Endpoint Privilege Management for Windows settings, this step is required if you want to take advantage of any new
features and enhancements in Endpoint Privilege Management for Windows.
Note: Endpoint Privilege Management for Windows settings are automatically saved in the latest format each time a change is
made. For details on editing Endpoint Privilege Management for Windows settings, see "Deploy Endpoint Privilege
Management for Windows policy" on page 173.
SALES: www.beyondtrust.com/contact
SUPPORT: www.beyondtrust.com/support
DOCUMENTATION: www.beyondtrust.com/docs
27
©2003-2024 BeyondTrust Corporation. All Rights Reserved. Other trademarks identified on this page are owned by their respective owners. BeyondTrust is not a chartered bank or trust company, or
depository institution. It is not authorized to accept deposits or trust accounts and is not licensed or regulated by any state or federal banking authority.
TC: 8/27/2024
PRIVILEGE MANAGEMENT FOR WINDOWS
24.4 ADMINISTRATION GUIDE

Note: Once Endpoint Privilege Management for Windows settings have been upgraded, they cannot be downgraded.
Therefore, we recommend an upgrade of Endpoint Privilege Management for Windows settings is performed only after all
instances of Endpoint Privilege Management for Windows have been upgraded.
Step 4: upgrade Endpoint Privilege Management for Windows
To upgrade Endpoint Privilege Management for Windows manually, double-click the client installation media for your operating system.
Note: For larger deployments, Endpoint Privilege Management for Windows supports mixed client environments, as it is fully
backwards compatible with older versions of Endpoint Privilege Management for Windows settings. This allows for phased
roll-outs of Endpoint Privilege Management for Windows, if preferred.
For steps to upgrade Endpoint Privilege Management for Windows using a deployment mechanism, see "Install Endpoint
Privilege Management for Windows" on page 17.
Step 5: delete old application definitions (upgrade from 5.4)
Once all machines are running version 5.5, it is safe to delete any application definitions still matching the publisher Avecto from your
configuration and to deploy that configuration.
SALES: www.beyondtrust.com/contact
SUPPORT: www.beyondtrust.com/support
DOCUMENTATION: www.beyondtrust.com/docs
28
©2003-2024 BeyondTrust Corporation. All Rights Reserved. Other trademarks identified on this page are owned by their respective owners. BeyondTrust is not a chartered bank or trust company, or
depository institution. It is not authorized to accept deposits or trust accounts and is not licensed or regulated by any state or federal banking authority.
TC: 8/27/2024
PRIVILEGE MANAGEMENT FOR WINDOWS
24.4 ADMINISTRATION GUIDE
Endpoint Privilege Management Reporting Console
The Reporting Console is an MMC snap-in and may connect to the local computer or a remote computer. The Reporting Console enables
you to view Endpoint Privilege Management for Windows events and privilege monitoring logs for the relevant computer.
To run the Endpoint Privilege Management Reporting Console:
1. Launch mmc.exe.
2. Select Add/Remove Snap-in from the File menu.
3. Select Endpoint Privilege Management Reporting from the available snap-ins and click Add.
Before the snap-in is added, you are prompted to select a computer to manage. The local computer is selected by default. To
connect to a remote computer, click the Another computer option button and enter the name of the remote computer or click the
Browse button to browse for a computer. Endpoint Privilege Management for Windows supports a connection to a central event
collector if you are using event forwarding to centralize events to a server.
You may also select an alternative location for the privilege monitoring logs, if you have a scripted solution in place to centralize the
privilege monitoring logs to a server. Enter the network location or click the Browse button to browse to the location.
4. Click Finish.
5. Click OK.
Note: You can add multiple instances of the Endpoint Privilege Management Reporting snap-in and connect them to different
computers.
Auditing report
The Auditing Report lists all the Endpoint Privilege Management for Windows events logged on that computer.
For each event the following information is available:
l
Date
l
Event ID
l
Filename (Codebase for ActiveX controls)
l
Command Line
l
Event Description
l
Username
l
Computer Name
l
Policy
l
Application Group
l
Reason
l
Custom Token
l
Hash (CLSID for ActiveX controls)
l
Certificate
l
PID
l
Parent PID
SALES: www.beyondtrust.com/contact
SUPPORT: www.beyondtrust.com/support
DOCUMENTATION: www.beyondtrust.com/docs
29
©2003-2024 BeyondTrust Corporation. All Rights Reserved. Other trademarks identified on this page are owned by their respective owners. BeyondTrust is not a chartered bank or trust company, or
depository institution. It is not authorized to accept deposits or trust accounts and is not licensed or regulated by any state or federal banking authority.
TC: 8/27/2024
PRIVILEGE MANAGEMENT FOR WINDOWS
24.4 ADMINISTRATION GUIDE

l
Trusted Application Name
l
Trusted Application Version
l
Date
l
Event ID
l
Filename (Codebase for ActiveX controls)
l
Command Line
l
Event Description
l
Username
l
Computer Name
l
Policy
l
Application Group
l
Reason
l
Custom Token
l
Hash (CLSID for ActiveX controls)
l
Certificate
l
PID
l
Parent PID
l
Trusted Application Name
l
Trusted Application Version
By default, the report shows all Endpoint Privilege Management for Windows events from the event log, but you can filter the report on
date, event number, username, and computer name. Click Update Report to reload the report.
The application definitions contained within each event may be copied and then pasted into Application Groups in the Endpoint Privilege
Management Policy Editor. Select one or more events, and then select Copy from the context menu. You can now paste the applications
into an Application Group.
Privilege monitoring report
Application view
The application view shows a list of all applications that have been monitored. Applications are identified by their file hash.
For each application, the following information is available:
l
Filename/Codebase
l
Type
l
Instances
l
Description
l
Certificate
l
Hash (CLSID for ActiveX controls)
l
Version (ActiveX controls only)
The instances column shows the number of times the application has run. To view the individual instances for an application, double-click
the entry in the list or select Show Details from the context menu. The Process View appears.
SALES: www.beyondtrust.com/contact
SUPPORT: www.beyondtrust.com/support
DOCUMENTATION: www.beyondtrust.com/docs
30
©2003-2024 BeyondTrust Corporation. All Rights Reserved. Other trademarks identified on this page are owned by their respective owners. BeyondTrust is not a chartered bank or trust company, or
depository institution. It is not authorized to accept deposits or trust accounts and is not licensed or regulated by any state or federal banking authority.
TC: 8/27/2024
PRIVILEGE MANAGEMENT FOR WINDOWS
24.4 ADMINISTRATION GUIDE

By default, the report shows all the monitored applications, but you may filter the report on date, username, and computer name. Click
Update Report to reload the report.
Process view
The process view shows a list of the individual processes that have been monitored for an application.
For each process the following information is available:
l
Date
l
PID
l
Command Line
l
Filename
To view the activity for a process, double-click the entry in the list or select Show Details from the context menu. The Activity View
appears.
Activity view
The activity view shows a list of all the privileged activity carried out by a process. Privileged activity is any activity that would fail under a
standard user account.
For each activity entry the following information is available:
l
Date
l
Operation
l
Object
l
Parameters
To go back to the process view, double-click the back up entry in the list or select Back Up from the context menu. The Process View
appears.
Diagnose connection problems
The Endpoint Privilege Management Reporting Console must connect to the registry and administrator file shares when connecting to a
remote computer.
If the Reporting Console fails to connect or fails to retrieve data, the most common causes are:
1. The Remote Registry service needs to be started on the remote machine. On Windows 7, this service is not set to start
automatically, so you should ensure it has been started.
2. The Windows Firewall may be blocking the incoming requests. Enabling the File and Printer Sharing exception in the Windows
Firewall Settings should resolve this problem.
SALES: www.beyondtrust.com/contact
SUPPORT: www.beyondtrust.com/support
DOCUMENTATION: www.beyondtrust.com/docs
31
©2003-2024 BeyondTrust Corporation. All Rights Reserved. Other trademarks identified on this page are owned by their respective owners. BeyondTrust is not a chartered bank or trust company, or
depository institution. It is not authorized to accept deposits or trust accounts and is not licensed or regulated by any state or federal banking authority.
TC: 8/27/2024
PRIVILEGE MANAGEMENT FOR WINDOWS
24.4 ADMINISTRATION GUIDE

Sign Endpoint Privilege Management for Windows settings
The Endpoint Privilege Management for Windows settings may be digitally signed. Endpoint Privilege Management for Windows can
either enforce or audit the loading of signed settings.
Endpoint Privilege Management for Windows installation mode
parameters
Endpoint Privilege Management for Windows verifies the certificate on any signed settings that it loads, regardless of where those settings
originate. The verification process includes:
l
Checking that the contents of the settings have not been altered
l
Establishing a chain of trust
l
Checking the certificate used to sign the settings contains the Endpoint Privilege Management for Windows configuration Signing
OID in its Enhanced Key Usage extension
l
Checking for revocation where network connectivity allows
Should the signature verification process fail for any reason, the course of action to take depends on the mode of operation. There are
three modes of operation in Endpoint Privilege Management for Windows. The mode is set via a command line option during installation:
Parameter Description
CERT_MODE=0 Standard Mode
The loading of unsigned settings is audited as information events (event 200). Signed
settings are audited as information events (event 200) if they are correctly signed and
as warning events (event 201) if they are incorrectly signed.
Endpoint Privilege Management for Windows is installed in Standard Mode by default.
CERT_MODE=1 Certificate Warning Mode
The loading of unsigned settings is audited as warning events (event 201). Signed
settings are audited as information events (event 200) if they are correctly signed and
as warning events (event 201) if they are incorrectly signed.
CERT_MODE=2 Certificate Enforcement Mode
Unsigned or incorrectly signed settings are not loaded and audited as error events
(event 202). Signed settings are audited as information events (event 200) if they are
correctly signed.
SALES: www.beyondtrust.com/contact
SUPPORT: www.beyondtrust.com/support
DOCUMENTATION: www.beyondtrust.com/docs
32
©2003-2024 BeyondTrust Corporation. All Rights Reserved. Other trademarks identified on this page are owned by their respective owners. BeyondTrust is not a chartered bank or trust company, or
depository institution. It is not authorized to accept deposits or trust accounts and is not licensed or regulated by any state or federal banking authority.
TC: 8/27/2024
PRIVILEGE MANAGEMENT FOR WINDOWS
24.4 ADMINISTRATION GUIDE

Example: To install the client MSI package silently in Certificate Warning Mode, use the following command line (the syntax
must be copied exactly):
MSIEXEC.exe /i PrivilegeManagementForWindows_x64.msi /qn CERT_MODE=1
or
MSIEXEC.exe /i PrivilegeManagementForWindows_x86.msi /qn CERT_MODE=1
Example: To install the client executable silently in Certificate Warning Mode, use the following command line (the syntax
must be copied exactly):
PrivilegeManagementForWindows_x64.exe /s /v" /qn CERT_MODE=1"
or
PrivilegeManagementForWindows_x86.exe /s /v" /qn CERT_MODE=1"
SALES: www.beyondtrust.com/contact
SUPPORT: www.beyondtrust.com/support
DOCUMENTATION: www.beyondtrust.com/docs
33
©2003-2024 BeyondTrust Corporation. All Rights Reserved. Other trademarks identified on this page are owned by their respective owners. BeyondTrust is not a chartered bank or trust company, or
depository institution. It is not authorized to accept deposits or trust accounts and is not licensed or regulated by any state or federal banking authority.
TC: 8/27/2024
PRIVILEGE MANAGEMENT FOR WINDOWS
24.4 ADMINISTRATION GUIDE

Create a PFX file for use with Endpoint Privilege Management
for Windows
The Endpoint Privilege Management for Windows settings console requires access to a certificate and private key to digitally sign XML
configuration. They must be contained in a PFX or PKCS#12 format file, and the certificate must specifically be designated as suitable for
signing Endpoint Privilege Management for Windows XML configuration. This is done via the Enhanced Key Usage extension when
generating certificates.
This approach provides another means of ensuring configuration cannot be created and signed by rogue users with access to a digital
signature certificate intended for a different purpose.
BeyondTrust has defined the following OID that should be added to the Enhanced Key Usage extension:
1.2.826.0.1.6538381.1.1.1 (Avecto Privilege Guard - Configuration - XML Configuration Signing)
Note: The Endpoint Privilege Management for Windows settings console does not check for the existence of this key usage.
The checks are performed when verifying digital signatures in the Endpoint Privilege Management for Windows service. A
configuration that is signed with a key that does not contain the specified Enhanced Key Usage extension always fails
signature verification checks.
The following sections provide details of two methods that can be used to generate a suitable PFX file, but it should be possible to use any
Certification Authority to produce certificates with the appropriate Enhanced Key Usage extension.
SALES: www.beyondtrust.com/contact
SUPPORT: www.beyondtrust.com/support
DOCUMENTATION: www.beyondtrust.com/docs
34
©2003-2024 BeyondTrust Corporation. All Rights Reserved. Other trademarks identified on this page are owned by their respective owners. BeyondTrust is not a chartered bank or trust company, or
depository institution. It is not authorized to accept deposits or trust accounts and is not licensed or regulated by any state or federal banking authority.
TC: 8/27/2024
PRIVILEGE MANAGEMENT FOR WINDOWS
24.4 ADMINISTRATION GUIDE

Generate a certificate
MakeCert is a certificate generation tool available from Microsoft that can be used to generate certificates for testing purposes.
Example: The following makecert command line can be used to generate a certificate suitable for signing Endpoint Privilege
Management for Windows configuration:
makecert -r -pe -n "CN=BeyondTrust Signed XML Configuration" -sky signature -eku
1.2.826.0.1.6538381.1.1.1 -ss my
The parameters can be changed as required. The example above generates a self-signed certificate with an exportable private key, and
adds it to the calling user’s local certificate store. The certificate must then be exported to a PFX file along with the private key in the usual
way.
The important parameter in the example is the addition of the Endpoint Privilege Management for Windows Configuration Signing OID to
the Enhanced Key Usage extension (-eku 1.2.826.0.1.6538381.1.1.1)
If a self-signed certificate is used to sign the Endpoint Privilege Management for Windows settings, the certificate must be distributed to all
clients for a chain of trust to be established and for signature verification to be successful.
Use certificate template in a certificate request
Once the certificate template is issued, the template can be used during
advanced certificate requests via the certsrv web interface.
Once the certificate is issued, it must be installed by the user before it can be exported to a PFX file in the usual way.
SALES: www.beyondtrust.com/contact
SUPPORT: www.beyondtrust.com/support
DOCUMENTATION: www.beyondtrust.com/docs
35
©2003-2024 BeyondTrust Corporation. All Rights Reserved. Other trademarks identified on this page are owned by their respective owners. BeyondTrust is not a chartered bank or trust company, or
depository institution. It is not authorized to accept deposits or trust accounts and is not licensed or regulated by any state or federal banking authority.
TC: 8/27/2024
PRIVILEGE MANAGEMENT FOR WINDOWS
24.4 ADMINISTRATION GUIDE

Note: The private key must be exported to the PFX file as well.
SALES: www.beyondtrust.com/contact
SUPPORT: www.beyondtrust.com/support
DOCUMENTATION: www.beyondtrust.com/docs
36
©2003-2024 BeyondTrust Corporation. All Rights Reserved. Other trademarks identified on this page are owned by their respective owners. BeyondTrust is not a chartered bank or trust company, or
depository institution. It is not authorized to accept deposits or trust accounts and is not licensed or regulated by any state or federal banking authority.
TC: 8/27/2024
PRIVILEGE MANAGEMENT FOR WINDOWS
24.4 ADMINISTRATION GUIDE

Microsoft Certificate Services
Microsoft Certificate Services is a useful way for organizations to run their Certification Authority. In its enterprise editions, Certificate
Services integrates with Active Directory to publish certificates and Certificate Revocation Lists to a location that is accessible to all
computers in the Active Directory domain.
Custom certificate templates can only be managed using enterprise CAs, therefore the following procedure is only possible on Enterprise
Editions of Windows 2008 R2.
Create an Endpoint Privilege Management for Windows configuration certificate
template
The easiest way to create a certificate with the BeyondTrust Endpoint Privilege Management for Windows Configuration Signing
Enhanced Key Usage extension is to create a new certificate template. Certificate templates allow the content and format of certificates to
be defined so users can request a certificate using a simple template rather than having to generate a complex certificate request.
To create a certificate template, an existing template must be duplicated and then modified.
To create a new version 2 or 3 certificate template:
1. Open the Certificate Templates snap-in.
2. In the details pane, right-click an existing certificate to serve as the starting point for the new certificate, and select Duplicate
Template.
3. Choose whether to duplicate the template as a Windows Server 2003–based template or a Windows Server 2008 R2–based
template.
4. On the General tab, enter the Template display name and the Template name, and click OK.
5. Define any additional attributes for the newly created certificate template.
The template must then be edited to make it suitable for signing Endpoint Privilege Management for Windows configuration. This is done
by adding the BeyondTrust Endpoint Privilege Management for Windows Configuration Signing OID as an application policy for the
template.
The Configuration Signing OID must first be defined.
To define an object identifier:
1. Open the Certificate Templates snap-in.
2. In the details pane, right-click the certificate template you want to modify, and then click Properties.
3. On the Extensions tab, click Application Policies, and then click Edit.
4. In the Edit Application Policies Extension dialog box, click Add.
5. In Add Application Policy, ensure the Endpoint Privilege Management for Windows Configuration Signing policy that you are
creating does not exist, and then click New.
SALES: www.beyondtrust.com/contact
SUPPORT: www.beyondtrust.com/support
DOCUMENTATION: www.beyondtrust.com/docs
37
©2003-2024 BeyondTrust Corporation. All Rights Reserved. Other trademarks identified on this page are owned by their respective owners. BeyondTrust is not a chartered bank or trust company, or
depository institution. It is not authorized to accept deposits or trust accounts and is not licensed or regulated by any state or federal banking authority.
TC: 8/27/2024
PRIVILEGE MANAGEMENT FOR WINDOWS
24.4 ADMINISTRATION GUIDE

6. In the New Application Policy dialog box, provide the name and
OID for the new application policy, and then click OK.
Now that the application policy is defined, you can associate it with the certificate template.
To associate the application policy with the certificate template:
1. Open the Certificate Templates snap-in.
2. In the details pane, right-click the certificate template you want to change, and then click Properties.
3. On the Extensions tab, click Application Policies > Edit.
4. In Edit Application Policies Extension, click Add.
5. In Add Application Policy, click the application policy, and then click OK.
SALES: www.beyondtrust.com/contact
SUPPORT: www.beyondtrust.com/support
DOCUMENTATION: www.beyondtrust.com/docs
38
©2003-2024 BeyondTrust Corporation. All Rights Reserved. Other trademarks identified on this page are owned by their respective owners. BeyondTrust is not a chartered bank or trust company, or
depository institution. It is not authorized to accept deposits or trust accounts and is not licensed or regulated by any state or federal banking authority.
TC: 8/27/2024
PRIVILEGE MANAGEMENT FOR WINDOWS
24.4 ADMINISTRATION GUIDE

Issue and distribute the certificate
Once the certificate template is created in the Certificate Templates snap-in and has replicated to all domain controllers in the forest, it can
now be published for deployment. The final task for publishing the certificate template is to select it for the Certification Authority (CA) to
issue.
Issue the certificate
To define which certificate templates are issued by a CA:
1. In Administrative Tools, click Certification Authority.
2. In the console tree, expand the CAName (where CAName is the name of your enterprise CA).
3. In the console tree, select the Certificate Templates container.
4. Right-click Certificate Templates, and then click New > Certificate Template to Issue.
5. In the Enable Certificate Templates dialog box, select the Endpoint Privilege Management for Windows Configuration certificate
template you want the CA to issue, and then click OK.
Distribute public keys
For signature verification to be successful at every client that reads signed Endpoint Privilege Management for Windows settings, a chain
of trust must be established. For this to be done, a suitable trust point must be distributed to each client that receives the Endpoint
Privilege Management for Windows settings. This should be done automatically when using a Microsoft enterprise CA.
Alternatively, public keys can be distributed using Group Policy.
Note: If you rely on third party providers for certificates, for example, not internal PKI, you will succeed by asking for a "key
signing ceremony" that allows you to specify the certificate parameters such as custom "extended key usage" values as
described in this appendix.
For more information on distributing public keys using Group Policy, see Distribute Certificates to Client Computers by Using
Group Policy at https://docs.microsoft.com/en-us/windows-server/identity/ad-fs/deployment/distribute-certificates-to-client-
computers-by-using-group-policy.
SALES: www.beyondtrust.com/contact
SUPPORT: www.beyondtrust.com/support
DOCUMENTATION: www.beyondtrust.com/docs
39
©2003-2024 BeyondTrust Corporation. All Rights Reserved. Other trademarks identified on this page are owned by their respective owners. BeyondTrust is not a chartered bank or trust company, or
depository institution. It is not authorized to accept deposits or trust accounts and is not licensed or regulated by any state or federal banking authority.
TC: 8/27/2024
PRIVILEGE MANAGEMENT FOR WINDOWS
24.4 ADMINISTRATION GUIDE

Create and edit signed settings
To digitally sign Endpoint Privilege Management for Windows settings, a PFX file containing an appropriate certificate and private key
must be supplied, alongside the corresponding password for the PFX file.
Note: For settings to be correctly signed, the certificate must have an OID that is specific to BeyondTrust Endpoint Privilege
Management for Windows. The chain of trust and revocation status is also checked by Endpoint Privilege Management for
Windows. If the settings have been tampered with since signing, the settings also fail the signing check.
To digitally sign the Endpoint Privilege Management for Windows settings:
1. Select the BeyondTrust Settings node.
2. Right-click and select Digitally Sign.
3. The Digitally sign your BeyondTrust Settings wizard appears.
4. Check the Sign the settings with the following private key option.
5. Click the Select key button and browse for the PFX file that contains the digital certificate.
6. Enter the password for the PFX file.
7. Click Finish.
To remove the digital signature from the Endpoint Privilege Management for Windows settings:
1. Select the Endpoint Privilege Management Settings node.
2. Right-click and click Digitally Sign.
3. The Digitally sign your Endpoint Privilege Management Settings wizard appears.
4. Select the Do not sign the settings option.
5. Click Finish.
Once the Endpoint Privilege Management for Windows settings are digitally signed, the Endpoint Privilege Management Policy Editor
prompts the administrator for the corresponding PFX password when the settings are opened.
To modify the signed settings, you must enter a valid password for the PFX.
Alternatively, you can select to remove the certificate from the settings, or
open the settings in Read Only mode. Canceling this prompt automatically
opens the settings in Read Only mode.
SALES: www.beyondtrust.com/contact
SUPPORT: www.beyondtrust.com/support
DOCUMENTATION: www.beyondtrust.com/docs
40
©2003-2024 BeyondTrust Corporation. All Rights Reserved. Other trademarks identified on this page are owned by their respective owners. BeyondTrust is not a chartered bank or trust company, or
depository institution. It is not authorized to accept deposits or trust accounts and is not licensed or regulated by any state or federal banking authority.
TC: 8/27/2024
PRIVILEGE MANAGEMENT FOR WINDOWS
24.4 ADMINISTRATION GUIDE

For more information about creating certificates suitable for use with Endpoint Privilege Management for Windows, see
"Create a PFX file for use with Endpoint Privilege Management for Windows" on page 34.
SALES: www.beyondtrust.com/contact
SUPPORT: www.beyondtrust.com/support
DOCUMENTATION: www.beyondtrust.com/docs
41
©2003-2024 BeyondTrust Corporation. All Rights Reserved. Other trademarks identified on this page are owned by their respective owners. BeyondTrust is not a chartered bank or trust company, or
depository institution. It is not authorized to accept deposits or trust accounts and is not licensed or regulated by any state or federal banking authority.
TC: 8/27/2024
PRIVILEGE MANAGEMENT FOR WINDOWS
24.4 ADMINISTRATION GUIDE

Behavior when policy certificate verification fails
When using signed Endpoint Privilege Management for Windows settings, timely certificate revocation enforcement may be desired. This
scenario is most common for clients unable to reach the CRL source since they are off the corporate network for extended periods of time.
By default, Endpoint Privilege Management for Windows allows certificates whose revocation may not be confirmed with Microsoft Crypto
APIs from either cached information, or directly from the CRL source.
Note: If agent protection is configured, you must first disable agent protection on the machine before you can change settings
in the Registry Editor.
The following registry configuration may be used to change the default behavior:
HKEY_LOCAL_MACHINE\SOFTWARE\Avecto\Privilege Guard Client\ DWORD "CRLNetworkErrorFailOpen" = 0
Failure to retrieve CRL is deemed an error and policy is not loaded.
DWORD "CRLNetworkErrorFailOpen" = 1
Failure to retrieve CRL is deemed a warning and policy is still loaded. This is the default behavior if this registry setting has not been
configured.
The CRL is cached when downloaded and honored until its Time To Live (TTL) has expired (standard Microsoft CryptoAPI behavior). The
Certificate Authority may be configured according to requirements. Microsoft Group Policy provides centralized configuration in this area.
Security and usability need to be balanced according to your organization's risk tolerance.
Note: Prior settings from the same source type (GPO, HTTP, etc) is deleted before the newly acquired settings are verified.
This could lead to no policy in effect on the endpoint in the case that invalid settings are delivered, and no valid settings from
other sources are in place.
SALES: www.beyondtrust.com/contact
SUPPORT: www.beyondtrust.com/support
DOCUMENTATION: www.beyondtrust.com/docs
42
©2003-2024 BeyondTrust Corporation. All Rights Reserved. Other trademarks identified on this page are owned by their respective owners. BeyondTrust is not a chartered bank or trust company, or
depository institution. It is not authorized to accept deposits or trust accounts and is not licensed or regulated by any state or federal banking authority.
TC: 8/27/2024
PRIVILEGE MANAGEMENT FOR WINDOWS
24.4 ADMINISTRATION GUIDE

Manual deployment of Endpoint Privilege Management for
Windows
Endpoint Privilege Management for Windows can optionally be deployed manually using any Windows Installer compatible third party
deployment system. The Endpoint Privilege Management for Windows package is available as both an MSI package and self-installing
executable package, from the BeyondTrust product archive.
Prerequisites
Endpoint Privilege Management for Windows must be installed in ePO Mode, either by selecting the McAfee ePolicy Orchestrator
Integration option when installing Endpoint Privilege Management for Windows, or by using a command line option if installing the client
using a deployment system. This will install additional components required to communicate with the McAfee Agent.
To install the client MSI package silently in ePO Mode, use the following command line:
MSIEXEC.exe /i PrivilegeManagementForWindows_x(XX).msi /qn EPOMODE=1
To install the client MSI package silently in ePO Mode with logging enabled:
MSIEXEC.exe /i PrivilegeManagementForWindows_x(XX).msi /qn EPOMODE=1 /sv “C:\PMFWInstallLog.txt”
To install the client executable silently in ePO Mode, use the following command line (the double quotes are required):
PrivilegeManagementForWindows_x(XX).exe /s /v" /qn EPOMODE=1"
Where (XX) represents 86 or 64 in relation to the 32-bit or 64-bit installation respectively.
The syntax above must be copied exactly for the install to work as designed, including all spacing.
Note: If you are deploying Endpoint Privilege Management for Windows using McAfee ePO, then ePO Mode is automatically
enabled.
Disable ePO mode
Once installed in ePO Mode, Endpoint Privilege Management for Windows will send events to the McAfee Agent, as well as raising events
to the Application Log. If you want to disable ePO mode at any time, set the following registry key:
HKEY_LOCAL_MACHINE\Software\Avecto\Privilege Guard Agent\DWORD "EPOMode"=0
To re-enable ePO Mode, set the above DWORD value to 1.
SALES: www.beyondtrust.com/contact
SUPPORT: www.beyondtrust.com/support
DOCUMENTATION: www.beyondtrust.com/docs
43
©2003-2024 BeyondTrust Corporation. All Rights Reserved. Other trademarks identified on this page are owned by their respective owners. BeyondTrust is not a chartered bank or trust company, or
depository institution. It is not authorized to accept deposits or trust accounts and is not licensed or regulated by any state or federal banking authority.
TC: 8/27/2024
PRIVILEGE MANAGEMENT FOR WINDOWS
24.4 ADMINISTRATION GUIDE

Launch the Endpoint Privilege Management Policy Editor
The Endpoint Privilege Management Policy Editor is accessed as a snap-in to the Microsoft Management Console.
From your administrator account, launch the Microsoft Management Console (MMC.exe). Type MMC into the Search Box from the Start
Menu and press the Enter key.
Note: You cannot edit policy in the Endpoint Privilege Management Policy Editor and Endpoint Privilege Management Policy
Editor at the same time.
To add Endpoint Privilege Management for Windows as a snap-in to the console:
1. Select File from the menu bar and select Add/Remove Snap-in.
2. Scroll down the list and select the Endpoint Privilege Management Settings snap-in. Click Add and then click OK.
3. Optionally, select File > Save as and save a shortcut for the snap-in to the desktop as Endpoint Privilege Management.
4. Select the Endpoint Privilege Management Settings node in the left pane and select the operating system node to display the
main screen in the details pane.
Navigate the Policy Editor
The left pane containing the Endpoint Privilege Management Settings
item is referred to as the Tree pane. The folders beneath Endpoint
Privilege Management Settings in the tree pane are referred to as
Nodes. The middle pane, which displays content relevant to the selected
node, is referred to as the Details pane.
When you expand the Endpoint Privilege Management Settings node, three nodes display:
1. Windows: Create Endpoint Privilege Management policy for Windows endpoints.
2. OS X: Create Endpoint Privilege Management policy for macOS endpoints.
3. Licensing: Manage Endpoint Privilege Management licenses.
When you expand the Windows node, you see five nodes:
1. Workstyles: Assign privileges to applications.
2. Application Groups: Define logical groupings of applications.
3. Content Groups: Define specific file content.
4. Messages: Define end user messages.
5. Custom Tokens: Define custom access tokens.
Once a Workstyle is created and selected in the tree pane, the Workstyle tabs are displayed in the details pane.
SALES: www.beyondtrust.com/contact
SUPPORT: www.beyondtrust.com/support
DOCUMENTATION: www.beyondtrust.com/docs
44
©2003-2024 BeyondTrust Corporation. All Rights Reserved. Other trademarks identified on this page are owned by their respective owners. BeyondTrust is not a chartered bank or trust company, or
depository institution. It is not authorized to accept deposits or trust accounts and is not licensed or regulated by any state or federal banking authority.
TC: 8/27/2024
PRIVILEGE MANAGEMENT FOR WINDOWS
24.4 ADMINISTRATION GUIDE

Automatic save
By default, the Endpoint Privilege Management Settings editor automatically saves any changes back to the appropriate GPO (or local
XML file, if you are using the standalone console).
Automatic saving can be disabled, by deselecting the Auto Commit Settings menu option on the Endpoint Privilege Management
Settings node, but we do not recommend it unless you have performance issues. If you deselect the Auto Commit Settings option, then
you must select the Commit Settings menu option to manually save any changes back to the GPO. The Auto Commit Settings option is
persisted to your user profile, so it is set for all future editing of Endpoint Privilege Management for Windows settings.
SALES: www.beyondtrust.com/contact
SUPPORT: www.beyondtrust.com/support
DOCUMENTATION: www.beyondtrust.com/docs
45
©2003-2024 BeyondTrust Corporation. All Rights Reserved. Other trademarks identified on this page are owned by their respective owners. BeyondTrust is not a chartered bank or trust company, or
depository institution. It is not authorized to accept deposits or trust accounts and is not licensed or regulated by any state or federal banking authority.
TC: 8/27/2024
PRIVILEGE MANAGEMENT FOR WINDOWS
24.4 ADMINISTRATION GUIDE

Policies and templates
An Endpoint Privilege Management for Windows policy is made up of one or more items from the following groups. Each of these groups
can be a node in Endpoint Privilege Management Settings:
l
Workstyles: A Workstyle is part of a policy. It's used to assign Application Rules for users. You can create Workstyles by using the
WorkStyle Wizard or by importing them.
l
Application Groups: Application Groups are used by Workstyles to group applications together to apply certain Endpoint
Privilege Management for Windows behavior.
l
Content Groups: Content groups are used by Workstyles to group content together to apply certain Endpoint Privilege
Management for Windows behavior.
l
Messages: Messages are used by Workstyles to provide information to the end user when Endpoint Privilege Management for
Windows has applied certain behavior that you've defined and need to notify the end user.
l
Custom Tokens: Custom tokens are used by Workstyles to assign custom privileges to content or Application Groups.
Users
Disconnected users are fully supported by Endpoint Privilege Management for Windows. When receiving policies from McAfee ePO,
Endpoint Privilege Management for Windows automatically caches all the information required to work offline, so the settings are still be
applied if the client is not connected to the corporate network. Any changes made to the policy do not propagate to the disconnected
computer until the McAfee Agent reestablishes a connection to the ePO Server.
Policies
Endpoint Privilege Management for Windows policies are applied to one or more endpoints. The Policy Summary screen summaries for
the number of Workstyles, Application Groups, target URL groups, target Content Groups, messages, tokens and licenses in the policy.
As this is a blank policy, all summaries will be zero.
Each item summary includes an Edit <Item> button, which allows you to jump to that section of the policy.
Endpoint Privilege Management for Windows incorporates an autosave, autosave recovery, and concurrent edit awareness feature to
reduce the risk or impact of data loss and prevent multiple users from overwriting individual polices.
an Endpoint Privilege Management for Windows template is a configuration that is merged with your existing policy. A template also
consists of any number of Workstyles, Application Groups, Content Groups, messages, and custom tokens.
Edit group policy
To edit policy, we recommend you use the Group Policy Management snap-in. Once you install the Endpoint Privilege Management
Policy Editor, the Endpoint Privilege Management for Windows settings are available in the Group Policy Management snap-in. The
Group Policy Management snap-in can be accessed from the Microsoft Management Console or Group Policy Management editor.
Note: If you want to create local policy to administer your endpoints, you can use the Endpoint Privilege Management snap-in
in the Microsoft Management Console or the Local Group Policy Editor. This creates a local policy only.
SALES: www.beyondtrust.com/contact
SUPPORT: www.beyondtrust.com/support
DOCUMENTATION: www.beyondtrust.com/docs
46
©2003-2024 BeyondTrust Corporation. All Rights Reserved. Other trademarks identified on this page are owned by their respective owners. BeyondTrust is not a chartered bank or trust company, or
depository institution. It is not authorized to accept deposits or trust accounts and is not licensed or regulated by any state or federal banking authority.
TC: 8/27/2024
PRIVILEGE MANAGEMENT FOR WINDOWS
24.4 ADMINISTRATION GUIDE

Endpoint Privilege Management settings
You can right-click on the Endpoint Privilege Management Settings node to access the following commands.
Click Tools in the right pane to access the Response Code Generator.
By default, Auto Commit Settings is selected. This means any changes made here are saved and applied using Group Policy.
Alternatively, you can clear Auto Commit Settings and select Commit Settings when you specifically want those settings to apply.
The following options are also available:
l
Create
l
Delete
l
Export
l
Import
l
Import Template
l
Digitally Sign
l
Save Report
l
Set Challenge/Response Shared Key
l
Show Hidden Groups
l
View
For more information, see the following:
l
"Response Code Generator" on page 51
l
"Create" on page 47
l
"Delete" on page 48
l
"Export" on page 48
l
"Import" on page 48
l
"Import template" on page 48
l
"Digitally sign" on page 48
l
"Save report" on page 49
l
"Set challenge/response shared key" on page 49
l
"Show hidden groups" on page 49
l
"View" on page 49
Create
Creates a new Endpoint Privilege Management for Windows policy. This deletes any existing policy for all operating systems. If you have
an existing policy, you are prompted to remove all existing settings when you click Create. Click Yes to delete your existing policy and
create a new one, or No to keep your existing policy.
SALES: www.beyondtrust.com/contact
SUPPORT: www.beyondtrust.com/support
DOCUMENTATION: www.beyondtrust.com/docs
47
©2003-2024 BeyondTrust Corporation. All Rights Reserved. Other trademarks identified on this page are owned by their respective owners. BeyondTrust is not a chartered bank or trust company, or
depository institution. It is not authorized to accept deposits or trust accounts and is not licensed or regulated by any state or federal banking authority.
TC: 8/27/2024
PRIVILEGE MANAGEMENT FOR WINDOWS
24.4 ADMINISTRATION GUIDE

Delete
Deletes your existing Endpoint Privilege Management for Windows policy. You are prompted to remove all existing settings when you click
Delete. Click Yes to delete your existing policy or No to keep your existing policy.
Delete items and conflict resolution
Some items in Endpoint Privilege Management Settings are referenced in other areas, such as Application Groups, messages and
custom tokens. These items can be deleted at any time, and if they are not referenced elsewhere, they delete without any further action
required.
When an item is deleted, Endpoint Privilege Management Policy Editor checks for any conflicts which may need to be resolved. If the item
you attempt to delete is already in use elsewhere in your settings, then a conflict is reported, and needs to be resolved.
You can review each detected conflict and observe the automatic resolution which takes place if you proceed. If more than one conflict is
reported, use the Next conflict and Previous conflict links to move between conflicts.
If you want to proceed, click Resolve All to remove the item from the areas of your Endpoint Privilege Management Settings where it is
currently in use.
Export
Endpoint Privilege Management for Windows policies can be imported to and exported from Group Policy as XML files, in a format
common to other editions of Endpoint Privilege Management, such as the Endpoint Privilege Management ePO Extension. This allows for
policies to be migrated and shared between different deployment mechanisms.
To export a policy, click Export and give the file a name. Click Save.
Import
Endpoint Privilege Management for Windows policies can be imported to and exported from Group Policy as XML files, in a format
common to other editions of Endpoint Privilege Management, such as the Endpoint Privilege Management ePO Extension. This allows for
policies to be migrated and shared between different deployment mechanisms.
To import a policy, click Import, navigate to the policy XML you want to import, and click Open.
Import template
Allows you to import template policies.
For more information, see "Templates" on page 52.
Digitally sign
You can digitally sign the Endpoint Privilege Management for Windows settings. Endpoint Privilege Management for Windows can either
enforce or audit the loading of signed settings.
For more information, see "Sign Endpoint Privilege Management for Windows settings" on page 32.
SALES: www.beyondtrust.com/contact
SUPPORT: www.beyondtrust.com/support
DOCUMENTATION: www.beyondtrust.com/docs
48
©2003-2024 BeyondTrust Corporation. All Rights Reserved. Other trademarks identified on this page are owned by their respective owners. BeyondTrust is not a chartered bank or trust company, or
depository institution. It is not authorized to accept deposits or trust accounts and is not licensed or regulated by any state or federal banking authority.
TC: 8/27/2024
PRIVILEGE MANAGEMENT FOR WINDOWS
24.4 ADMINISTRATION GUIDE

Save report
You can obtain a report of your Windows policy which can be saved locally, if required.
Set challenge/response shared key
This allows you to set the Challenge/Response Shared Key for the policy. This is encrypted once you have set it. This key is then required
by the challenge/response generator to generate response codes. The only way to change the Challenge/Response Shared Key is by
setting a new one.
Show hidden groups
Some Application Groups are hidden by default; for example, Application Groups prefixed by (Default) in the QuickStart Policy. You can
show or hide Application Groups in Endpoint Privilege Management for Windows.
To show groups that are hidden by default, right-click on the Endpoint Privilege Management Settings node and select Show Hidden
Groups. You can hide the groups again by clearing Show Hidden Groups.
View
This allows you to view the Workstyles Editor, which is the default, or the HTML Report for your Windows policy.
For more information, see "HTML report" on page 49.
License
Endpoint Privilege Management for Windows requires a valid license code to be entered in the Endpoint Privilege Management Policy
Editor. If multiple Endpoint Privilege Management for Windows policies are applied to an endpoint, you need at least one valid license
code for one of those policies.
For example, you can add the Endpoint Privilege Management for Windows license to an Endpoint Privilege Management for Windows
policy that is applied to all managed endpoints, even if it doesn't have any Workstyles. This ensures all endpoints receive a valid Endpoint
Privilege Management for Windows license if they have Endpoint Privilege Management for Windows installed. If you are unsure, then we
recommend you add a valid license when you create the Endpoint Privilege Management for Windows policy.
Insert a license
1. Click No License. Click to enter a license code to enter a license if one doesn't already exist, or Valid License if you want to
enter an additional license code.
2. Paste your Endpoint Privilege Management for Windows license code and click Add. The license details are shown.
HTML report
The Endpoint Privilege Management for Windows settings may be viewed as an HTML report for your Windows policy only. This report
follows the same style as the Group Policy Management Console (GPMC) reports.
To show the HTML view:
SALES: www.beyondtrust.com/contact
SUPPORT: www.beyondtrust.com/support
DOCUMENTATION: www.beyondtrust.com/docs
49
©2003-2024 BeyondTrust Corporation. All Rights Reserved. Other trademarks identified on this page are owned by their respective owners. BeyondTrust is not a chartered bank or trust company, or
depository institution. It is not authorized to accept deposits or trust accounts and is not licensed or regulated by any state or federal banking authority.
TC: 8/27/2024
PRIVILEGE MANAGEMENT FOR WINDOWS
24.4 ADMINISTRATION GUIDE

1. Select the Endpoint Privilege Management Settings node.
2. Right-click and select View > HTML Report.
Endpoint Privilege Management for Windows uses the same style as the GPMC for its HTML reports. You can expand and collapse the
various sections of the HTML report to show or hide more detailed information.
To return to the Workstyle Editor view:
1. Select the Endpoint Privilege Management Settings node.
2. Right-click and select View > Workstyles Editor.
You may also save the HTML report to a file (the HTML view does not need to be displayed to save the HTML report).
To save a HTML Report:
1. Select the Endpoint Privilege Management Settings node.
2. Right-click and click Save Report.
3. Enter a filename for the report and click Save.
Note: When displaying Resultant Set of Policy (RSoP) results, the Endpoint Privilege Management Settings Policy Editor
defaults to HTML view, but a read-only Workstyles Editor view may also be displayed.
SALES: www.beyondtrust.com/contact
SUPPORT: www.beyondtrust.com/support
DOCUMENTATION: www.beyondtrust.com/docs
50
©2003-2024 BeyondTrust Corporation. All Rights Reserved. Other trademarks identified on this page are owned by their respective owners. BeyondTrust is not a chartered bank or trust company, or
depository institution. It is not authorized to accept deposits or trust accounts and is not licensed or regulated by any state or federal banking authority.
TC: 8/27/2024
PRIVILEGE MANAGEMENT FOR WINDOWS
24.4 ADMINISTRATION GUIDE

Response Code Generator
The Response Code Generator allows you to generate a response code using the PGChallengeResponseUI utility.
To generate a Response Code from Endpoint Privilege Management Settings:
1. Click the Tools link from the right pane of Endpoint Privilege Management Settings.
2. Click Launch Response Code Generator.
3. Enter the shared key and the challenge code. The response code is shown in the third text field.
SALES: www.beyondtrust.com/contact
SUPPORT: www.beyondtrust.com/support
DOCUMENTATION: www.beyondtrust.com/docs
51
©2003-2024 BeyondTrust Corporation. All Rights Reserved. Other trademarks identified on this page are owned by their respective owners. BeyondTrust is not a chartered bank or trust company, or
depository institution. It is not authorized to accept deposits or trust accounts and is not licensed or regulated by any state or federal banking authority.
TC: 8/27/2024
PRIVILEGE MANAGEMENT FOR WINDOWS
24.4 ADMINISTRATION GUIDE

Templates
Templates can be imported into your Endpoint Privilege Management for Windows settings. You can choose to merge them into your
existing policy; otherwise, the template overwrites your existing policy.
Note: Be careful when merging policies with production policies. If No is selected, then the existing policy settings and license
information are removed. If Yes is selected, then the template is added to the existing policy.
The following templates are Windows specific:
l
Windows QuickStart
l
Discovery
l
Server Roles
l
Trusted App Protection (TAP)
For more information, see the following:
l
"Windows QuickStart" on page 53
l
"Discovery" on page 60
l
"Server Roles" on page 61
l
"Trusted App Protection (TAP)" on page 62
SALES: www.beyondtrust.com/contact
SUPPORT: www.beyondtrust.com/support
DOCUMENTATION: www.beyondtrust.com/docs
52
©2003-2024 BeyondTrust Corporation. All Rights Reserved. Other trademarks identified on this page are owned by their respective owners. BeyondTrust is not a chartered bank or trust company, or
depository institution. It is not authorized to accept deposits or trust accounts and is not licensed or regulated by any state or federal banking authority.
TC: 8/27/2024
PRIVILEGE MANAGEMENT FOR WINDOWS
24.4 ADMINISTRATION GUIDE

Windows QuickStart
The QuickStart for Windows policy contains Workstyles, Application Groups, messages, and custom tokens configured with Endpoint
Privilege Management and Application Control. The QuickStart policy is designed from BeyondTrust’s experiences of implementing the
solution across thousands of customers, and is intended to balance security with user freedom. As every environment is different, we
recommend you thoroughly test this configuration to ensure it complies with the requirements of your organization.
IMPORTANT!
As of release 5.5, all releases of this product are signed with BeyondTrust Corporation, rather than Avecto, as the software
publisher name. If prior to 5.5 you used the QuickStart Policy Template as a starting point, it is likely that your configuration will
include Application Groups which target our own applications based on a publisher match to Avecto. An upgrade to 5.5 or beyond
requires you to update your configuration so that it continues to match the versions of the applications and tools that you use. We
recommend one of the following two options:
Option 1
Add a copy of any existing application definitions which target Avecto and update those copies to target BeyondTrust Corporation
instead; the presence of both sets of application definitions ensure they continue to match both new and existing versions during the
implementation of 5.5. This option has an advantage over Option 2, in that it also targets any application definitions that you may have
created yourself that target the Avecto publisher.
Option 2
You may copy fragments of the QuickStart policies in version 5.5 to your existing application definitions.
For either option, it is critical that you roll out your configuration changes before you update your Endpoint Privilege Management for
Windows software to version 5.5 or later.
This template policy contains the following elements:
Workstyles
l
All Users
l
High Flexibility
l
Medium Flexibility
l
Low Flexibility
Application groups
l
Add Admin - All Users (Business Apps)
l
Add Admin - All Users (Windows Functions)
l
Add Admin - High Flexibility
l
Add Admin - Medium Flexibility
l
Add Admin - Low Flex (added)
SALES: www.beyondtrust.com/contact
SUPPORT: www.beyondtrust.com/support
DOCUMENTATION: www.beyondtrust.com/docs
53
©2003-2024 BeyondTrust Corporation. All Rights Reserved. Other trademarks identified on this page are owned by their respective owners. BeyondTrust is not a chartered bank or trust company, or
depository institution. It is not authorized to accept deposits or trust accounts and is not licensed or regulated by any state or federal banking authority.
TC: 8/27/2024
PRIVILEGE MANAGEMENT FOR WINDOWS
24.4 ADMINISTRATION GUIDE

l
Add Admin - Protected Operations
l
Allow - Allowed Functions & Apps
l
Block - Blocked Apps
l
Passive - High Business Apps
l
Passive - Medium Business Apps
l
Passive - Low Business Apps
l
Passive - All Users Functions & Apps
Hidden application groups
l
(Default) Any Application
l
(Default) Any Trusted & Signed UAC Prompt
l
(Default) Any UAC Prompt
l
(Default) Endpoint Privilege Management Tools
l
(Default) Child Processes of TraceConfig.exe
l
(Default) Signed UAC Prompt
l
(Default) Software Deployment Tool Installs
l
(Recommended) Restricted Functions
l
(Recommended) Restricted Functions (On-Demand)
l
(Default) Trusted Parent Processes
Messages
l
Allow Message (Authentication & Reason)
l
Allow Message (Select Reason)
l
Allow Message (Support Desk)
l
Allow Message (Yes / No)
l
Block Message
l
Block Notification
l
Notification (Trusted)
Custom tokens
l
BeyondTrust Support Token
For information on how to upgrade Avecto signed application definitions, see "Upgrade Endpoint Privilege Management for
Windows" on page 23
SALES: www.beyondtrust.com/contact
SUPPORT: www.beyondtrust.com/support
DOCUMENTATION: www.beyondtrust.com/docs
54
©2003-2024 BeyondTrust Corporation. All Rights Reserved. Other trademarks identified on this page are owned by their respective owners. BeyondTrust is not a chartered bank or trust company, or
depository institution. It is not authorized to accept deposits or trust accounts and is not licensed or regulated by any state or federal banking authority.
TC: 8/27/2024
PRIVILEGE MANAGEMENT FOR WINDOWS
24.4 ADMINISTRATION GUIDE

Windows QuickStart policy summary
By using and building on the QuickStart policy, you can quickly improve your organization's security without having to monitor and analyze
your users' behavior first and then design and create your Endpoint Privilege Management for Windows configuration.
After the QuickStart policy is deployed to groups within your organization, you can start to gather information on your users' behavior. This
provides you with a better understanding of the applications used within your organization, and whether they require admin rights, need to
be blocked, or need authorizing for specific users.
This data can then be used to further refine the QuickStart policy to provide a more tailored Endpoint Privilege Management for Windows
solution for your organization.
Windows Workstyles
The QuickStart policy contains five Workstyles that should be used together to manage all users in your organization.
All users
This Workstyle contains a set of default rules that apply to all standard users regardless of the level of flexibility they need.
The All Users Workstyle contains rules to:
l
Block any applications in the Block - Blocklisted Apps group
l
Allow Endpoint Privilege Management for Windows Support tools
l
Allow standard Windows functions, business applications, and applications installed through trusted deployment tools to run with
admin rights
l
Allow approved standard user applications to run passively
High flexibility
This Workstyle is designed for users that require a lot of flexibility, such as developers.
The High Flexibility Workstyle contains rules to:
l
Allow known business applications and operating system functions to run.
l
Allow users to run signed applications with admin rights.
l
Allow users to run unknown applications with admin rights once they confirm that the application should be elevated.
l
Allow applications that are in the Add Admin – High Flexibility group to run with admin rights.
l
Allow unknown business application and operating system functions to run on-demand.
Medium flexibility
This Workstyle is designed for users that require some flexibility, such as sales engineers.
The Medium Flexibility Workstyle contains rules to:
l
Allow known business applications and operating system functions to run.
l
Allow users to run signed applications with admin rights once they confirm that the application should be elevated.
l
Prompt users to provide a reason before they can run unknown applications with admin rights.
SALES: www.beyondtrust.com/contact
SUPPORT: www.beyondtrust.com/support
DOCUMENTATION: www.beyondtrust.com/docs
55
©2003-2024 BeyondTrust Corporation. All Rights Reserved. Other trademarks identified on this page are owned by their respective owners. BeyondTrust is not a chartered bank or trust company, or
depository institution. It is not authorized to accept deposits or trust accounts and is not licensed or regulated by any state or federal banking authority.
TC: 8/27/2024
PRIVILEGE MANAGEMENT FOR WINDOWS
24.4 ADMINISTRATION GUIDE

l
Allow applications that are in the Add Admin – Medium Flexibility group to run with admin rights.
l
Allow unknown business application and operating system functions to run on-demand.
l
Restricted OS functions that require admin rights are prevented and require support interaction.
Low flexibility
This Workstyle is designed for users that don't require much flexibility, such as helpdesk operators.
The Low Flexibility Workstyle contains rules to:
l
Prompt users to contact support if a trusted or untrusted application requests admin rights.
l
Prompt users to contact support if an unknown application tries to run.
l
Allow known approved business applications and operating system functions to run (Windows only).
Windows Workstyle parameters
The Endpoint Privilege Management for Windows settings include a number of features allowing customization of text and strings used for
end user messaging and auditing. If you want to include properties relating to the settings applied, the application being used, the user, or
the installation of Endpoint Privilege Management for Windows, then parameters may be used which are replaced with the value of the
variable at runtime.
Parameters are identified as any string surrounded by brackets ([ ]), and if detected, the Endpoint Privilege Management client attempts to
expand the parameter. If successful, the parameter is replaced with the expanded property. If unsuccessful, the parameter remains part of
the string. The table below shows a summary of all available parameters and where they are supported.
Parameter Description
[PG_ACTION] The action which the user performed from an end user message
[PG_AGENT_VERSION] The version of Endpoint Privilege Management for Windows
[PG_APP_DEF] The name of the Application Rule that matched the application
[PG_APP_GROUP] The name of the Application Group that contained a matching Application Rule
[PG_AUTH_METHODS] Lists the authentication and/or authorization methods used to allow the requested
action to proceed
[PG_AUTH_USER_DOMAIN] The domain of the designated user who authorized the application
[PG_AUTH_USER_NAME] The account name of the designated user who authorized the application
[PG_COM_APPID] The APPID of the COM component being run
[PG_COM_CLSID] The CLSID of the COM component being run
[PG_COM_NAME] The name of the COM component being run
[PG_COMPUTER_DOMAIN] The name of the domain that the host computer is a member of
[PG_COMPUTER_NAME] The NetBIOS name of the host computer
[PG_CONTENT_DEF] The definition name of the matching content
[PG_CONTENT_FILE_DRIVE_TYPE] The drive type of the matching content
[PG_CONTENT_FILE_HASH] The SHA-1 hash of the matching content
[PG_CONTENT_FILE_IE_ZONE] The Internet Zone of the matching content
[PG_CONTENT_FILE_NAME] The file name of the matching content
SALES: www.beyondtrust.com/contact
SUPPORT: www.beyondtrust.com/support
DOCUMENTATION: www.beyondtrust.com/docs
56
©2003-2024 BeyondTrust Corporation. All Rights Reserved. Other trademarks identified on this page are owned by their respective owners. BeyondTrust is not a chartered bank or trust company, or
depository institution. It is not authorized to accept deposits or trust accounts and is not licensed or regulated by any state or federal banking authority.
TC: 8/27/2024
PRIVILEGE MANAGEMENT FOR WINDOWS
24.4 ADMINISTRATION GUIDE

Parameter Description
[PG_CONTENT_FILE_OWNER] The owner of the matching content
[PG_CONTENT_FILE_PATH] The full path of the matching content
[PG_CONTENT_GROUP] The group name of a matching content definition
[PG_DOWNLOAD_URL] The full URL from which an application was downloaded
[PG_DOWNLOAD_URL_DOMAIN] The domain from which an application was downloaded
[PG_EVENT_TIME] The date and time that the policy matched
[PG_EXEC_TYPE] The type of execution method: Application Rule or shell rule
[PG_GPO_DISPLAY_NAME] The display name of the GPO (Group Policy Object)
[PG_GPO_NAME] The name of the GPO that contained the matching policy
[PG_GPO_VERSION] The version number of the GPO that contained the matching policy
[PG_IDP_AUTH_USER_NAME] The value given by the Identify Provider as the user who successfully authenticated to
allow the requested action to proceed. Maps to the OIDC "email" scope.
[PG_MESSAGE_NAME] The name of the custom message that was applied
[PG_MSG_CHALLENGE] The 8 digit challenge code presented to the user
[PG_MSG_RESPONSE] The 8 digit response code entered by the user
[PG_PROG_CLASSID] The ClassID of the ActiveX control
[PG_PROG_CMD_LINE] The command line of the application being run
[PG_PROG_DRIVE_TYPE] The type of drive where application is being executed
[PG_PROG_FILE_VERSION] The file version of the application being run
[PG_PROG_HASH] The SHA-1 hash of the application being run
[PG_PROG_HASH_SHA256] The SHA-256 hash of the application being run
[PG_PROG_NAME] The program name of the application
[PG_PROG_PARENT_NAME] The file name of the parent application
[PG_PROG_PARENT_PID] The process identifier of the parent of the application
[PG_PROG_PATH] The full path of the application file
[PG_PROG_PID] The process identifier of the application
[PG_PROG_PROD_VERSION] The product version of the application being run
[PG_PROG_PUBLISHER] The publisher of the application
[PG_PROG_TYPE] The type of application being run
[PG_PROG_URL] The URL of the ActiveX control
[PG_SERVICE_ACTION] The action performed on the matching service
[PG_SERVICE_DISPLAY_NAME] The display name of the Windows service
[PG_SERVICE_NAME] The name of the Windows service
[PG_STORE_PACKAGE_NAME] The package name of the Windows Store App
[PG_STORE_PUBLISHER] The package publisher of the Windows Store app
[PG_STORE_VERSION] The package version of the Windows Store app
[PG_TOKEN_NAME] The name of the built-in token or Custom Token that was applied
SALES: www.beyondtrust.com/contact
SUPPORT: www.beyondtrust.com/support
DOCUMENTATION: www.beyondtrust.com/docs
57
©2003-2024 BeyondTrust Corporation. All Rights Reserved. Other trademarks identified on this page are owned by their respective owners. BeyondTrust is not a chartered bank or trust company, or
depository institution. It is not authorized to accept deposits or trust accounts and is not licensed or regulated by any state or federal banking authority.
TC: 8/27/2024
PRIVILEGE MANAGEMENT FOR WINDOWS
24.4 ADMINISTRATION GUIDE

Parameter Description
[PG_USER_DISPLAY_NAME] The display name of the user
[PG_USER_DOMAIN] The name of the domain that the user is a member of
[PG_USER_NAME] The account name of the user
[PG_USER_REASON] The reason entered by the user
[PG_USER_SID] The SID of the user
[PG_WORKSTYLE_NAME] The name of the Workstyle
Windows Application Groups
The Application Groups that are prefixed with (Default) or (Recommended) are hidden by default and do not need to be altered.
l
Add Admin – General (Business Apps): Contains applications that are approved for elevation for all users, regardless of their
flexibility level.
l
Add Admin – General (Windows Functions): Contains operating system functions that are approved for elevation for all users.
l
Add Admin – High Flexibility: Contains the applications that require admin rights that should only be provided to the high
flexibility users.
l
Add Admin – Low Flexibility: Contains the applications that require admin rights that should only be provided to the low flexibility
users.
l
Add Admin – Medium Flexibility: Contains the applications that require admin rights that should only be provided to the medium
flexibility users.
l
Add Admin – Protected Operations: Contains the applications that require admins rights that should only be provided to the
protected operations users.
l
Passive - High Business Apps
l
Passive - Medium Business Apps
l
Passive - Low Business Apps
l
Block - Blocklisted Apps: This group contains applications that are blocked for all users.
l
Passive - All Users Functions & Apps: Contains trusted applications, tasks and scripts that should execute as a standard user.
l
(Default) Any Application: Contains all application types and is used as a catch-all for unknown applications.
l
(Default) Any Trusted & Signed UAC Prompt: Contains signed (trusted ownership) application types that request admin rights.
l
(Default) Any UAC Prompt: This group contains application types that request admin rights.
l
(Default) Endpoint Privilege Management Tools: This group is used to provide access to a BeyondTrust executable that
collects Endpoint Privilege Management for Windows troubleshooting information.
l
(Default) Child Processes of TraceConfig.exe
l
(Default) Signed UAC Prompt: Contains signed (trusted ownership) application types that request admin rights.
l
(Recommended) Restricted Functions: This group contains OS applications and consoles that are used for system
administration and trigger UAC when they are executed.
l
(Recommended) Restricted Functions (On Demand): This group contains OS applications and consoles that are used for
system administration.
l
(Default) Trusted Parent Processes
SALES: www.beyondtrust.com/contact
SUPPORT: www.beyondtrust.com/support
DOCUMENTATION: www.beyondtrust.com/docs
58
©2003-2024 BeyondTrust Corporation. All Rights Reserved. Other trademarks identified on this page are owned by their respective owners. BeyondTrust is not a chartered bank or trust company, or
depository institution. It is not authorized to accept deposits or trust accounts and is not licensed or regulated by any state or federal banking authority.
TC: 8/27/2024
PRIVILEGE MANAGEMENT FOR WINDOWS
24.4 ADMINISTRATION GUIDE

Windows messages
The following messages are created as part of the QuickStart policy and are used by some of the Application Rules:
l
Allow Message (Authentication): Asks the user to provide a reason and enter their password before the application runs with
admin rights.
l
Allow Message (Select Reason): Asks the user to select a reason from a dropdown menu before the application runs with admin
rights.
l
Allow Message (Support Desk): Presents the user with a challenge code and asks them to obtain authorization from the support
desk. Support can either provide a response code or a designated, authorized user can enter their login details to approve the
request.
l
Allow Message (Yes / No): Asks the user to confirm that they want to proceed to run an application with admin rights.
l
Block Message: Warns the user that an application has been blocked.
l
Block Notification: Notifies the user that an application has been blocked and submitted for analysis.
l
Notification (Trusted): Notifies the user that an application has been trusted.
Windows custom token
A custom token is created as part of the QuickStart policy. The custom token is called Endpoint Privilege Management Support Token
and is only used to ensure an authorized user can gain access to Endpoint Privilege Management for Windows troubleshooting
information.
Note: We do not recommend using the Endpoint Privilege Management Support Token for any other Application Rules in
your Workstyles.
Customize the Windows QuickStart policy
Before deploying the QuickStart policy to your users, you need to make some company-specific customizations to the standard template.
At a minimum you need to:
l
Configure the users or groups that can authorize requests that trigger messages.
l
Assign users and groups to the high, medium, and low flexibility Workstyles.
l
Populate the Block - Blocklisted Apps Application Group with any applications that you want to block for all users.
l
Set your shared key so you can generate an Endpoint Privilege Management for Windows Response code.
SALES: www.beyondtrust.com/contact
SUPPORT: www.beyondtrust.com/support
DOCUMENTATION: www.beyondtrust.com/docs
59
©2003-2024 BeyondTrust Corporation. All Rights Reserved. Other trademarks identified on this page are owned by their respective owners. BeyondTrust is not a chartered bank or trust company, or
depository institution. It is not authorized to accept deposits or trust accounts and is not licensed or regulated by any state or federal banking authority.
TC: 8/27/2024
PRIVILEGE MANAGEMENT FOR WINDOWS
24.4 ADMINISTRATION GUIDE

Discovery
The Discovery policy contains Workstyles, Application Groups, and messages to allow the discovery of applications that need
administrative privileges to execute. This must be applied to administrator users and includes a preconfigured exclusion group (false
positives) maintained by BeyondTrust.
This template policy contains the following configurations:
Workstyles
l
Discovery Workstyle
Application groups
l
(Default Rule) Any Application
l
(Default Rule) Any UAC Prompts
l
Approved Standard User Apps
l
Passive - All Users & Apps
Messages
l
Allow Message (Yes / No)
SALES: www.beyondtrust.com/contact
SUPPORT: www.beyondtrust.com/support
DOCUMENTATION: www.beyondtrust.com/docs
60
©2003-2024 BeyondTrust Corporation. All Rights Reserved. Other trademarks identified on this page are owned by their respective owners. BeyondTrust is not a chartered bank or trust company, or
depository institution. It is not authorized to accept deposits or trust accounts and is not licensed or regulated by any state or federal banking authority.
TC: 8/27/2024
PRIVILEGE MANAGEMENT FOR WINDOWS
24.4 ADMINISTRATION GUIDE

Server Roles
The Server Roles policy contains Workstyles, Application Groups, and content groups to manage different server roles such as DHCP,
DNS, IIS, and print servers.
This template policy contains the following elements:
Workstyles
l
Server Role - Active Directory - Template
l
Server Role - DHCP - Template
l
Server Role - DNS - Template
l
Server Role - File Services - Template
l
Server Role - Hyper V - Template
l
Server Role - IIS - Template
l
Server Role - Print Services - Template
l
Server Role - Windows General - Template
Application groups
l
Server Role - Active Directory - Server 2008R2
l
Server Role - DHCP - Server 2008R2
l
Server Role - DNS - Server 2008R2
l
Server Role - File Services - Server 2008R2
l
Server Role - General Tasks - Server 2008R2
l
Server Role - Hyper V - Server 2008R2
l
Server Role - IIS - Server 2008R2
l
Server Role - Print Services - Server 2008R2
Content groups
l
AD Management
l
Hosts Management
l
IIS Management
l
Printer Management
l
Public Desktop
SALES: www.beyondtrust.com/contact
SUPPORT: www.beyondtrust.com/support
DOCUMENTATION: www.beyondtrust.com/docs
61
©2003-2024 BeyondTrust Corporation. All Rights Reserved. Other trademarks identified on this page are owned by their respective owners. BeyondTrust is not a chartered bank or trust company, or
depository institution. It is not authorized to accept deposits or trust accounts and is not licensed or regulated by any state or federal banking authority.
TC: 8/27/2024
PRIVILEGE MANAGEMENT FOR WINDOWS
24.4 ADMINISTRATION GUIDE

Trusted App Protection (TAP)
The Trusted App Protection (TAP) policies contain Workstyles, Application Groups, and messages to offer an additional layer of protection
against malware for trusted business applications, safeguarding them from exploitation attempts.
The TAP policies apply greater protection to key business applications including Microsoft Office, Adobe Reader, and web browsers,
which are often exploited by malicious content. It works by preventing these applications from launching unknown payloads and
potentially risky applications, such as PowerShell. It also offers protection by preventing untrusted DLLs being loaded by these
applications, another common malware technique.
In our research, we discovered that malware attack chains commonly seek to drop and launch an executable or abuse a native Windows
application such as PowerShell. Using a TAP policy prevents these attacks and compliments existing anti-malware technologies by
preventing an attack from launching without relying on detection or reputation.
The Trusted Application Protection policy you have chosen is inserted at the top of the Workstyles, so it is, by default, the first Workstyle to
be evaluated. Once a Workstyle action is triggered, subsequent Workstyles aren't evaluated for that process.
Workstyles
l
Trusted Application Protection - High Flexibility (depends on the TAP policy you have chosen)
l
Trusted Application Protection - High Security (depends on the TAP policy you have chosen)
Application Groups
l
Browsers
l
Browsers - Trusted Exploitables
l
Browsers - Untrusted child processes
l
Content Handlers
l
Content Handlers - Trusted Exploitables
l
Content Handlers - Untrusted child processes
Note: Content Handlers are used to hold content rather than executables.
Messages
l
Block Message
Trusted Application Protection policies summary
The TAP policies allow you to control the child processes which TAP applications can run.
There are two policies to choose from:
l
High Flexibility
l
High Security
SALES: www.beyondtrust.com/contact
SUPPORT: www.beyondtrust.com/support
DOCUMENTATION: www.beyondtrust.com/docs
62
©2003-2024 BeyondTrust Corporation. All Rights Reserved. Other trademarks identified on this page are owned by their respective owners. BeyondTrust is not a chartered bank or trust company, or
depository institution. It is not authorized to accept deposits or trust accounts and is not licensed or regulated by any state or federal banking authority.
TC: 8/27/2024
PRIVILEGE MANAGEMENT FOR WINDOWS
24.4 ADMINISTRATION GUIDE

You should choose the High Flexibility policy if you have users who need to download and install or update software. You should choose
the High Security policy if your users don't need to download and install or update software.
The High Security policy checks that all child processes have either a trusted publisher, a trusted owner, a source URL, or a BeyondTrust
Zone Identifier tag, whereas the High Flexibility policy only validates the immediate child processes allowing a wider range installers to
run. If child processes don't have any of these four criteria, they are blocked from execution. Known exploits are also blocked by both
TAP policies.
Note: Installers that spawn additional child processes are blocked by the TAP (High Security) policy if those child processes
are using applications that are on the TAP blocklist, but would be allowed to run using the TAP (High Flexibility) policy. For
more information, see "Trusted Application Protection block list" on page 66.
Trusted publisher
l
A trusted publisher must be signed. In addition, the publisher certificate must be valid, in date, and not revoked.
Trusted owner
l
A trusted owner is any owner that is in the default Windows groups Administrators, SystemUser, or TrustedInstaller.
SourceURL
l
The source URL must be present. This is specific to browsers.
BeyondTrust Zone Identifier tag
l
The BeyondTrust Zone Identifier tag must be present. This is applied when the browser applies an Alternate Data Stream (ADS)
tag. This is specific to browsers.
In addition, all processes on the blocklist are blocked irrespective of their publisher and owner.
The TAP policy template affects the following applications:
l
Microsoft Word
l
Microsoft Excel
l
Microsoft PowerPoint
l
Microsoft Publisher
l
Adobe Reader 11 and lower
l
Adobe Reader DC
l
Microsoft Outlook
l
Google Chrome
l
Mozilla Firefox
l
Microsoft Internet Explorer
l
Microsoft Edge (Legacy and Chromium versions)
SALES: www.beyondtrust.com/contact
SUPPORT: www.beyondtrust.com/support
DOCUMENTATION: www.beyondtrust.com/docs
63
©2003-2024 BeyondTrust Corporation. All Rights Reserved. Other trademarks identified on this page are owned by their respective owners. BeyondTrust is not a chartered bank or trust company, or
depository institution. It is not authorized to accept deposits or trust accounts and is not licensed or regulated by any state or federal banking authority.
TC: 8/27/2024
PRIVILEGE MANAGEMENT FOR WINDOWS
24.4 ADMINISTRATION GUIDE

Note: TAP applications and their child processes must match all the criteria within the definitions provided in the Application
Groups of the policy for the TAP policy to apply.
You can configure TAP process control by importing the TAP template. TAP also has Reporting.
For more information, see the following:
l
For a list of blocked processes, "Trusted Application Protection block list" on page 66
l
"Trusted Application Protection reporting" on page 65
Trusted Application Protection precedence
The TAP Workstyle you choose is placed at the top of your list of Workstyles when you import the policy template. This is because it runs
best as a priority rule. This ensures child processes of TAP applications (policy dependent) that do not have a trusted publisher, trusted
owner, a source URL, or a BeyondTrust Zone Identifier tag are blocked from execution and that known exploits are blocked.
The Trusted Application Protection Workstyle is the first to be evaluated by default. Once a Workstyle action is triggered, subsequent
Workstyles aren't evaluated for that process.
Modify the Trusted Application Protection policies
Both the Trusted Application Protection (TAP) policies (High Flexibility and High Security) protect against a broad range of attack vectors.
The approaches listed here can be used in either TAP policy if you need to modify the TAP policy to address a specific use case that is
being blocked by a TAP policy.
The TAP (High Security) policy is, by design, more secure and less flexible, as it blocks all child processes of a Trusted Application that do
not have a trusted owner, trusted publisher, source URL, or BeyondTrust Zone Identifier. It is for these reasons more likely to require
modification.
The TAP policy that you choose should be based on your business requirements and existing policy. If using a TAP policy causes a
legitimate use case to be blocked, there are some actions you can take to resolve this.
Change the policy to audit
You can change the TAP (High Security) policy Application Rules Action to Allow Execution and change the Access Token to Enforce
User's Default Rights. Ensure Raise an Event is set to On and click OK.
Note: Changing the TAP policy to Allow Execution effectively disables it. You do not get any protection from a TAP policy if
you make this change.
If you make this change for the four Application Rules in the TAP (High Security) policy, TAP programs are able to execute as if the TAP
(High Security) policy wasn't applied, but you can see what events are being triggered by TAP and make policy adjustments accordingly.
The event details include information on the Application Group and TAP application. This allows you to gather details to understand if it's a
legitimate use case. You can perform some actions to incorporate the legitimate use case into the TAP (High Security) policy.
SALES: www.beyondtrust.com/contact
SUPPORT: www.beyondtrust.com/support
DOCUMENTATION: www.beyondtrust.com/docs
64
©2003-2024 BeyondTrust Corporation. All Rights Reserved. Other trademarks identified on this page are owned by their respective owners. BeyondTrust is not a chartered bank or trust company, or
depository institution. It is not authorized to accept deposits or trust accounts and is not licensed or regulated by any state or federal banking authority.
TC: 8/27/2024
PRIVILEGE MANAGEMENT FOR WINDOWS
24.4 ADMINISTRATION GUIDE

Use the high flexibility policy
Both the TAP policies offer additional protection against a wide range of attack vectors. If you are using the TAP (High Security) policy you
can change to the TAP (High Flexibility) policy. This is useful if you have a use case where additional child processes of TAP applications
are being blocked by the TAP (High Security) policy.
Edit the matching criteria
If your legitimate use case is running a specific command that is detailed in the event, you can add this to the matching criteria of the
application that's being blocked. You can use the standard Endpoint Privilege Management for Windows matching criteria, such as Exact
Match or Regular Expressions.
Example: WebEx uses an extension from Google Chrome. We have catered for this in the policy using matching criteria.
This criteria says:
If the Parent Process matches the (TAP) High Security - Browsers Application Group for any parent in the tree.
and
The Product Description contains the string Windows Command Processor
and
The Command Line does NOT contain \\.\pipe\chrome.nativeMessaging
The TAP policy (High Security) blocks the process.
Edit the Trusted Exploitable list
If your legitimate use case is using an application that is listed on either the Browsers - Trusted Exploitables or the Content Handlers -
Trusted Exploitables list, you can remove it.
If you remove it from either list, any browsers or content using that trusted exploitable to run malicious content are not stopped by the TAP
(High Security) policy.
Remove application from Trusted Application Group
You can remove the application that is listed in the Trusted Browsers or Trusted Content Handlers groups from the list. This means
that the application no longer benefits from the protection offered by either of the TAP policies.
Create an Allow rule
You can also add an Endpoint Privilege Management for Windows Allow rule and place it higher in the precedence order than the TAP
(High Security) policy. This allows your use case to run but it also overrides any subsequent rules that apply to that application. Therefore
it should be used with caution.
Trusted Application Protection reporting
Trusted Application Protection (TAP) is reported in Reporting. You can use the top level TAP dashboard to view the TAP incidents over
the time period, split by type of TAP application. In the same dashboard, you can also see the number of incidents, targets, users, and
hosts for each TAP application.
SALES: www.beyondtrust.com/contact
SUPPORT: www.beyondtrust.com/support
DOCUMENTATION: www.beyondtrust.com/docs
65
©2003-2024 BeyondTrust Corporation. All Rights Reserved. Other trademarks identified on this page are owned by their respective owners. BeyondTrust is not a chartered bank or trust company, or
depository institution. It is not authorized to accept deposits or trust accounts and is not licensed or regulated by any state or federal banking authority.
TC: 8/27/2024
PRIVILEGE MANAGEMENT FOR WINDOWS
24.4 ADMINISTRATION GUIDE

Trusted Application Protection block list
To view the list of applications blocked from being launched by trusted applications when Trusted Application Protection (TAP) is enabled:
1. After TAP High Flexibility or High Security is imported, right-click on the top-level Privilege Management Settings node, and
click Show Hidden Groups.
2. The list of applications can be found under the following groups:
o
(TAP) High Security - Browsers - Trusted Exploitables
o
(TAP) High Security - Content Handlers - Trusted Exploitables
o
(TAP) High Flexibility - Browsers - Trusted Exploitables
o
(TAP) High Flexibility - Content Handlers - Trusted Exploitables
Use advanced parent tracking
With version 21.3 of EPM-W, advanced parent tracking (APT) tracks parent processes and increases the effectiveness of TAP policies
while also reducing false positives from Windows PID re-use.
When processing rules, EPM-W attempts to determine the parent of a process through APT first. Following that, EPM-W uses other rule
properties (like child inheritance) to rely on the information provided by Windows.
To use the advanced parent tracking:
l
If you are not currently using a TAP policy, import the TAP template
(High Security or High Flexibility) using the latest version of the
EPM-W client.
l
If you are an existing TAP policy user and the policy was created
using the EPM-W Policy Editor 21.2 or earlier, then add two new
rules to the bottom of your TAP workstyle (High Security or High
Flexibility).
High security
l
(TAP) High Security - Browsers
o
Target Application Group: (TAP) High Security - Browsers
o
Access Token: Keep Privileges - Enhanced
l
(TAP) High Security - Content Handlers
o
Target Application Group: (TAP) High Security - Content Handlers
o
Access Token:Keep Privileges - Enhanced
SALES: www.beyondtrust.com/contact
SUPPORT: www.beyondtrust.com/support
DOCUMENTATION: www.beyondtrust.com/docs
66
©2003-2024 BeyondTrust Corporation. All Rights Reserved. Other trademarks identified on this page are owned by their respective owners. BeyondTrust is not a chartered bank or trust company, or
depository institution. It is not authorized to accept deposits or trust accounts and is not licensed or regulated by any state or federal banking authority.
TC: 8/27/2024
PRIVILEGE MANAGEMENT FOR WINDOWS
24.4 ADMINISTRATION GUIDE

High flexibility
l
(TAP) High Flexibility - Browsers
o
Target Application Group: (TAP) High Flexibility- Browsers
o
Access Token: Keep Privileges - Enhanced
l
(TAP) High Flexibility - Content Handlers
o
Target Application Group: (TAP) High Flexibility - Content Handlers
o
Access Token: Keep Privileges - Enhanced
For either of these workstyles, you will also need to remove the check from
the Force standard user rights on File Open/Save dialogs for each
application in these Application Groups.
Note: Enable Show Hidden Groups to edit these workstyles.
SALES: www.beyondtrust.com/contact
SUPPORT: www.beyondtrust.com/support
DOCUMENTATION: www.beyondtrust.com/docs
67
©2003-2024 BeyondTrust Corporation. All Rights Reserved. Other trademarks identified on this page are owned by their respective owners. BeyondTrust is not a chartered bank or trust company, or
depository institution. It is not authorized to accept deposits or trust accounts and is not licensed or regulated by any state or federal banking authority.
TC: 8/27/2024
PRIVILEGE MANAGEMENT FOR WINDOWS
24.4 ADMINISTRATION GUIDE

Endpoint Privilege Management for Windows policies for
Windows
an Endpoint Privilege Management for Windows policy for Windows is built with the following optional components:
l
Workstyles: A Workstyle is part of a policy. It's used to assign Application Rules for users. You can create Workstyles using the
WorkStyle Wizard or import them.
l
Application Groups: Application Groups are used by Workstyles to group applications together to apply certain Endpoint
Privilege Management for Windows behavior.
l
Content Groups: Content groups are used by Workstyles to group content together to apply certain Endpoint Privilege
Management for Windows behavior.
l
Messages: Messages are used by Workstyles to provide information to the end user when Endpoint Privilege Management for
Windows has applied certain behavior that you've defined and need to notify the end user.
l
Custom Tokens: Custom tokens are used by Workstyles to assign custom privileges to content or Application Groups.
We have produced a pre-built QuickStart policy that is configured with Endpoint Privilege Management for Windows and Application
Control.
For more information, see the following:
l
"Workstyles" on page 71
l
"Application Groups" on page 104
l
"Content groups" on page 142
l
"Messages" on page 145
l
"Custom tokens" on page 168
l
On the BeyondTrust QuickStart policy, "Windows QuickStart policy summary" on page 55
SALES: www.beyondtrust.com/contact
SUPPORT: www.beyondtrust.com/support
DOCUMENTATION: www.beyondtrust.com/docs
68
©2003-2024 BeyondTrust Corporation. All Rights Reserved. Other trademarks identified on this page are owned by their respective owners. BeyondTrust is not a chartered bank or trust company, or
depository institution. It is not authorized to accept deposits or trust accounts and is not licensed or regulated by any state or federal banking authority.
TC: 8/27/2024
PRIVILEGE MANAGEMENT FOR WINDOWS
24.4 ADMINISTRATION GUIDE

Policy administration
You can import prebuilt Endpoint Privilege Management for Windows policies.
For more information on template policies, see "Import template" on page 48.
Advanced agent settings
The Advanced Agent Settings section allows you to configure and deploy additional registry based settings to Endpoint Privilege
Management for Windows.
1. Right-click the top level Endpoint Privilege Management Settings node and click Advanced Agent Settings.
2. Select either 32-bit Agent Values if you want to configure a 32-bit
registry setting, or 64-bit Agent Values for a 64-bit registry setting.
3. Click Add Value. A new line is added to the advanced agent settings list.
4. Double-click the Value Name for the new setting, and enter the value name.
5. Choose the correct Type, either DWORD, String, or Multi-String.
6. Double-click the Value Data for the new setting, and enter the value data. For DWORD values, you can toggle the display type
between Hexadecimal and Decimal.
7. Click OK to save your changes.
Note: Each advanced agent setting adheres to Group Policy precedence rules. If advanced agent settings are configured in
multiple Group Policies, then the Group Policy with the highest precedence is applied (except for multi-string settings, which is
merged and consolidated by Endpoint Privilege Management for Windows).
Note: Advanced Agent Settings should only be used when instructed to do so by BeyondTrust Technical Support.
Windows Policy configuration precedence
Endpoint Privilege Management for Windows supports a variety of deployment methods, and accepts multiple simultaneous
configurations from any combination of the following:
SALES: www.beyondtrust.com/contact
SUPPORT: www.beyondtrust.com/support
DOCUMENTATION: www.beyondtrust.com/docs
69
©2003-2024 BeyondTrust Corporation. All Rights Reserved. Other trademarks identified on this page are owned by their respective owners. BeyondTrust is not a chartered bank or trust company, or
depository institution. It is not authorized to accept deposits or trust accounts and is not licensed or regulated by any state or federal banking authority.
TC: 8/27/2024
PRIVILEGE MANAGEMENT FOR WINDOWS
24.4 ADMINISTRATION GUIDE

l
McAfee ePO Policy: A configuration that is stored in McAfee ePO, configured using the Endpoint Privilege Management ePO
Extension in the ePO Policy Catalog.
l
Webservice Policy: A configuration that is served from an EPM webservice using HTTPS.
l
Webserver Policy: A configuration located on a web server, accessible using HTTP, HTTPS, or FTP.
l
Group Policy: Configurations that are stored in Group Policy Objects, configured using Active Directory Group Policy (GPMC)
and GPEdit (Local Group Policy). Group Policy based configurations are evaluated according to GPO precedence rules.
l
Local Policy: A standalone configuration, which is stored locally and is configured using the Endpoint Privilege Management
Policy Editor snap-in for the Microsoft Management Console.
l
BeyondInsight: A web-based console where you configure and launch vulnerability assessment scans. As a scan completes, a
report is automatically generated. Results can be navigated interactively in the console.
Endpoint Privilege Management for Windows uses the following default precedence to evaluate each configuration for matching rules:
ePO > Webservice > BeyondInsight > Webserver > GPO > Local
Configuration precedence settings can be configured either as part of the client installation, or using the Windows Registry once the client
is installed.
To modify the configuration precedence at client installation, use one of the following command lines to install Endpoint Privilege
Management for Windows with a specific configuration precedence:
msiexec /i PrivilegeManagementForWindows_xx (XX).msi
POLICYPRECEDENCE="EPO,WEBSERVICE,WEBSERVER,GPO,LOCAL"
PrivilegeManagementForWindows_x(XX).exe /s /v"
POLICYPRECEDENCE=\"EPO,WEBSERVICE,WEBSERVER,GPO,LOCAL\""
Note: In the command line argument above, (XX) represents 86 or 64 in relation to the 32-bit or 64-bit installation respectively.
To modify your configuration precedence using the Windows Registry, run regedit.exe with elevated privileges and an anti-tamper token
disabled.
Note: If agent protection is configured, you must first disable agent protection on the machine before you can change settings
in the Registry Editor.
Navigate to the following key and edit the string as required:
HKEY_LOCAL_MACHINE\Software\Avecto\Privilege Guard Client
REG_SZ PolicyPrecedence = "EPO,WEBSERVICE,WEBSERVER,GPO,LOCAL"
Only deployment methods listed in the Endpoint Privilege Management for Windows engineering key PolicyEnabled are applied,
irrespective of the order listed in the PolicyPrecedence key. Both keys are located in the same place in the Windows registry.
SALES: www.beyondtrust.com/contact
SUPPORT: www.beyondtrust.com/support
DOCUMENTATION: www.beyondtrust.com/docs
70
©2003-2024 BeyondTrust Corporation. All Rights Reserved. Other trademarks identified on this page are owned by their respective owners. BeyondTrust is not a chartered bank or trust company, or
depository institution. It is not authorized to accept deposits or trust accounts and is not licensed or regulated by any state or federal banking authority.
TC: 8/27/2024
PRIVILEGE MANAGEMENT FOR WINDOWS
24.4 ADMINISTRATION GUIDE

Workstyles
Endpoint Privilege Management for Windows Workstyles are used to assign Application Groups for a specific user, or group of users. The
Workstyle wizard can generate Application Rules depending on the type of Workstyle you choose.
For more information, please also see:
l
"Application Groups" on page 104
l
"Create workstyles" on page 73
Workstyle properties
To edit the advanced properties for a Workstyle:
1. Expand the Workstyles node and select the relevant Workstyle.
2. Right-click and select Edit Workstyle Options.
Privilege monitoring
Endpoint Privilege Management for Windows can monitor the behavior of specific privileged applications and processes in Windows, a
feature called privilege monitoring. Privilege monitoring is enabled as an auditing option in the properties of an Application Rule or an On-
Demand Application Rule. When enabled, Endpoint Privilege Management for Windows records all privileged operations performed by
the application or process that would fail under a standard user account. These include file operations, registry operations, and any
interactions with other components such as Windows services.
The application must be running under a privileged account, such as an administrator or power user. Alternatively, an application could be
running with elevated privileges because you added it to the Application Rules or On-Demand Application Rules section of the
Workstyle and assigned it to run with admin rights.
Privilege monitoring logs are recorded on each endpoint, and the logs can be accessed using the Endpoint Privilege Management
Reporting MMC snap-in. The configuration of privilege monitoring logs is applied to each Workstyle.
SALES: www.beyondtrust.com/contact
SUPPORT: www.beyondtrust.com/support
DOCUMENTATION: www.beyondtrust.com/docs
71
©2003-2024 BeyondTrust Corporation. All Rights Reserved. Other trademarks identified on this page are owned by their respective owners. BeyondTrust is not a chartered bank or trust company, or
depository institution. It is not authorized to accept deposits or trust accounts and is not licensed or regulated by any state or federal banking authority.
TC: 8/27/2024
PRIVILEGE MANAGEMENT FOR WINDOWS
24.4 ADMINISTRATION GUIDE

For more information about privilege monitoring contact your BeyondTrust consultant.
Privilege monitoring events
l
Log Monitoring Event to Application Event Log: This option logs an event to the Application event log the first time an
application performs a privileged operation.
l
Log Cancel Events (when user cancels message): This option raises an event when a user cancels an End User Message,
either by clicking the Cancel button, Email button, or clicking a Hyperlink. The action performed by the user is available as a
Policy Parameter [PG_ACTION], which can be used by the script to perform different audit actions based on the user interaction.
To log Cancel Events, enable Raise an Event for the rule that has been matched.
For more information, see "Raise an Event" on page 78.
Privilege monitoring log files
The following Privilege Monitoring options are available:
l
Log Application Activity to Log Files: This option enables logging of privileged activity to log files. The activity level can be set
with the activity slider.
l
Application Summary and Activity: This option logs information about the application and unique privileged activity (Default
option).
l
Application Summary and Detailed Activity: This options logs information about the application and all privileged activity.
l
Maximum Activity Records Per Process: This option determines the maximum number of records that are recorded per
process (Default 100).
l
Keep Application Activity Logs for: This option determines how long activity logs are kept before they are purged (Default 14
days).
SALES: www.beyondtrust.com/contact
SUPPORT: www.beyondtrust.com/support
DOCUMENTATION: www.beyondtrust.com/docs
72
©2003-2024 BeyondTrust Corporation. All Rights Reserved. Other trademarks identified on this page are owned by their respective owners. BeyondTrust is not a chartered bank or trust company, or
depository institution. It is not authorized to accept deposits or trust accounts and is not licensed or regulated by any state or federal banking authority.
TC: 8/27/2024
PRIVILEGE MANAGEMENT FOR WINDOWS
24.4 ADMINISTRATION GUIDE

Create workstyles
1. Navigate to the Windows > Workstyles node.
2. Right-click the Workstyles node, and then click Create Workstyle on the top-right. The Workstyle Wizard is displayed.
3. You can optionally enter a license code at this stage or you can enter it later once the Workstyle has been created.
4. You can choose from Controlling or Blank for your Workstyle. A controlling Workstyle allows you to apply rules for access to
privileges and applications. A blank Workstyle allows you to create an empty Workstyle without any predefined elements. If you
selected a blank Workstyle, the next screen is Finish, as there is nothing to configure.
5. Filtering (Controlling Workstyle only). This determines who receives this Workstyle. You can choose from standard users only or
everyone. If you apply it to everyone, it applies to administrators. You can modify the filters and apply more detailed filtering once
the Workstyle is created.
6. Capabilities (Controlling Workstyle only). Allows you to choose Privilege Management and/or Application Control. If you don't
select either capabilities, the next screen is Finish. This Workstyle contains only filtering information.
7. Privilege Management (Controlling Workstyle with the Endpoint Privilege Management capability). Allows you to choose:
l
Whether you want to display a notification to the user when applications are elevated by Endpoint Privilege Management
for Windows
l
How you want to manage Windows User Account Control (UAC) prompts
l
Whether you want to allow the on-demand elevation of applications
Note: If you select Present users with a challenge code from the dropdown, you are prompted to configure the challenge
and response functionality at the end of creating your Workstyle, if your policy doesn't already have one.
8. Application Control (Controlling Workstyle with the Application Control capability). Allows you to choose:
l
How you want to apply application control. You can choose an allowlist or blocklist approach. We recommend you use an
allowlist approach
l
As an allowlist: How you want to handle non-allowed applications
l
As a blocklist: How you want to handle blocked applications
9. Finish. Allows you to enter a Name and Description for your new policy. If the Workstyle has been configured to use a
Challenge/Response message and the policy doesn't have an existing key, you are asked to set a key. You can check the box on
this screen to activate this Workstyle immediately or you can leave the box unchecked to continue to configure the Workstyle
before you apply it to your endpoints.
Depending on the type of Workstyle you created and any capabilities that are included, Endpoint Privilege Management for Windows
auto-generates certain Application Groups (containing rules), Content Groups, messages, and Custom Tokens. Filters are applied and
subsequently configured as part of the Workstyle.
For more information, see the following:
l
"Challenge/response authorization" on page 162
l
"Application Groups" on page 104
l
"Content groups" on page 142
l
"Messages" on page 145
l
"Custom tokens" on page 168
SALES: www.beyondtrust.com/contact
SUPPORT: www.beyondtrust.com/support
DOCUMENTATION: www.beyondtrust.com/docs
73
©2003-2024 BeyondTrust Corporation. All Rights Reserved. Other trademarks identified on this page are owned by their respective owners. BeyondTrust is not a chartered bank or trust company, or
depository institution. It is not authorized to accept deposits or trust accounts and is not licensed or regulated by any state or federal banking authority.
TC: 8/27/2024
PRIVILEGE MANAGEMENT FOR WINDOWS
24.4 ADMINISTRATION GUIDE

Disable/enable workstyles
You can enable or disable Workstyles to stop them being processed by Endpoint Privilege Management for Windows.
1. Navigate to the policy and select the Workstyles node. You can see which policies are disabled and enabled in the list.
2. Right-click on the Workstyle and click Disable Workstyle to disable
it or Enable Workstyle to enable it.
In the above example, the General Rules Workstyle is enabled and the High Flexibility Workstyle is disabled.
Workstyle precedence
If you have multiple Workstyles, they are evaluated in the order in which they are listed. Workstyles that are higher in the list have a higher
precedence. Once an application matches a Workstyle, no further Workstyles are processed for that application, so it is important that you
order your Workstyles correctly, because it is possible for an application to match multiple Workstyles.
To change the precedence of a Workstyle:
1. Select Windows > Workstyles from the left pane.
2. Right-click and choose from the options Move Top, Move Up, Move Down, and Move Bottom as required.
Changes are automatically saved.
SALES: www.beyondtrust.com/contact
SUPPORT: www.beyondtrust.com/support
DOCUMENTATION: www.beyondtrust.com/docs
74
©2003-2024 BeyondTrust Corporation. All Rights Reserved. Other trademarks identified on this page are owned by their respective owners. BeyondTrust is not a chartered bank or trust company, or
depository institution. It is not authorized to accept deposits or trust accounts and is not licensed or regulated by any state or federal banking authority.
TC: 8/27/2024
PRIVILEGE MANAGEMENT FOR WINDOWS
24.4 ADMINISTRATION GUIDE

Workstyle summary
The Workstyle Summary shows you your Workstyle settings at a glance, and allows you to configure the following elements of a
Workstyle.
The tabs are displayed across the topic. Some of these tabs may not be displayed if they've not been configured in your policy.
Overview
The Overview tab allows you to quickly access the following features of your policy:
l
General
Allows you to edit the description of your Workstyle and enable or disable it.
l
Totals
Allows you to configure the following types of rule:
o
Application Rules
o
On-Demand Application Rules
o
Content Rules
l
Trusted Application Protection
Allows you to configure the following type of rule:
o
Trusted Application DLL Protection
l
General Rules
Allows you to configure the following General Rules:
o
Collect User Information
o
Collect Host Information
o
Prohibit Privileged Account Management
o
Enable Windows Remote Management Connections
l
Filters
Allows you to configure the following Filters:
o
Account Filters
o
Computer Filters
o
Time Range Filters
o
Expiry Filter
o
WMI (Windows Management information) Filters
For more information, see the following:
l
"Application rules" on page 77
l
"On-demand application rules" on page 87
SALES: www.beyondtrust.com/contact
SUPPORT: www.beyondtrust.com/support
DOCUMENTATION: www.beyondtrust.com/docs
75
©2003-2024 BeyondTrust Corporation. All Rights Reserved. Other trademarks identified on this page are owned by their respective owners. BeyondTrust is not a chartered bank or trust company, or
depository institution. It is not authorized to accept deposits or trust accounts and is not licensed or regulated by any state or federal banking authority.
TC: 8/27/2024
PRIVILEGE MANAGEMENT FOR WINDOWS
24.4 ADMINISTRATION GUIDE
l
"Content rules" on page 91
l
"Trusted application DLL protection" on page 94
l
"General rules" on page 96
l
"Account filters" on page 99
l
"Computer filters" on page 100
l
"Time range filters" on page 101
l
"Expiry filter" on page 102
l
"WMI (Windows Management Information) filters" on page 103
SALES: www.beyondtrust.com/contact
SUPPORT: www.beyondtrust.com/support
DOCUMENTATION: www.beyondtrust.com/docs
76
©2003-2024 BeyondTrust Corporation. All Rights Reserved. Other trademarks identified on this page are owned by their respective owners. BeyondTrust is not a chartered bank or trust company, or
depository institution. It is not authorized to accept deposits or trust accounts and is not licensed or regulated by any state or federal banking authority.
TC: 8/27/2024
PRIVILEGE MANAGEMENT FOR WINDOWS
24.4 ADMINISTRATION GUIDE

Application rules
Application Rules are applied to Application Groups. Application Rules can be used to enforce allowlisting, monitoring, and assigning
privileges to groups of applications. They are a set of rules that apply to the applications listed in the Application Group.
You must have an Application Group before you can create an Application Rule.
Application Rules are color coded in the interface:
l
Blue: A Power Rule is assigned to the Application Rule. This could
be an allow or block action.
l
Green: The default action is allow.
l
Orange: The default action is block.
For more information, see the following:
l
"Application Groups" on page 104
l
"Create Application Groups" on page 104
l
"Power Rules" on page 80
Insert an application rule
Click Application Rules to view, create, or modify the following for each Application Rule:
Option Description
Target Application Group Select from the Application Groups list.
Run a Rule Script This option allows you to assign a Rule Script that runs before the Application Rule triggers.
You need to use Manage Scripts from the dropdown to import your Rule Script before you can select
it.
Select the Rule Script you want to use from the dropdown list.
Action Select from Allow Execution or Block Execution. This is what happens if the application in the
targeted Application Group is launched by the end user.
End User Message Select whether a message will be displayed to the user when they launch the application. We
recommend using messages if you blocking the execution of the application, so the end user has
some feedback on why the application doesn't launch.
Password Safe Account Name If you deploying the BeyondInsight management console, you can integrate Password Safe with
Endpoint Privilege Management for Windows. These features are detailed in the BeyondInsight
Integration Guide.
SALES: www.beyondtrust.com/contact
SUPPORT: www.beyondtrust.com/support
DOCUMENTATION: www.beyondtrust.com/docs
77
©2003-2024 BeyondTrust Corporation. All Rights Reserved. Other trademarks identified on this page are owned by their respective owners. BeyondTrust is not a chartered bank or trust company, or
depository institution. It is not authorized to accept deposits or trust accounts and is not licensed or regulated by any state or federal banking authority.
TC: 8/27/2024
PRIVILEGE MANAGEMENT FOR WINDOWS
24.4 ADMINISTRATION GUIDE

Option Description
Access Token Select the type of token to pass to the target Application Group. You can select from:
l
Passive (no change): No changes are made to the token. This is essentially an audit feature.
l
Enforce User's default rights: Removes all rights and uses the user's default token.
Windows UAC always tries to add administration rights to the token being used so if the user
clicks on an application that triggers UAC, the user cannot progress past the UAC prompt.
l
Drop Admin Rights: Removes administration rights from the user's token.
l
Add Full Admin (Required for installers): Use the full admin token in scenarios where your
users require privileges SeDebugPrivilege or SeLoadDriverPrivilege. An example use case
is MSI files running in a client/server mode where SeDebugPrivilege is required to interact
with the server component which runs as SYSTEM. This only applies to cases where the
standard user needs to run the MSI directly.
l
Add Basic Admin Rights: Permits elevation of most applications and tasks. We recommend
using this token as the default elevation token. This access token is essentially full admin but
excludes the following privileges: SeDebugPrivilege and SeLoadDriverPrivilege. If users
need to debug applications or access drivers, then use the full admin token.
l
Privilege Management Support Token: Applies Add Full Admin privileges with tamper
protection removed.
l
Keep Privileges - Enhanced:This token behaves similar to the Passive (no change) token
in that there is no change to privilege, elevation, or integrity level. The token uses the same
privileges of the original process token and adds some additional context to it: the token is
added to the anti-tamper group and will be tracked by the advanced parent tracking feature.
This access token can only be used with application rules.
Auditing
Raise an Event By default, user and computer information is included in all audit events. Events are forwarded to a
local event log file.
To not include user and computer information in the audit, set Raise an Event to On (Anonymous).
Note: Event fields that contain user directory information may still contain a username
within the file path.
Run an Audit Script This option allows you to select an audit script to run after the Application Rule.
You need to use Manage Scripts from the dropdown to import your audit script before you can select
it.
Select the audit script you want to use from the dropdown list.
Privilege Monitoring Raises a privileged monitoring event.
McAfee ePO Reporting Options
Note: This option is only available if you checked the McAfee integration box when you installed the Endpoint Privilege
Management Policy Editor.
ePO Threat Events Select this option to raise an ePO threat event. These are separate from Endpoint Privilege
Management reporting events.
SALES: www.beyondtrust.com/contact
SUPPORT: www.beyondtrust.com/support
DOCUMENTATION: www.beyondtrust.com/docs
78
©2003-2024 BeyondTrust Corporation. All Rights Reserved. Other trademarks identified on this page are owned by their respective owners. BeyondTrust is not a chartered bank or trust company, or
depository institution. It is not authorized to accept deposits or trust accounts and is not licensed or regulated by any state or federal banking authority.
TC: 8/27/2024
PRIVILEGE MANAGEMENT FOR WINDOWS
24.4 ADMINISTRATION GUIDE

Option Description
Endpoint Privilege Management
Reporting (in ePO)
Select this option to raise an Endpoint Privilege Management reporting event. These are available in
BeyondTrust Reporting.
BeyondInsight Reporting
BeyondInsight Events When configured, sends BeyondInsight events to BeyondInsight.
Endpoint Privilege Management
Reporting
When configured, sends Endpoint Privilege Management reporting events to BeyondInsight.
For more information, see the following:
l
"Application Groups" on page 104
l
"Manage scripts" on page 84
l
BeyondInsight Integration Guide at https://www.beyondtrust.com/docs/privilege-management/documents/windows-
mac/pm-windows-bi-integration.pdf
l
Access Tokens at https://docs.microsoft.com/en-us/windows/win32/secauthz/access-tokens
Application rule precedence
If you add more than one Application Rule to a Workstyle, entries that are higher in the list have a higher precedence. Once an application
matches an Application Rule, no further rules or Workstyles are processed. If an application can match more than one Workstyle or rule,
then it is important that you order both your Workstyles and rules correctly. You can move Application Rules up and down to change the
precedence.
SALES: www.beyondtrust.com/contact
SUPPORT: www.beyondtrust.com/support
DOCUMENTATION: www.beyondtrust.com/docs
79
©2003-2024 BeyondTrust Corporation. All Rights Reserved. Other trademarks identified on this page are owned by their respective owners. BeyondTrust is not a chartered bank or trust company, or
depository institution. It is not authorized to accept deposits or trust accounts and is not licensed or regulated by any state or federal banking authority.
TC: 8/27/2024
PRIVILEGE MANAGEMENT FOR WINDOWS
24.4 ADMINISTRATION GUIDE

Power Rules
A Power Rule is a PowerShell based framework that lets you change the outcome of an Application Rule, based on the outcome of a
PowerShell script.
Instead of a fixed Default Rule that can either be set to Allow, Elevate, Audit, or Block for the applications in the targeted Application
Group, a Power Rule lets you determine your own outcome based on any scenario you can build into a PowerShell script.
Any existing default rule within a Workstyle can be updated to a Power Rule by setting the action to a Power Rule script, and importing the
PowerShell script you want to use. Endpoint Privilege Management for Windows provides a PowerShell module with an interface to collect
information about the user, application, and policy. The module can then send a resulting action back to Endpoint Privilege Management
for Windows to apply.
The Power Rules module also provides a variety of message options that allow you to collect additional information to support your
PowerShell script logic and provide updates to the user as to the status, progress, or outcome of your rule. The messages that are
supported include:
l
Authentication message
l
Business justification message
l
Information message
l
Pass code message
l
Vaulted credential message
l
Asynchronous progress dialog for long running tasks
Power Rules is a highly flexible feature with unlimited potential. If you can do it in PowerShell, you can do it in a Power Rule. Here are
some example use cases for Power Rules:
l
Environmental Factors: Collecting additional information about the application, user, computer, or network status to influence
whether an application should be allowed to run, or run with elevated privileges.
l
Service Management: Automatically submitting tickets to IT Service Management solutions, and determining the outcome of a
service ticket.
l
File Reputation: Performing additional checks on an application by looking up the file hash in an application store, reputation
service, or a vulnerability database.
l
Privileged Access Management: Checking out credentials from a password safe or vault, and passing them back to Endpoint
Privilege Management for Windows to run the application in that context.
Note: Power Rules are best used for exception handling and in conjunction with static policy.
For more information, see the following:
l
On creating your own Power Rule, the Core Scripting Guide at www.beyondtrust.com/docs/privilege-
management/windows.htm
l
On using the BeyondTrust-supported integration with ServiceNow, the ServiceNow Scripting Guide at
www.beyondtrust.com/docs/privilege-management/windows.htm
l
"Power Rules additional guidance" on page 81
SALES: www.beyondtrust.com/contact
SUPPORT: www.beyondtrust.com/support
DOCUMENTATION: www.beyondtrust.com/docs
80
©2003-2024 BeyondTrust Corporation. All Rights Reserved. Other trademarks identified on this page are owned by their respective owners. BeyondTrust is not a chartered bank or trust company, or
depository institution. It is not authorized to accept deposits or trust accounts and is not licensed or regulated by any state or federal banking authority.
TC: 8/27/2024
PRIVILEGE MANAGEMENT FOR WINDOWS
24.4 ADMINISTRATION GUIDE

Power Rules additional guidance
You can use the PowerShell get-help command to get help on any cmdlet in PowerShell. You can also use the following arguments to get
additional guidance on the cmdlet: -examples, -detailed, -full, and -online.
Compatibility
Power Rules requires PowerShell 3.0 or later. Run the following command to check the version of PowerShell you are running:
$PSVersionTable.PSVersion
If you attempt to edit an Application Rule containing a Power Rule in an Endpoint Privilege Management Policy Editor older than v5.3.x,
the PowerRuleScript attribute (that is linked to the Power Rule) is removed from the Application Rule.
For more information about compatibility with other Endpoint Privilege Management for Windows versions, see the Release
Notes for each version, at https://www.beyondtrust.com/docs/release-notes/.
Third party integration security
When you integrate with a third party, you should ensure you use the most secure mechanism possible. For example, if a vendor offers
both HTTP and HTTPS, you should use HTTPS.
Supported application types
All application types are supported, with the following exceptions:
l
Remote PowerShell Script
l
Remote PowerShell Command
l
Windows Service
l
Windows Store Application
If you try to use these application types with a Power Rule, the Rule Script is not executed and the event states:
Script execution skipped: Application Type not supported.
Validation
Some restrictions are enforced by the Endpoint Privilege Management Policy Editor but cannot be enforced in a scripting environment.
The following is guidance for creating your Power Rule. If Endpoint Privilege Management for Windows cannot determine the correct
course of action, it applies the default rule.
All Messages and Tokens must exist in your policy configuration prior to being referenced in a Power Rule script.
l
The Action must match the Message. For example, if the Action is Allow, the message must be of type Allow.
l
If you set the Action to Allow, we assume a passive token but you can add a different token such a Custom Token that you have
created.
l
Tokens cannot be used when the Action is Block.
l
If you specify an account to run as, your Action must be Allow.
SALES: www.beyondtrust.com/contact
SUPPORT: www.beyondtrust.com/support
DOCUMENTATION: www.beyondtrust.com/docs
81
©2003-2024 BeyondTrust Corporation. All Rights Reserved. Other trademarks identified on this page are owned by their respective owners. BeyondTrust is not a chartered bank or trust company, or
depository institution. It is not authorized to accept deposits or trust accounts and is not licensed or regulated by any state or federal banking authority.
TC: 8/27/2024
PRIVILEGE MANAGEMENT FOR WINDOWS
24.4 ADMINISTRATION GUIDE

If the script fails, a local audit event 801 is triggered.
If you use Set-PRRunAsProperty, you need to use Set-PRRuleProperty and set the -Action argument to Allow. You can optionally set
the -Token argument. If you don't define a token, then a passive token is applied.
The values for the -Action and -Token are case sensitive.
For more information, see "Power Rules additional guidance" on page 81.
Script restrictions
There are some restrictions that you need to be aware of when you are creating your own integrations.
Block comments
Single line comments are supported but block comments are not. Block comments take the form:
<# block comment #>
PowerShell single line comments are supported.
# comment
#Requires
The #Requires notation is not supported.
Script audit failure event
If a rule script fails, then a local Windows event is created, and the Endpoint Privilege Management for Windows event number is 801. This
event is always created, even when auditing is turned off. The following fields are shown in the event:
Variable Name Description
RuleScriptFileName Name attribute of the script in the config
RuleScriptName Set by script properties
RuleScriptVersion Set by script properties
RuleScriptPublisher The publisher of the script
RuleScriptRuleAffected Whether a rule script changed an Endpoint Privilege Management for Windows rule
RuleScriptStatus Timeout, Exception
RuleScriptResult Script timeout exceeded: X seconds, Set Rule Properties failed validation
ExceptionType Any valid .NET exception type
ExceptionMessage The short exception message
ProcessId PID of the process matching the rule
ParentProcessId PID of the parent process matching the rule
SALES: www.beyondtrust.com/contact
SUPPORT: www.beyondtrust.com/support
DOCUMENTATION: www.beyondtrust.com/docs
82
©2003-2024 BeyondTrust Corporation. All Rights Reserved. Other trademarks identified on this page are owned by their respective owners. BeyondTrust is not a chartered bank or trust company, or
depository institution. It is not authorized to accept deposits or trust accounts and is not licensed or regulated by any state or federal banking authority.
TC: 8/27/2024
PRIVILEGE MANAGEMENT FOR WINDOWS
24.4 ADMINISTRATION GUIDE

Variable Name Description
ProcessStartTime Time the process started
Event Time Time the script started
UniqueProcessId GUID of process to link this data to associated audit process event
PowerShell scripts execution policy
We recommend using one PowerShell script for each integration you create. If you create a Power Rule script that in turn calls an
additional PowerShell script, you need to distribute that PowerShell script independently and may need to change your PowerShell
execution policy to ensure it can run.
Encodings
If you want to maintain signed scripts, you must ensure they are encoded in UTF-16 LE prior to importing them into Endpoint Privilege
Management for Windows. Rule script files exported from the Endpoint Privilege Management Policy Editor are always encoded in UTF-
16 LE.
Settings files are encrypted at the endpoint. Settings files must be encoded in UTF-8.
SALES: www.beyondtrust.com/contact
SUPPORT: www.beyondtrust.com/support
DOCUMENTATION: www.beyondtrust.com/docs
83
©2003-2024 BeyondTrust Corporation. All Rights Reserved. Other trademarks identified on this page are owned by their respective owners. BeyondTrust is not a chartered bank or trust company, or
depository institution. It is not authorized to accept deposits or trust accounts and is not licensed or regulated by any state or federal banking authority.
TC: 8/27/2024
PRIVILEGE MANAGEMENT FOR WINDOWS
24.4 ADMINISTRATION GUIDE

Manage scripts
The Manage Scripts option is available from the Run a Rule Script dropdown or Run an Audit Script dropdown on the Edit
Application Rule dialog box.
There are two types of scripts that you can use:
l
Rule Scripts: PowerShell scripts and optional associated settings files allow you to modify the outcome of an Endpoint Privilege
Management for Windows rule, once a script has been run. These scripts can only be run in the user context.
l
Audit Scripts: VB, Javascript, or PowerShell scripts run after the Endpoint Privilege Management for Windows rule. These are for
auditing purposes. These scripts can be run in the user or system context.
Both rules can be imported into Endpoint Privilege Management for Windows using this dialog box.
Manage rule scripts
The Rule Script node contains all the rule scripts in your policy. If a rule script is assigned to the Application Rule you are currently editing,
the icon displays a green tick on it.
If you previously imported rule scripts, they are listed on the Rule Script node on the left side of the Script Manager.
Rule scripts must be created outside the Policy Editor and imported. You cannot create a new rule script using the Script Manager. Click
Import Script at the bottom of the Script Manager to import a new rule script.
Import a rule script
There are two components to rule scripts:
l
Rule script
l
(Optional) Settings file: Each rule script can have an optional Settings file which must be in a valid *.json format. They are useful
for managing credentials required for integrations and other sensitive information.
BeyondTrust-supported integrations are available from BeyondTrust.
Note: You should not edit BeyondTrust-supported integrations, as this may affect the level of support we are able to provide.
While you can edit a rule script in the Script Manager, we recommend you import the completed script into the Script Manager.
To import a rule script:
1. Copy the PowerShell rule script (*.ps1) and associated settings (*.json) file somewhere locally so you can locate them from the
Policy Editor.
2. Click the Run a Rule Script dropdown and select Manage Scripts.
3. Select the Rule Scripts node and click Import Script at the bottom of the dialog box.
4. Navigate to your PowerShell (*.ps1) file and click Open.
5. The script is loaded into the Script Manager.
6. Edit the rule script at this point, if required.
7. Optionally, change the Timeout settings. This is the time that Endpoint Privilege Management for Windows waits from the start of
SALES: www.beyondtrust.com/contact
SUPPORT: www.beyondtrust.com/support
DOCUMENTATION: www.beyondtrust.com/docs
84
©2003-2024 BeyondTrust Corporation. All Rights Reserved. Other trademarks identified on this page are owned by their respective owners. BeyondTrust is not a chartered bank or trust company, or
depository institution. It is not authorized to accept deposits or trust accounts and is not licensed or regulated by any state or federal banking authority.
TC: 8/27/2024
PRIVILEGE MANAGEMENT FOR WINDOWS
24.4 ADMINISTRATION GUIDE

script execution for the script to complete before running the default rule.
8. Click Close to save your changes.
Add a settings file
After you add a rule script (*.ps1), you can optionally add a Settings file (*.json) if one is required for the integration. The Settings file
contains any information that is specific to your integration environment, such as URLs, usernames, and passwords. The Settings file is
encrypted on the endpoint.
1. Go to Settings > Import Settings.
2. Navigate to and select your Settings file.
3. Click Open. Before you proceed, review and edit the Settings file in this window. Click Save to associate this Settings file with
your rule script.
4. The name of the Settings file that is associated with your rule script is shown next to the Settings button. Click Settings to view
the contents of your settings file at any time.
You can click Delete Settings at any time to clear the Settings window. Importing a new script overwrites the existing one.
After you associate a settings (*.json) file with a rule script (*.ps1), it is always associated with that rule script wherever you use it. For
example, if you associate a settings file with a rule script for an Application Rule and select the same rule script in an On-Demand
Application Rule, the same settings file is used. Changes to the settings or rule script file in either location are applied wherever it's used.
Export a rule script
If you need to share the rule script you can export it. You cannot export the settings file because it is linked to the rule script.
To export an existing rule script:
1. From the Script Manager, click Export Script.
2. Navigate to where you want to save the script to and click Save.
Delete a rule script
Note: A rule script assigned to an Application Rule or an On-Demand Application Rule cannot be deleted.
To delete a rule script:
1. From the Script Manager, select the rule script and click Delete Script.
2. If the script is not used by an Application Rule or an On-Demand Application Rule, you are prompted to confirm the deletion.
A rule script is only assigned to an Application Group after you click Close on the Script Manager dialog box and click OK on the Edit
Application Rule dialog box. Clicking Close on only the Script Manager does not associate a rule script with that Application Group.
Manage audit scripts
The Audit Script node contains all the audit scripts in your policy. If an audit script is assigned to the Application Rule you are currently
editing, the icon displays a green tick on it.
If you previously imported rule scripts, they are listed on the rule script node on the left side of the Script Manager.
SALES: www.beyondtrust.com/contact
SUPPORT: www.beyondtrust.com/support
DOCUMENTATION: www.beyondtrust.com/docs
85
©2003-2024 BeyondTrust Corporation. All Rights Reserved. Other trademarks identified on this page are owned by their respective owners. BeyondTrust is not a chartered bank or trust company, or
depository institution. It is not authorized to accept deposits or trust accounts and is not licensed or regulated by any state or federal banking authority.
TC: 8/27/2024
PRIVILEGE MANAGEMENT FOR WINDOWS
24.4 ADMINISTRATION GUIDE

Click Import Script at the bottom of the Script Manager to import a script. Alternatively, you can create an audit script in the Policy Editor.
Create an audit script
You can create audit scripts using the Policy Editor.
To create an audit script:
1. Click New in the Audit Scripts node in the Script Manager.
2. You can choose the following options and enter your script directly into the Policy Editor.
l
Script Language: Choose from VB Script, Javascript, or PowerShell Script. Switching between languages clears all code
in the script editor window.
l
Script Context: An audit script can run in the User or System context.
l
Timeout: The time that Endpoint Privilege Management for Windows waits from the start of script execution for the script
to complete before activating the default rule options.
3. Click Close to save the changes.
Import an audit script
Audit scripts can be imported in the Policy Editor.
To import an audit script:
1. Copy the audit script (*.vbs, *.js, or *.ps1) file somewhere locally so you can locate it from the Policy Editor.
2. Click either the Run a Rule Script or Run an Audit Script dropdown and click Manage Scripts.
3. Select the Audit Scripts node and click Import Script at the bottom of the dialog box.
4. Navigate to the audit script file and click Open.
5. The script is loaded into the Script Manager.
6. Edit the audit script here, if required.
7. Click Close to save your changes.
Export an audit script
You can export an existing audit script if you need to share it.
To export an existing audit script:
1. From the Script Manager, click Export Script.
2. Navigate to where you want to save the script and click Save. The audit script is exported.
Delete an audit script
You can delete an audit script, even if it is assigned to an existing Application Rule.
To delete an audit script:
1. From the Script Manager, select the audit script and click Delete Script.
SALES: www.beyondtrust.com/contact
SUPPORT: www.beyondtrust.com/support
DOCUMENTATION: www.beyondtrust.com/docs
86
©2003-2024 BeyondTrust Corporation. All Rights Reserved. Other trademarks identified on this page are owned by their respective owners. BeyondTrust is not a chartered bank or trust company, or
depository institution. It is not authorized to accept deposits or trust accounts and is not licensed or regulated by any state or federal banking authority.
TC: 8/27/2024
PRIVILEGE MANAGEMENT FOR WINDOWS
24.4 ADMINISTRATION GUIDE

On-demand application rules
The On-Demand Application Rules tab of the Workstyle allows you create rules to launch applications with specific privileges (usually
admin rights), on demand from a right-click Windows context menu.
Enable and configure on-demand integration
To enable On-Demand Application Rules, select the On-Demand
Application Rules Workstyle tab. The first check box applies to all
versions of Windows that have the Run as administrator option. The
second two check boxes apply to the Classic Windows Shell only. They do
not apply to the Windows Modern UI that is available in Windows 8 and Windows 10.
Windows Modern UI
If an On-Demand Application Rule is triggered, Endpoint Privilege Management for Windows references the check box labeled Apply the
On-Demand Application Rules to the "Run as administrator". If the box is checked, Endpoint Privilege Management for Windows
intercepts the Run as administrator option in the right-click context menu and overrides it. The labeling of the option doesn’t change in
this instance. If the box is unchecked, Endpoint Privilege Management for Windows does not intercept the option to Run as
Administrator.
Endpoint Privilege Management for Windows also references the check box labeled Hide "Run as" and "Run as administrator"
commands in the Classic Shell context menu. If it is checked, these options, where present, are hidden from the right-click context
menu. Endpoint Privilege Management for Windows does not continue process additional Application Rules.
Windows Classic Shell
If an On-Demand Application Rule is triggered, Endpoint Privilege Management for Windows references the check box in the Classic
Shell Context Menu Options section labeled Apply custom on-demand option to the Classic Shell context menu (this won’t
affect the "Run as administrator" option). If the box is checked, Endpoint Privilege Management for Windows adds a new option to the
right-click context menu that you configured in the Classic Shell Context Menu Option section, for example, Run with Endpoint
Privilege Management.
Endpoint Privilege Management for Windows also references the check box labeled Hide "Run as" and "Run as administrator"
commands in the Classic Shell context menu. If it is selected, these options, where present, are hidden from the right-click context
menu. Endpoint Privilege Management for Windows does not continue to process additional Application Rules.
Note: Unlike Application Rules, the On-Demand Rules list only receives the assigned privileges if the user launches a relevant
application using the context menu.
Application Groups for On Demand Application Rules are added and managed in the same way as Application Groups for Application
Rules. Right-click anywhere on the lower section of the page and select Insert Application Rule.
For more information, see
SALES: www.beyondtrust.com/contact
SUPPORT: www.beyondtrust.com/support
DOCUMENTATION: www.beyondtrust.com/docs
87
©2003-2024 BeyondTrust Corporation. All Rights Reserved. Other trademarks identified on this page are owned by their respective owners. BeyondTrust is not a chartered bank or trust company, or
depository institution. It is not authorized to accept deposits or trust accounts and is not licensed or regulated by any state or federal banking authority.
TC: 8/27/2024
PRIVILEGE MANAGEMENT FOR WINDOWS
24.4 ADMINISTRATION GUIDE

l
"Application rules" on page 77.
l
If you are using the EPM Policy Editor, see "Create On-Demand Application Rules" in Workstyles at
https://www.beyondtrust.com/docs/privilege-management/console/pm-cloud/use-the-policy-editor/policy-editor-
workstyles.htm
Manage languages
The menu option that is displayed can be configured for multiple languages. Endpoint Privilege Management for Windows detects the
regional language of the end user, and if a message in that language is configured, the correct translation is displayed.
To add a new menu option translation:
1. In the On-Demand Application rules, click the Add Language button.
2. The Add Language dialog box appears. Select the correct language, and then click OK.
3. A new text box for the selected language appears.
4. Enter your own translation for the selected language and click Save in the left pane.
Note: If a language cannot be matched for the region of the end user, then the default language is displayed. To change the
default language, select the language and click Set As Default.
Create an on-demand rule
On-Demand Application Rules are not checked by Endpoint Privilege Management for Windows unless you enabled them in the top
section.
Right-click and select Insert Application Rule to view, create, or modify the following for each On-Demand Application Rule:
Option Description
Target Application Group Select from the Application Groups list.
Run a Rule Script This option allows you to assign a rule script that is run before the
Application Rule triggers.
You need to use Manage Scripts from the dropdown to import the rule
script before you can select it.
Select the rule script you want to use from the dropdown list.
Action Select from Allow Execution or Block Execution. This is what happens if
the application in the targeted Application Group is launched by the end
user.
End User Message Select whether a message will be displayed to the user when they launch
the application. We recommend using messages if you're blocking the
execution of the application, so the end user has some feedback on why the
application doesn't launch.
SALES: www.beyondtrust.com/contact
SUPPORT: www.beyondtrust.com/support
DOCUMENTATION: www.beyondtrust.com/docs
88
©2003-2024 BeyondTrust Corporation. All Rights Reserved. Other trademarks identified on this page are owned by their respective owners. BeyondTrust is not a chartered bank or trust company, or
depository institution. It is not authorized to accept deposits or trust accounts and is not licensed or regulated by any state or federal banking authority.
TC: 8/27/2024
PRIVILEGE MANAGEMENT FOR WINDOWS
24.4 ADMINISTRATION GUIDE

Option Description
Access Token Select the type of token to be passed to be used for the target Application
Group. You can select from:
l
Passive (no change): Doesn't make any change to the user's
token. This is essentially an audit feature.
l
Enforce User's default rights: Removes all rights and uses the
user's default token. Windows UAC always tries to add
administration rights to the token being used so if the user clicks on
a application that triggers UAC, the user cannot progress past the
UAC prompt.
l
Drop Admin Rights: Removes administration rights from the user's
token.
l
Add Full Admin (Required for installers): Use the full admin
token in scenarios where your users require privileges
SeDebugPrivilege or SeLoadDriverPrivilege. An example use
case is MSI files running in a client/server mode where
SeDebugPrivilege is required to interact with the server component
which runs as SYSTEM. This only applies to cases where the
standard user needs to run the MSI directly.
l
Add Basic Admin Rights: Permits elevation of most applications
and tasks. We recommend using this token as the default elevation
token. This access token is essentially full admin but excludes the
following privileges: SeDebugPrivilege and
SeLoadDriverPrivilege. If users need to debug applications or
access drivers, then use the full admin token.
l
Privilege Management Support Token: Applies Add Full Admin
privileges with tamper protection removed.
Auditing
Raise an Event Whether or not you want an event to be raised if this Application Rule is
triggered. This forwards to the local event log file.
Run an Audit Script This option allows you to select an audit script to run after the Application
Rule.
You must use Manage Scripts from the dropdown to import your Audit
Script before you can select it.
Select the audit script you want to use from the dropdown list.
Privilege Monitoring Raises a privileged monitoring event.
McAfee ePO Reporting Options
Note: This option is only available if you checked the McAfee integration box when you installed the Endpoint Privilege
Management Policy Editor.
ePO Queries and Reports Select this option to raise an ePO threat event. These are separate from
Endpoint Privilege Management reporting events.
BeyondTrust Reporting (in ePO) Select this option to raise an Endpoint Privilege Management reporting
event. These are available in BeyondTrust Reporting.
SALES: www.beyondtrust.com/contact
SUPPORT: www.beyondtrust.com/support
DOCUMENTATION: www.beyondtrust.com/docs
89
©2003-2024 BeyondTrust Corporation. All Rights Reserved. Other trademarks identified on this page are owned by their respective owners. BeyondTrust is not a chartered bank or trust company, or
depository institution. It is not authorized to accept deposits or trust accounts and is not licensed or regulated by any state or federal banking authority.
TC: 8/27/2024
PRIVILEGE MANAGEMENT FOR WINDOWS
24.4 ADMINISTRATION GUIDE

For more information, see the following:
l
"Enable and configure on-demand integration" on page 87
l
"Application Groups" on page 104
l
"Manage scripts" on page 84
l
Access Tokens at https://docs.microsoft.com/en-us/windows/win32/secauthz/access-tokens
SALES: www.beyondtrust.com/contact
SUPPORT: www.beyondtrust.com/support
DOCUMENTATION: www.beyondtrust.com/docs
90
©2003-2024 BeyondTrust Corporation. All Rights Reserved. Other trademarks identified on this page are owned by their respective owners. BeyondTrust is not a chartered bank or trust company, or
depository institution. It is not authorized to accept deposits or trust accounts and is not licensed or regulated by any state or federal banking authority.
TC: 8/27/2024
PRIVILEGE MANAGEMENT FOR WINDOWS
24.4 ADMINISTRATION GUIDE

Content rules
Content rules define the actions Endpoint Privilege Management for Windows takes when content, such as a file, is launched by the user.
You need a Content Group before you can create a Content Rule.
For more information, see "Content groups" on page 142.
Insert a content rule
Click Content Rules to view, create, or modify the following for each Application Rule:
Option Description
Target Content Group Select from the Content Groups list.
Action Select from Allow Modification or Block Access. This is what happens if the user tries to access
the content.
End User Message Select if a message is displayed to the user when they try to access the content. We recommend
using messages if you're blocking content from being accessed, so the end user has some feedback.
Access Token Select the type of token to pass to the target Application Group. You can select from:
l
Passive (no change): Doesn't make any change to the user's token. This is essentially an
audit feature.
l
Enforce User's default rights: Removes all rights and uses the user's default token.
Windows UAC always attempts to add administration rights to the token being used, so if the
user clicks on an application that triggers UAC, the user cannot progress past the
UAC prompt.
l
Drop Admin Rights: Removes administration rights from the user's token.
l
Add Admin Right: Adds administration rights to the user's token.
Auditing
Raise an Event Whether or not you want an event to be raised if this content rule is triggered. This forwards to the
local event log file.
Run an Audit Script You can choose to run an audit script if required.
McAfee ePO Reporting Options
Note: This option is only available if you checked the McAfee integration box when you installed the Endpoint Privilege
Management Policy Editor.
ePO Queries and Reports Select this option to raise an ePO threat event. These are separate from Endpoint Privilege
Management reporting events.
BeyondTrust Endpoint Privilege
Management Reporting (in ePO)
Select this option to raise an Endpoint Privilege Management reporting event. These are available in
BeyondTrust Endpoint Privilege Management Reporting.
For more information, see the following:
SALES: www.beyondtrust.com/contact
SUPPORT: www.beyondtrust.com/support
DOCUMENTATION: www.beyondtrust.com/docs
91
©2003-2024 BeyondTrust Corporation. All Rights Reserved. Other trademarks identified on this page are owned by their respective owners. BeyondTrust is not a chartered bank or trust company, or
depository institution. It is not authorized to accept deposits or trust accounts and is not licensed or regulated by any state or federal banking authority.
TC: 8/27/2024
PRIVILEGE MANAGEMENT FOR WINDOWS
24.4 ADMINISTRATION GUIDE

l
"Content groups" on page 142
l
Access Tokens at https://docs.microsoft.com/en-us/windows/win32/secauthz/access-tokens
SALES: www.beyondtrust.com/contact
SUPPORT: www.beyondtrust.com/support
DOCUMENTATION: www.beyondtrust.com/docs
92
©2003-2024 BeyondTrust Corporation. All Rights Reserved. Other trademarks identified on this page are owned by their respective owners. BeyondTrust is not a chartered bank or trust company, or
depository institution. It is not authorized to accept deposits or trust accounts and is not licensed or regulated by any state or federal banking authority.
TC: 8/27/2024
PRIVILEGE MANAGEMENT FOR WINDOWS
24.4 ADMINISTRATION GUIDE
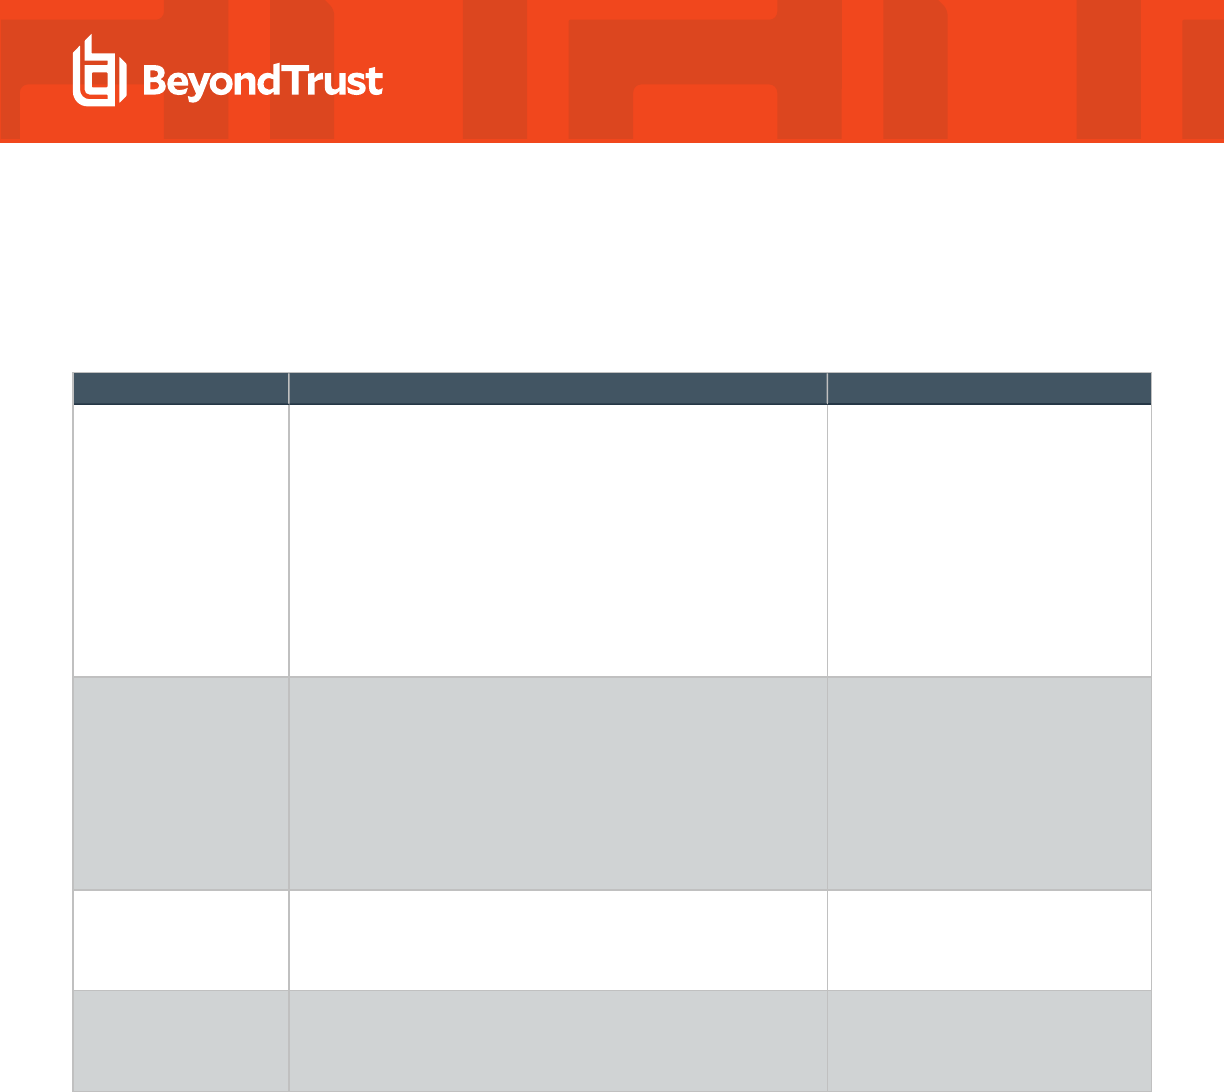
Built-in groups
Endpoint Privilege Management for Windows includes a number of built-in groups that may be used in any Application Rule or content
rule. They provide a simple and convenient way for the application of broad rules to applications and content, in particular when defining
catch-all rules. Built-in groups also help to simplify your configurations by reducing the amount of groups.
Group Criteria Valid Types
Any Application Matches any application that executed. Will also match any child
applications.
l
Executables
l
Control Panel Applets
l
Installer Packages
l
Endpoint Privilege
Management Policy Editors
l
Windows Scripts
l
PowerShell Scripts
l
Batch Scripts
l
Registry Scripts
Any Signed Application Matches any application that executed which has been signed by a
publisher. Will also match any child applications of signed
applications.
l
Executables
l
Control Panel Applets
l
Installer Packages
l
Endpoint Privilege
Management Policy Editors
l
Windows Scripts
l
PowerShell Scripts
Any Signed UAC Prompt Matches any application that triggers a Windows UAC Prompt,
which has been signed by a publisher. Will also match any child
applications.
l
Executables
l
Installer Packages
l
COM Classes
Any UAC Prompt Matches any application that triggers a Windows UAC prompt. Will
also match any child applications.
l
Executables
l
Installer Packages
l
COM Classes
SALES: www.beyondtrust.com/contact
SUPPORT: www.beyondtrust.com/support
DOCUMENTATION: www.beyondtrust.com/docs
93
©2003-2024 BeyondTrust Corporation. All Rights Reserved. Other trademarks identified on this page are owned by their respective owners. BeyondTrust is not a chartered bank or trust company, or
depository institution. It is not authorized to accept deposits or trust accounts and is not licensed or regulated by any state or federal banking authority.
TC: 8/27/2024
PRIVILEGE MANAGEMENT FOR WINDOWS
24.4 ADMINISTRATION GUIDE

Trusted application DLL protection
Endpoint Privilege Management for Windows can dynamically evaluate DLLs for trusted applications for each Workstyle. The first
Workstyle to have DLL Control Enabled or Disabled causes any configuration of DLL Control in subsequent Workstyles to be ignored.
If the DLL has either a valid publisher or is owned by a Trusted Owner, then it is not blocked by the TAP control.
l
Trusted Publisher: A trusted publisher must be signed. In addition, the publisher certificate must be valid, in date, and not
revoked.
l
Trusted Owner: A trusted owner is any owner that is in the default Windows groups Administrators, SystemUser, or
TrustedInstaller.
TAP DLL control affects the following applications:
l
Microsoft Word, Microsoft Excel, Microsoft PowerPoint, Microsoft Publisher, Adobe Reader 11 and earlier, Adobe Reader DC,
Microsoft Outlook, Google Chrome, Mozilla Firefox, Microsoft Internet Explorer, Microsoft Edge
You can turn on the monitoring of DLLs for TAP applications in any Workstyle. However, the first Workstyle to have DLL Control Enabled
or Disabled causes any configuration of DLL Control in subsequent Workstyles to be ignored.
Configure trusted application DLL protection
Click Trusted Application DLL Protection enabled, click to Configure to administer how DLLs are handled for TAP applications.
Option Description
Trusted Application Protection (DLL) Select Enabled, Disabled, or Not Configured from the dropdown list. The
first Workstyle to be evaluated that has DLL Control Enabled or Disabled is
matched by Endpoint Privilege Management for Windows, meaning
subsequent Workstyles are not evaluated by Endpoint Privilege
Management for Windows.
Action Select from Passive (No Change) or Block Execution. This is what
happens if the DLL in the TAP application tries to run.
End User Message Select if a message will be displayed to the user when the DLL tries to run
(regardless of it's allowed to run). We recommend using messages if you're
blocking a DLL from running, so the end user has some feedback.
Auditing
Raise an Event Whether or not you want an event to be raised if the TAP application tries to
run a DLL. This forwards to the local event log file.
McAfee ePO Reporting Options
ePO Threat Events Select this option to raise an ePO threat event. These are separate from
Endpoint Privilege Management reporting events.
Endpoint Privilege Management Reporting Events Select this option to raise an Endpoint Privilege Management reporting
event. These are available in BeyondTrust Endpoint Privilege Management
Reporting.
SALES: www.beyondtrust.com/contact
SUPPORT: www.beyondtrust.com/support
DOCUMENTATION: www.beyondtrust.com/docs
94
©2003-2024 BeyondTrust Corporation. All Rights Reserved. Other trademarks identified on this page are owned by their respective owners. BeyondTrust is not a chartered bank or trust company, or
depository institution. It is not authorized to accept deposits or trust accounts and is not licensed or regulated by any state or federal banking authority.
TC: 8/27/2024
PRIVILEGE MANAGEMENT FOR WINDOWS
24.4 ADMINISTRATION GUIDE

Option Description
Exclusions
Exclude DLLs from Rule Enter DLLs here that you want to exclude from DLL Control for TAP
Applications. These are DLLs that have either an untrusted owner or an
untrusted publisher, but you still want to be allowed to run with DLL Control
for TAP enabled in the Workstyle. This list of DLLs is not validated. If the
DLL name listed isn't matched by the client, then nothing is excluded.
Note: Third party applications may give error messages that aren't immediately clear to the end user when a DLL is blocked
from running in a TAP application by Endpoint Privilege Management for Windows.
SALES: www.beyondtrust.com/contact
SUPPORT: www.beyondtrust.com/support
DOCUMENTATION: www.beyondtrust.com/docs
95
©2003-2024 BeyondTrust Corporation. All Rights Reserved. Other trademarks identified on this page are owned by their respective owners. BeyondTrust is not a chartered bank or trust company, or
depository institution. It is not authorized to accept deposits or trust accounts and is not licensed or regulated by any state or federal banking authority.
TC: 8/27/2024
PRIVILEGE MANAGEMENT FOR WINDOWS
24.4 ADMINISTRATION GUIDE

General rules
To view or edit the General Rules of a Workstyle, select Windows > Workstyles > 'Workstyle Name' > General Rules from the policy
tree.
Collect user information
This rule, when enabled, raises an audit event each time a user logs onto the client machine. The audit event collects the following
information, which is reported through the Reporting pack:
l
Logon Time: The date and time the user logged on.
l
Is Administrator: The client checks whether the user account has been granted local administrator rights either directly or
through group membership.
l
Session Type: The type of logon session, for example, console, RDP, or ICA.
l
Session Locale: The regional settings of the user session/profile.
l
Logon Client Session Hostname: The hostname of the client the user is logging on from. This is either the local computer (for
Console sessions) or the remote device name (for remote sessions).
l
Logon Client Session IP Address: The IP address of the client the user is logging on from. This is either the local computer (for
console sessions) or the remote device name (for remote sessions).
For more information on user information reporting, see the BeyondTrust Endpoint Privilege Management Reporting guides at
www.beyondtrust.com/docs/privilege-management/windows.htm.
Collect host information
This rule, when enabled, raises an audit event on computer start-up or when the Endpoint Privilege Management for Windows service is
started. The audit event collects the following information, which is reported through the Reporting pack:
l
Instance ID: A unique reference identifying a specific service start event.
l
OS Version: The name and version of the operating system, including service pack.
l
Chassis Type: The type of chassis of the client, for example, workstation, mobile, server, or VM.
l
Language: The default system language.
l
Location: The current region and time zone of the device.
l
Client Version: The version of the Endpoint Privilege Management for Windows.
l
Client Settings: The type of installation and current settings of the Endpoint Privilege Management for Windows.
l
System Uptime: Time since the computer booted.
l
Unexpected Service Start: Only added if the service has unexpectedly started (that is, a previous start was not proceeded by a
service stop).
An additional event is raised if the computer shuts down, or if the Endpoint Privilege Management for Windows service is stopped:
l
Instance ID: A unique reference identifying the last service start event.
l
Computer Shutdown: Value identifying whether the service stopped as part of a computer shutdown event.
This option is only available in policies set under the Computer Configuration Group policy.
SALES: www.beyondtrust.com/contact
SUPPORT: www.beyondtrust.com/support
DOCUMENTATION: www.beyondtrust.com/docs
96
©2003-2024 BeyondTrust Corporation. All Rights Reserved. Other trademarks identified on this page are owned by their respective owners. BeyondTrust is not a chartered bank or trust company, or
depository institution. It is not authorized to accept deposits or trust accounts and is not licensed or regulated by any state or federal banking authority.
TC: 8/27/2024
PRIVILEGE MANAGEMENT FOR WINDOWS
24.4 ADMINISTRATION GUIDE

For more information on computer information reporting, see the BeyondTrust Endpoint Privilege Management Reporting
guides.
Prohibit Privileged Account Management
This rule, when enabled, blocks users from modifying local privileged group memberships. This prevents real administrators, or
applications which have been granted administrative rights through Endpoint Privilege Management for Windows, from adding and/or
removing and/or modifying a privileged account.
The list of local privileged groups that are prohibited from modification when this rule is enabled is:
l
Built-in administrators
l
Power users
l
Account operators
l
Server operators
l
Printer operators
l
Backup operators
l
RAS servers group
l
Network configuration operators
This rule provides three options:
l
Not Configured: This Workstyle is ignored.
l
Enabled: The user cannot add, remove, or modify user accounts in local privileged groups.
l
Disabled: Default behavior based on the users rights or those of the application.
Enable Windows Remote Management connections
This rule, when enabled, authorizes standard users who match the Workstyle to connect to a computer remotely using WinRM, which
would normally require local administrator rights. This general rule supports remote PowerShell command management, and must be
enabled in order to allow a standard user to execute PowerShell scripts and/or commands.
To allow remote network connections, you may be required to enable the Windows Group Policy setting access this computer from the
network.
For more information, see the following:
l
"Insert remote PowerShell commands" on page 130
l
Access this Computer from the Network on https://docs.microsoft.com/en-us/previous-versions/windows/it-
pro/windows-server-2003/cc740196(v=ws.10)
SALES: www.beyondtrust.com/contact
SUPPORT: www.beyondtrust.com/support
DOCUMENTATION: www.beyondtrust.com/docs
97
©2003-2024 BeyondTrust Corporation. All Rights Reserved. Other trademarks identified on this page are owned by their respective owners. BeyondTrust is not a chartered bank or trust company, or
depository institution. It is not authorized to accept deposits or trust accounts and is not licensed or regulated by any state or federal banking authority.
TC: 8/27/2024
PRIVILEGE MANAGEMENT FOR WINDOWS
24.4 ADMINISTRATION GUIDE

Filters
To view or edit the general properties of a Workstyle, select Windows
> Workstyles > 'Workstyle Name' > Filters from the policy tree. The
Filters section is last in the list on the right.
The Filters tab of a Workstyle can be used to further refine when a Workstyle is actually applied.
By default, a Workstyle applies to all users and computers who receive it. However, you can add one or more filters that restrict the
application of the Workstyle:
l
Account Filter: This filter restricts the Workstyle to specific users or groups of users.
l
Computer Filter: This filter restricts the Workstyle to specific computers (names or IP addresses), or Remote Desktop clients.
l
Time Filter: This filter restricts the Workstyle to being applied at particular days of the week and times of the day.
l
Expiry Filter: This filter expires a Workstyle at a set date and time.
l
WMI Filter: This filter restricts the Workstyle based on the success or failure of a WMI query.
If you want the Workstyle to apply only if all filters match, select the option ALL filters must match from the dropdown menu. If you want
the Workstyle to apply when any filter matches, select the option ANY filter can match from the dropdown menu.
Filters can also be configured to apply if there are no matches. This is referred to as an exclude filter. To set an exclude filter, right-click the
filter and check the option Apply this filter if it does NOT match (This does not apply to Time and Expiry filters).
Note: Time filters and Expiry filters can only be used once in a Workstyle.
SALES: www.beyondtrust.com/contact
SUPPORT: www.beyondtrust.com/support
DOCUMENTATION: www.beyondtrust.com/docs
98
©2003-2024 BeyondTrust Corporation. All Rights Reserved. Other trademarks identified on this page are owned by their respective owners. BeyondTrust is not a chartered bank or trust company, or
depository institution. It is not authorized to accept deposits or trust accounts and is not licensed or regulated by any state or federal banking authority.
TC: 8/27/2024
PRIVILEGE MANAGEMENT FOR WINDOWS
24.4 ADMINISTRATION GUIDE

Account filters
Account filters specify the users and groups the Workstyle are applied to.
Note: When a new Workstyle is created, a default account filter is added to target either Standard users only, or Everyone
(including administrators), depending on your selection in the Workstyle Wizard.
Configure account filters
1. On the Filter tab, click Add a filter.
2. Click Add an Account Filter > Add a new account.
3. Select the following to add groups:
l
From Local or Domain AD: Add an account or group name on the AD object dialog box. Enter the name and click
Check Names to validate.
l
From Microsoft Entra ID: Add a group name on the Select Groups from Microsoft Entra ID dialog box. Enter the name
and click Check Names to validate.
4. The group name is underlined when the name matches on an Active Directory or Microsoft Entra ID group name. Otherwise, an
error message is displayed.
Note: When no filters exist on a Workstyle, it applies to all. Microsoft Entra ID group filters depend on Endpoint Privilege
Management for Windows agent version 21.1 or later. Earlier Endpoint Privilege Management for Windows agent versions
ignore Microsoft Entra ID filters.
Domain and well known accounts display a Security Identifier (SID). The SID is used by Endpoint Privilege Management for Windows,
which avoids account lookup operations. For local accounts, the name is used by Endpoint Privilege Management for Windows, and the
SID is looked up when the Workstyle is loaded by the client. Local Account appears in the SID column of the accounts list for local
accounts.
By default, an account filter applies if any of the user or group accounts in the list match the user. If you have specified multiple user and
group accounts within one account filter, and want to apply the Workstyle only if all entries in the account filter match, then check the
option All items below should match.
You can add more than one account filter if you want the user to be a member of more than one group of accounts for the Workstyle to be
applied.
If an account filter is added, but no user or group accounts are specified, a warning is displayed advising No accounts added, and the
account filter is ignored.
Note: If All items below should match is enabled, and you have more than one user account listed, the Workstyle never
applies, as the user cannot match two different user accounts.
SALES: www.beyondtrust.com/contact
SUPPORT: www.beyondtrust.com/support
DOCUMENTATION: www.beyondtrust.com/docs
99
©2003-2024 BeyondTrust Corporation. All Rights Reserved. Other trademarks identified on this page are owned by their respective owners. BeyondTrust is not a chartered bank or trust company, or
depository institution. It is not authorized to accept deposits or trust accounts and is not licensed or regulated by any state or federal banking authority.
TC: 8/27/2024
PRIVILEGE MANAGEMENT FOR WINDOWS
24.4 ADMINISTRATION GUIDE

Computer filters
A computer filter can be used to target specific computers and remote desktop clients. You can specify a computer using either its
host/DNS name, or by an IP address.
To restrict the Workstyle to specific computers by IP address:
1. Select the Filters tab, and then click Add a new filter.
2. Click Add a Computer Filter > Add a new IP rule. The Add IP rule dialog box appears.
3. Enter the IP address manually, in the format 123.123.123.123.
4. Click Add.
Note: If the computer filter is intended to match the IP address of remote computers using remote desktop sessions, check the
option Match the remote desktop (instead of the local computer).
Note: You can also use the asterisk wildcard (*) in any octet to include all addresses in that octet range, for example,
192.168.*.*. Alternatively, you can specify a particular range for any octet, for example, 192.168.0.0-254. Wildcards and
ranges can be used in the same IP Address, but not in the same octet.
To restrict the Workstyle to specific computers by hostname:
1. Select the Filters tab, and then click Add a Filter.
2. Click Add a Computer Filter > Add a new hostname rule. The Add hostname rule dialog box appears.
3. Enter one or more hostnames, separated by semicolons, or alternatively browse for one or more computers. You can use the * and
? wildcard characters in hostnames.
4. Click Add.
5. If the computer filter is intended to match the hostname of remote computers using remote desktop sessions, check the option
Match the remote desktop (instead of the local computer).
Note: By default, a computer filter is applied if any of the computers or IP Addresses in the list match the computer or client. If
you specified multiple entries, and want to apply the Workstyle only if all entries in the computer filter match, then check the
option All items below should match.
If a computer filter is added, but no host names or IP addresses are specified, a warning is displayed advising No rules added, and the
computer filter is ignored.
SALES: www.beyondtrust.com/contact
SUPPORT: www.beyondtrust.com/support
DOCUMENTATION: www.beyondtrust.com/docs
100
©2003-2024 BeyondTrust Corporation. All Rights Reserved. Other trademarks identified on this page are owned by their respective owners. BeyondTrust is not a chartered bank or trust company, or
depository institution. It is not authorized to accept deposits or trust accounts and is not licensed or regulated by any state or federal banking authority.
TC: 8/27/2024
PRIVILEGE MANAGEMENT FOR WINDOWS
24.4 ADMINISTRATION GUIDE

Time range filters
A time range filter can specify the hours of a day and days of week for a Workstyle to be applied.
To restrict a Workstyle to a specific date/time period of activity:
1. Select the Filters tab, and click Add a new filter.
2. Click on Add a Time Filter > Edit time restrictions. The Time Restrictions dialog box appears.
3. Select Active and Inactive times in the time grid by either selecting individual elements or dragging over areas with the left mouse
button held down.
4. Click OK.
Note: Only one time filter can be added to a Workstyle.
The time filter is applied based on the user’s timezone by default. Uncheck the Use timezone of user for time restrictions (otherwise
use UTC) box to use UTC for the timezone.
SALES: www.beyondtrust.com/contact
SUPPORT: www.beyondtrust.com/support
DOCUMENTATION: www.beyondtrust.com/docs
101
©2003-2024 BeyondTrust Corporation. All Rights Reserved. Other trademarks identified on this page are owned by their respective owners. BeyondTrust is not a chartered bank or trust company, or
depository institution. It is not authorized to accept deposits or trust accounts and is not licensed or regulated by any state or federal banking authority.
TC: 8/27/2024
PRIVILEGE MANAGEMENT FOR WINDOWS
24.4 ADMINISTRATION GUIDE

Expiry filter
An expiry filter specifies an expiry date and time for a Workstyle.
To restrict a Workstyle to an expiry date and time:
1. Select the Filters tab, and click Add a new filter.
2. Click Add an Expiry Filter.
3. Set the date and time that you want the Workstyle to expire.
Note: Only one expiry filter can be added to a Workstyle.
The expiry time is applied based on the user’s timezone by default. Uncheck the Use timezone of user for Workstyle expiry
(otherwise use UTC) box to use UTC for the timezone.
SALES: www.beyondtrust.com/contact
SUPPORT: www.beyondtrust.com/support
DOCUMENTATION: www.beyondtrust.com/docs
102
©2003-2024 BeyondTrust Corporation. All Rights Reserved. Other trademarks identified on this page are owned by their respective owners. BeyondTrust is not a chartered bank or trust company, or
depository institution. It is not authorized to accept deposits or trust accounts and is not licensed or regulated by any state or federal banking authority.
TC: 8/27/2024
PRIVILEGE MANAGEMENT FOR WINDOWS
24.4 ADMINISTRATION GUIDE

WMI (Windows Management Information) filters
A WMI filter specifies if a Workstyle should be applied, based on the outcome of a WMI query.
The filter allows you to specify the following:
l
Description: Free text to describe the WMI query.
l
Namespace: Set the namespace that the query executes against. By default, this is root\CIMV2.
l
Query: The WMI Query Language (WQL) statement to execute.
l
Timeout: The time (in seconds) the client waits for a response before terminating the query. By default, no timeout is specified.
Note: Long running WMI queries result in delayed application launches. Therefore, we recommend a timeout be specified to
ensure that queries are terminated in a timely manner.
When you execute a WMI query, the client checks if any rows of data are returned. If any data is returned, then the WMI query is
successful. If no data is returned or an error is detected in the execution, the WMI query is unsuccessful.
It is possible for a WMI query to return many rows of data, in which case you can create more complex WQL statements using WHERE
clauses. The more clauses you add to your statement, the fewer rows are likely to return, and the more specific your WMI query will be.
The WMI filter includes several default templates for common WMI queries. To add a new WMI query from a template, click Add a WMI
template and use the instant search box to quickly find a template.
WQL statements can include parameterized values, which allow you to execute queries including select user, computer, and Endpoint
Privilege Management for Windows properties.
Note: WMI queries are always run as SYSTEM, and cannot be executed against remote computers or network resources.
WMI filters do not support impersonation levels, and can only be used with SELECT queries.
By default, a WMI filter applies if any of the WMI queries in the list return true. If you specified multiple WMI queries, and want to apply the
Workstyle only if ALL queries return true, then check the option All items below should match.
If a WMI filter is added, but no WMI queries are specified, a warning is displayed advising No queries added and the WMI filter is ignored.
For more information on how to use parameters, see "Windows QuickStart policy summary" on page 55.
SALES: www.beyondtrust.com/contact
SUPPORT: www.beyondtrust.com/support
DOCUMENTATION: www.beyondtrust.com/docs
103
©2003-2024 BeyondTrust Corporation. All Rights Reserved. Other trademarks identified on this page are owned by their respective owners. BeyondTrust is not a chartered bank or trust company, or
depository institution. It is not authorized to accept deposits or trust accounts and is not licensed or regulated by any state or federal banking authority.
TC: 8/27/2024
PRIVILEGE MANAGEMENT FOR WINDOWS
24.4 ADMINISTRATION GUIDE

Application Groups
Application Groups are used to define logical groupings of applications.
Application Groups are assigned to Workstyles, so you must define Application Groups for all of the applications you want to assign to a
Workstyle.
Create Application Groups
To create an Application Group:
1. Navigate to Endpoint Privilege Management Settings > Windows > Application Groups.
2. Right-click Application Groups and click New Application Group. This creates an Application Group with the default name
Application Group x, where x increments numerically.
3. Right-click the new Application Group and click Rename. Enter the new name you want and press Return to save the new
Application Group.
View or edit the properties of an Application Group
Each Application Group has a name, an optional description, and can be hidden from the policy navigation tree. You can edit these in the
properties for the Application Group.
To view the properties of an Application Group:
1. Navigate to Endpoint Privilege Management Settings > Windows > Application Groups.
2. Right-click the Application Group and select Properties to view its properties. Enter or change the description and click OK to
save the new properties.
You can also choose to hide the Application Group in this menu by checking the Hidden box.
For more information, see "Show hidden groups" on page 49.
Delete an Application Group
Application Groups are usually mapped to one or more Application Rule in a Workstyle. If you attempt to delete an Application Rule that is
mapped to an Application Group, you are notified of this before you continue. If you continue to delete the Application Group, the
associated Application Rule in the Workstyle is also deleted.
To delete an Application Group:
1. Navigate to Endpoint Privilege Management Settings > Windows > Application Groups.
2. Right-click the Application Group you want to delete and click Delete.
3. If there aren't any Application Rules in the Workstyle using that Application Group, then it is deleted. If there are Application Rules
in the Workstyle that reference that Application Group, then you are prompted to check the reference before you continue. If you
click Resolve All, then both the Application Group and the Application Rule that references it are deleted from your policy. If you
don't want to do this, click Cancel.
SALES: www.beyondtrust.com/contact
SUPPORT: www.beyondtrust.com/support
DOCUMENTATION: www.beyondtrust.com/docs
104
©2003-2024 BeyondTrust Corporation. All Rights Reserved. Other trademarks identified on this page are owned by their respective owners. BeyondTrust is not a chartered bank or trust company, or
depository institution. It is not authorized to accept deposits or trust accounts and is not licensed or regulated by any state or federal banking authority.
TC: 8/27/2024
PRIVILEGE MANAGEMENT FOR WINDOWS
24.4 ADMINISTRATION GUIDE

Duplicate an Application Group
You can duplicate an Application Group if you need a new Application Group that contains the same applications as an existing
Application Group. You can edit a duplicated Application Group independently of the Application Group it was duplicated from.
To duplicate an Application Group:
1. Navigate to Endpoint Privilege Management Settings > Windows > Application Groups.
2. Right-click the Application Group you want to duplicate and click Copy.
3. Select the Application Groups node, right-click, and select Paste. This makes a new copy of the Application Group and all the
Application Rules the original Application Group contains.
A new duplicate Application Group with an incremental number in brackets appended to the name is created that you can add applications
to.
Rule precedence
If you add more than one Application Rule or Content Rule to a Workstyle, then entries that are higher in the list have a higher precedence.
Once a target matches a rule, no further rules or Workstyles are processed for that target. If a target is able to match more than one
Workstyle or rule, then it is important that you order both your Workstyles and rules correctly.
To change the precedence of a rule in a Workstyle:
1. Expand the relevant Workstyle, and then select the rule type tab: Application, On-Demand, or Content.
2. Right-click the rule and use the following options to change the rule precedence: Move Top, Move Up, Move Down, and Move
Bottom.
SALES: www.beyondtrust.com/contact
SUPPORT: www.beyondtrust.com/support
DOCUMENTATION: www.beyondtrust.com/docs
105
©2003-2024 BeyondTrust Corporation. All Rights Reserved. Other trademarks identified on this page are owned by their respective owners. BeyondTrust is not a chartered bank or trust company, or
depository institution. It is not authorized to accept deposits or trust accounts and is not licensed or regulated by any state or federal banking authority.
TC: 8/27/2024
PRIVILEGE MANAGEMENT FOR WINDOWS
24.4 ADMINISTRATION GUIDE

Application definitions
Endpoint Privilege Management for Windows must match every enabled criteria in an application definition before it triggers a match (the
rules are combined with a logical AND).
Application definitions that require a match can also be negated. To target applications that do not match the definition, select does NOT
match from the dropdown.
ActiveX codebase matches
When inserting ActiveX controls, this is enabled by default and we recommend you use this option in most circumstances. You must enter
the URL to the codebase for the ActiveX control. You can choose to match based on the following options (wildcard characters ? and *
may be used):
l
Exact Match
l
Starts With
l
Ends With
l
Contains
l
Regular Expressions
Although you can enter a relative codebase name, we strongly recommend you enter the full URL to the codebase, as it is more secure.
ActiveX version matches
If the ActiveX control you entered has a version property, then you can choose Check Min Version and/or Check Max Version and edit
the respective version number fields.
App ID matches
Use to match the App ID of the COM class, which is a GUID used by Windows to set properties for a CLSID. AppIds can be used by one or
more CLSIDs.
The available operators are identical to those for the File or Folder Name definition.
Application requires elevation (UAC)
Use to check if an executable requires elevated rights to run and would cause UAC (User Account Control) to trigger. This is a useful way
to replace inappropriate UAC prompts with Endpoint Privilege Management for Windows end user messages to either block or prompt the
user for elevation.
Note: This is supported on install only.
Uninstaller
This option allows you to match on any uninstaller type (MSI or EXE).
SALES: www.beyondtrust.com/contact
SUPPORT: www.beyondtrust.com/support
DOCUMENTATION: www.beyondtrust.com/docs
106
©2003-2024 BeyondTrust Corporation. All Rights Reserved. Other trademarks identified on this page are owned by their respective owners. BeyondTrust is not a chartered bank or trust company, or
depository institution. It is not authorized to accept deposits or trust accounts and is not licensed or regulated by any state or federal banking authority.
TC: 8/27/2024
PRIVILEGE MANAGEMENT FOR WINDOWS
24.4 ADMINISTRATION GUIDE

BeyondTrust Zone Identifier exists
This option allows you to match on the BeyondTrust Zone Identifier tag, where present. If an Alternate Data Stream (ADS) tag is applied
by the browser, we also apply a BeyondTrust Zone Identifier tag to the file. The BeyondTrust Zone Identifier tag can be used as matching
criteria if required.
CLSID matches
This option allows you to match the class ID of the ActiveX control or COM class, which is a unique GUID stored in the registry.
COM display name matches
If the class you entered has a Display Name, then it is automatically extracted and you can choose to match on this property. By default, a
substring match is attempted (Contains). Alternatively, you may choose to pattern match based on either a wildcard match (? and *) or a
regular expression. The available operators are identical to those for the File or Folder Name definition.
Command line matches
If the filename is not specific enough, you can match the command line, by checking this option and entering the command line to match.
By default, a substring match is attempted (Contains). Alternatively, you may choose to pattern match based on either a wildcard match (?
and *) or a regular expression. The available operators are identical to those for the File or Folder Name definition.
PowerShell removes double quotes from command strings prior to transmitting to the target. Therefore, we do not recommend that
Command Line definitions include double quotes, as they fail to match the command.
Controlling process matches
This option allows you to target content based on the process (application) that is used to open the content file. The application must be
added to an Application Group. You can also define whether any parent of the application matches the definition.
Drive matches
This option can be used to check the type of disk drive where the file is located. Choose from one of the following options:
l
Fixed disk: Any drive that is identified as being an internal hard disk.
l
Network: Any drive that is identified as a network share.
l
RAM disk: Any drive that is identified as a RAM drive.
l
Any Removable Drive or Media: If you want to target any removable drive or media, but are unsure of the specific drive type,
choose this option, which matches any of the removable media types below. Alternatively, if you want to target a specific type,
choose from one of the following removable media types:
o
Removable Media: Any drive that is identified as removable media.
o
USB: Any drive that is identified as a disk connected by USB.
o
CD/DVD: Any drive that is identified as a CD or DVD drive.
o
eSATA Drive: Any drive that is identified as a disk connected by eSATA.
SALES: www.beyondtrust.com/contact
SUPPORT: www.beyondtrust.com/support
DOCUMENTATION: www.beyondtrust.com/docs
107
©2003-2024 BeyondTrust Corporation. All Rights Reserved. Other trademarks identified on this page are owned by their respective owners. BeyondTrust is not a chartered bank or trust company, or
depository institution. It is not authorized to accept deposits or trust accounts and is not licensed or regulated by any state or federal banking authority.
TC: 8/27/2024
PRIVILEGE MANAGEMENT FOR WINDOWS
24.4 ADMINISTRATION GUIDE

File or folder name matches
Applications are validated by matching the file or folder name. You can choose to match based on the following options (wildcard
characters ? and * may be used):
l
Exact Match
l
Starts With
l
Ends With
l
Contains
l
Regular Expressions
Although you can enter relative filenames, we strongly recommend you enter the full path to a file or the COM server. Environment
variables are also supported.
We recommend that you do not use the definition File or Folder Name does NOT Match in isolation for executable types, as it results in
matching every application, including hosted types, such as installer packages, scripts, batch files, registry files, management consoles,
and Control Panel applets.
When creating blocking rules for applications or content, and the File or Folder Name is used as matching criteria against paths which
exist on network shares, this should be done using the UNC network path and not by the mapped drive letter.
For more information, see "Regular expressions syntax" on page 186.
File hash (SHA-1) matches
If a reference file is entered, then a SHA-1 hash of the application is generated. This definition ensures the application remains
unchanged, as changing a single character causes the SHA-1 hash to change.
File hash (SHA-256) matches
Set the SHA-256 file hash on an application. On the Windows operating system, you can select either match or does NOT match.
SHA-256 is supported for all applications that support SHA-1. However, we recommend using the newer and more secure SHA-256 hash
rather than SHA-1.
File version matches
If the file, service executable, or COM server you enter has a File Version property, then it is automatically extracted and you can choose
Check Min Version and/or Check Max Version, and edit the respective version number fields.
Parent process matches
This option can be used to check if an application’s parent process matches a specific Application Group. You must create an Application
Group for this purpose or specify an existing Application Group in the Parent Process group. Setting Match All Parents in Tree to True
traverses the complete parent/child hierarchy for the application, looking for any matching parent process, whereas setting this option to
False checks only the application’s direct parent process.
SALES: www.beyondtrust.com/contact
SUPPORT: www.beyondtrust.com/support
DOCUMENTATION: www.beyondtrust.com/docs
108
©2003-2024 BeyondTrust Corporation. All Rights Reserved. Other trademarks identified on this page are owned by their respective owners. BeyondTrust is not a chartered bank or trust company, or
depository institution. It is not authorized to accept deposits or trust accounts and is not licensed or regulated by any state or federal banking authority.
TC: 8/27/2024
PRIVILEGE MANAGEMENT FOR WINDOWS
24.4 ADMINISTRATION GUIDE

Product code matches
If the file you entered has a Product Code, then it is automatically extracted and you can choose to check this code.
Product description matches
If the file you enter has a Product Description property, then it is automatically extracted, and you can choose to match on this property.
By default, a substring match is attempted (Contains). Alternatively, you may choose to pattern match based on either a wildcard match (?
and *) or a regular expression. The available operators are identical to those for the File or Folder Name definition.
Product name matches
If the file, COM server, or service executable you enter has a Product Name property, then it is automatically extracted and you can
choose to match on this property. By default, a substring match is attempted (Contains). Alternatively, you may choose to pattern match
based on either a wildcard match (? and *) or a regular expression. The available operators are identical to those for the File or Folder
Name definition.
Product version matches
If the file, COM server, or service executable you entered has a Product Version property, then it is automatically extracted and you can
choose Check Min Version and/or Check Max Version and edit the respective version number fields.
Publisher matches
This option can be used to check for the existence of a valid publisher. If you browse for an application, then the certificate subject name is
automatically retrieved, if the application is signed. For Windows system files, the Windows security catalog is searched, and if a match is
found, the certificate for the security catalog is retrieved. If multiple certificates exist on a targeted filetypes, Endpoint Privilege
Management for Windows will search through all certificates to look for a match. Publisher checks are supported on executables, Control
Panel applets, installer packages, Windows scripts, and PowerShell scripts. By default, a substring match is attempted (Contains).
Alternatively, you may choose to pattern match based on either a wildcard match (? and *) or a regular expression. The available
operators are identical to those for the File or Folder Name definition.
Starting in version 23.6, catalog subsystems for publisher matching has been implemented, which allows for scaling of policies to
reference many hundreds of thousands of app definitions.
For more information, see Setting up and Using Additional Catalog Subsystems for Publisher Matching at
https://beyondtrustcorp.service-now.com/csm?id=kb_article_view&sysparm_article=KB0020204.
Service actions matches
This option allows you to define the actions which are allowed. Choose from:
l
Service Stop: Grants permission to stop the service.
l
Service Start: Grants permission to start the service.
l
Service Pause / Resume: Grants permission to pause and resume the service.
l
Service Configure: Grants permission to edit the properties of the service.
SALES: www.beyondtrust.com/contact
SUPPORT: www.beyondtrust.com/support
DOCUMENTATION: www.beyondtrust.com/docs
109
©2003-2024 BeyondTrust Corporation. All Rights Reserved. Other trademarks identified on this page are owned by their respective owners. BeyondTrust is not a chartered bank or trust company, or
depository institution. It is not authorized to accept deposits or trust accounts and is not licensed or regulated by any state or federal banking authority.
TC: 8/27/2024
PRIVILEGE MANAGEMENT FOR WINDOWS
24.4 ADMINISTRATION GUIDE

Service display name matches
This option allows you to match the name of the Windows service, for example, W32Time. You may choose to match based on the
following options (wildcard characters ? and * may be used):
l
Exact Match
l
Starts With
l
Ends With
l
Contains
l
Regular Expressions
Service name matches
This option allows you to match the name of the Windows service, for example, W32Time. You may choose to match based on the
following options (wildcard characters ? and * may be used):
l
Exact Match
l
Starts With
l
Ends With
l
Contains
l
Regular Expressions
Source URL matches
If an application was downloaded using a web browser, this option can be used to check where the application or installer was originally
downloaded from. The application is tracked by Endpoint Privilege Management for Windows at the point it is downloaded, so that if a user
decides to run the application or installer at a later date, the source URL can still be verified. By default, a substring match is attempted
(Contains). Alternatively, you may choose to pattern match based on either a wildcard match (? and *) or a regular expression. The
available operators are identical to those for the File or Folder Name definition.
Trusted ownership matches
This option can be used to check if an application’s file is owned by a trusted owner (the trusted owner accounts are SYSTEM,
Administrators, or Trusted Installer).
Upgrade code matches
If the file you enter has an Upgrade Code, then it is automatically extracted and you can choose to check this code.
Windows Store application version
This option allows you to match the version of the Windows Store application, for example, 16.4.4204.712. You can choose Check Min
Version and/or Check Max Version and edit the respective version number fields.
SALES: www.beyondtrust.com/contact
SUPPORT: www.beyondtrust.com/support
DOCUMENTATION: www.beyondtrust.com/docs
110
©2003-2024 BeyondTrust Corporation. All Rights Reserved. Other trademarks identified on this page are owned by their respective owners. BeyondTrust is not a chartered bank or trust company, or
depository institution. It is not authorized to accept deposits or trust accounts and is not licensed or regulated by any state or federal banking authority.
TC: 8/27/2024
PRIVILEGE MANAGEMENT FOR WINDOWS
24.4 ADMINISTRATION GUIDE

Windows Store package name
This option allows you to match the name of the Windows Store Application, for example, microsoft.microsoftskydrive. You can choose
to match based on the following options (wildcard characters ? and * may be used):
l
Exact Match
l
Starts With
l
Ends With
l
Contains
l
Regular Expressions
Windows Store publisher
This option allows you to match the publisher name of the Windows Store Application, for example, Microsoft Corporation. By default, a
substring match is attempted (Contains). Alternatively, you may choose to pattern match based on either a wildcard match (? and *) or a
regular expression. The other available operators are:
l
Exact Match
l
Starts With
l
Ends With
l
Contains
l
Regular Expressions
The Browse File and Browse Apps options can only be used if configuring Endpoint Privilege Management for Windows settings from a
Windows 8 client.
Advanced options
Allow child processes will match this application definition
If this box is checked, then any child processes that are launched from this application (or its children) also match this rule. The rules are
still processed in order, so it’s still possible for a child process to match a higher precedence rule (or Workstyle) first. Therefore, this option
prevents a child process from matching a lower precedence rule. It should also be noted that if an application is launched by an On-
Demand Rule and this option is selected, then its children are processed against the On-Demand Rules, and not the Application Rules. If
this option is not selected, then the children are processed against the Application Rules in the normal way. You can further refine this
option by restricting the child processes to a specific Application Group. The default is to match <Any Application>, which will match any
child process.
Note: If you want to exclude specific processes from matching this rule, then click …match… to toggle the rule to …does not
match….
Note: Child processes are evaluated in the context that the parent executed. For example, if the parent executed through on-
demand shell elevation, then Endpoint Privilege Management for Windows first attempts to match On-Demand Application
Rules for any children of the executed application.
SALES: www.beyondtrust.com/contact
SUPPORT: www.beyondtrust.com/support
DOCUMENTATION: www.beyondtrust.com/docs
111
©2003-2024 BeyondTrust Corporation. All Rights Reserved. Other trademarks identified on this page are owned by their respective owners. BeyondTrust is not a chartered bank or trust company, or
depository institution. It is not authorized to accept deposits or trust accounts and is not licensed or regulated by any state or federal banking authority.
TC: 8/27/2024
PRIVILEGE MANAGEMENT FOR WINDOWS
24.4 ADMINISTRATION GUIDE

Force standard user rights on File Open/Save common dialogs
If the application allows a user to open or save files using the common Windows Open or Save dialog box, then selecting this option
ensures the user does not have admin privileges within these dialog boxes. These dialog boxes have Explorer-like features, and allow a
user to rename, delete, or overwrite files. If an application is running with elevated rights and this option is disabled, the Open/Save dialog
boxes allow a user to replace protected system files.
Where present, this option is selected by default to ensure Endpoint Privilege Management for Windows forces these dialog boxes to run
with the user’s standard rights, to prevent the user from tampering with protected system files.
When enabled, this option also prevents processes launched from within these dialog boxes from inheriting the rights of an elevated
application.
Environment variables
Endpoint Privilege Management for Windows supports the use of the following environment variables in file path and command line
application definitions:
System variables
l
%ALLUSERSPROFILE%
l
%COMMONPROGRAMFILES(x86)%
l
%COMMONPROGRAMFILES%
l
%PROGRAMDATA%
l
%PROGRAMFILES(x86)%
l
%PROGRAMFILES%
l
%SYSTEMROOT%
l
%SYSTEMDRIVE%
User variables
l
%APPDATA%
l
%USERPROFILE%
l
%HOMEPATH%
l
%HOMESHARE%
l
%LOCALAPPDATA%
l
%LOGONSERVER%
To use any of the environment variables above, enter the variable, including the % characters, into a file path or command line. Endpoint
Privilege Management for Windows expands the environment variable prior to attempting a file path or command line match.
SALES: www.beyondtrust.com/contact
SUPPORT: www.beyondtrust.com/support
DOCUMENTATION: www.beyondtrust.com/docs
112
©2003-2024 BeyondTrust Corporation. All Rights Reserved. Other trademarks identified on this page are owned by their respective owners. BeyondTrust is not a chartered bank or trust company, or
depository institution. It is not authorized to accept deposits or trust accounts and is not licensed or regulated by any state or federal banking authority.
TC: 8/27/2024
PRIVILEGE MANAGEMENT FOR WINDOWS
24.4 ADMINISTRATION GUIDE

Insert ActiveX controls
Unlike other application types, Endpoint Privilege Management for Windows only manages the privileges for the installation of ActiveX
controls. ActiveX controls usually require administrative rights to install, but once installed, they run with the standard privileges of the web
browser.
1. Select the Application Group you want to add the ActiveX control to.
2. Right-click and select Insert Application > ActiveX Control.
3. Enter the Codebase (URL) if required. This is a full or partial URL that specifies the location of the ActiveX control.
4. Enter a description if required. By default, this is the name of the application you're inserting.
5. You need to configure the matching criteria for the executable and then click Next. You can configure:
l
ActiveX Codebase matches
l
CLSID matches
l
ActiveX Version matches
6. You need to configure the Advanced Options for the application. You can configure:
l
Allow child processes will match this application definition
l
Force standard user rights on File Open/Save common dialogs
7. Click OK. The ActiveX Control is added to the Application Group.
For more information, see "Advanced options" on page 111.
SALES: www.beyondtrust.com/contact
SUPPORT: www.beyondtrust.com/support
DOCUMENTATION: www.beyondtrust.com/docs
113
©2003-2024 BeyondTrust Corporation. All Rights Reserved. Other trademarks identified on this page are owned by their respective owners. BeyondTrust is not a chartered bank or trust company, or
depository institution. It is not authorized to accept deposits or trust accounts and is not licensed or regulated by any state or federal banking authority.
TC: 8/27/2024
PRIVILEGE MANAGEMENT FOR WINDOWS
24.4 ADMINISTRATION GUIDE

Insert batch files
1. Select the Application Group you want to add the application to.
2. Right-click and select Insert Application > Batch File .
3. You can leave the File or Folder Name blank to match on all applications of this type, type in a specific name or path manually, or
click Browse File , Browse Folder, or Template.
4. Enter a description, if required. By default, this is the name of the application you're inserting.
5. You need to configure the matching criteria for the executable. You can configure:
l
File or Folder Name matches
l
Command Line matches
l
Drive matches
l
File Hash (SHA-1 Fingerprint) matches
l
File Hash (SHA-256) matches
l
Trusted Ownership matches
l
Application Requires Elevation (UAC)
l
Parent Process matches
l
Source URL matches
l
BeyondTrust Zone Identifier exists
6. You need to configure the Advanced Options for the application. You can configure:
l
Allow child processes will match this application definition
l
Force standard user rights on File Open and Save common dialogs
7. Click OK. The Active X Control is added to the Application Group.
For more information, see the following:
l
"Insert applications from templates" on page 138
l
"File or folder name matches" on page 108
l
"Command line matches" on page 107
l
"Drive matches" on page 107
l
"File hash (SHA-1) matches" on page 108
l
"Trusted ownership matches" on page 110
l
"Application requires elevation (UAC)" on page 106
l
"Parent process matches" on page 108
l
"Source URL matches" on page 110
l
"BeyondTrust Zone Identifier exists" on page 107
l
"Advanced options" on page 111
SALES: www.beyondtrust.com/contact
SUPPORT: www.beyondtrust.com/support
DOCUMENTATION: www.beyondtrust.com/docs
114
©2003-2024 BeyondTrust Corporation. All Rights Reserved. Other trademarks identified on this page are owned by their respective owners. BeyondTrust is not a chartered bank or trust company, or
depository institution. It is not authorized to accept deposits or trust accounts and is not licensed or regulated by any state or federal banking authority.
TC: 8/27/2024
PRIVILEGE MANAGEMENT FOR WINDOWS
24.4 ADMINISTRATION GUIDE

Insert COM classes
COM elevations are a form of elevation which are typically initiated from Explorer, when an integrated task requires administrator rights.
Explorer uses COM to launch the task with admin rights, without having to elevate Explorer. Every COM class has a unique identifier,
called a CLSID, that is used to launch the task.
COM tasks usually trigger a Windows UAC prompt because they need administrative privileges to proceed. Endpoint Privilege
Management for Windows allows you to target specific COM CLSIDs and assign privileges to the task without granting full administration
rights to the user. COM based UAC prompts can also be targeted and replaced with custom messaging, where COM classes can be
allowed and/or audited.
1. Select the Application Group you want to add the COM Class to.
2. Right-click and select Insert Application > COM Class .
3. Enter a Class ID (CLSID) if required. Endpoint Privilege Management for Windows extracts information from this for the criteria if
required. Or click Browse Class or Template.
4. Enter a description if required. By default, this is the name of the application you're inserting.
5. You need to configure the matching criteria for the executable. COM classes are hosted by a COM server DLL or EXE, so COM
classes can be validated from properties of the hosting COM server. You can configure:
l
File or Folder Name matches
l
Drive matches
l
File Hash (SHA-1 Fingerprint) matches
l
File Hash (SHA-256) matches
l
Product Name matches
l
Publisher matches
l
CLSID matches
l
App ID matches
l
COM Display Name matches
l
Product Description matches
l
Product Version matches
l
File Version matches
l
Trusted Ownership matches
l
Application Requires Elevation (UAC): Match if Application Requires Elevation (User Account Control) is always
enabled, as COM classes require UAC to elevate
l
Source URL matches
6. You need to configure the Advanced Options for the application. You can configure:
l
Allow child processes will match this application definition
l
Force standard user rights on File Open/Save common dialogs
7. Click OK . The application is added to the Application Group.
For more information, see the following:
l
"Insert applications from templates" on page 138
l
"File or folder name matches" on page 108
SALES: www.beyondtrust.com/contact
SUPPORT: www.beyondtrust.com/support
DOCUMENTATION: www.beyondtrust.com/docs
115
©2003-2024 BeyondTrust Corporation. All Rights Reserved. Other trademarks identified on this page are owned by their respective owners. BeyondTrust is not a chartered bank or trust company, or
depository institution. It is not authorized to accept deposits or trust accounts and is not licensed or regulated by any state or federal banking authority.
TC: 8/27/2024
PRIVILEGE MANAGEMENT FOR WINDOWS
24.4 ADMINISTRATION GUIDE

l
"Drive matches" on page 107
l
"File hash (SHA-1) matches" on page 108
l
"Product name matches" on page 109
l
"Publisher matches" on page 109
l
"CLSID matches" on page 107
l
"App ID matches" on page 106
l
"COM display name matches" on page 107
l
"Product description matches" on page 109
l
"Product version matches" on page 109
l
"File version matches" on page 108
l
"Trusted ownership matches" on page 110
l
"Application requires elevation (UAC)" on page 106
l
"Source URL matches" on page 110
l
"Advanced options" on page 111
SALES: www.beyondtrust.com/contact
SUPPORT: www.beyondtrust.com/support
DOCUMENTATION: www.beyondtrust.com/docs
116
©2003-2024 BeyondTrust Corporation. All Rights Reserved. Other trademarks identified on this page are owned by their respective owners. BeyondTrust is not a chartered bank or trust company, or
depository institution. It is not authorized to accept deposits or trust accounts and is not licensed or regulated by any state or federal banking authority.
TC: 8/27/2024
PRIVILEGE MANAGEMENT FOR WINDOWS
24.4 ADMINISTRATION GUIDE

Insert control panel applets
1. Select the Application Group you want to add the application to.
2. Right-click and select Insert Application > Control Panel Applet.
3. You can leave the File or Folder Name blank to match on all applications of this type, type in a specific name or path manually, or
click Browse File, Browse Folder, or Template.
4. Enter a description, if required. By default, this is the name of the application you're inserting.
5. You need to configure the matching criteria for the control panel applet. You can configure:
l
File or Folder Name matches
l
Command Line matches
l
Drive matches
l
File Hash (SHA-1 Fingerprint) matches
l
File Hash (SHA-256) matches
l
Product Name matches
l
Publisher matches
l
Product Description matches
l
Product Version matches
l
File Version matches
l
Trusted Ownership matches
l
Application Requires Elevation (UAC)
l
Parent Process matches
l
Source URL matches
l
BeyondTrust Zone Identifier exists
6. You need to configure the Advanced Options for the application. You can configure:
l
Allow child processes will match this application definition
l
Force standard user rights on File Open/Save common dialogs
7. Click OK. The Application is added to the Application Group.
For more information, see the following:
l
"Insert applications from templates" on page 138
l
"File or folder name matches" on page 108
l
"Command line matches" on page 107
l
"Drive matches" on page 107
l
"File hash (SHA-1) matches" on page 108
l
"Product name matches" on page 109
l
"Publisher matches" on page 109
l
"Product description matches" on page 109
l
"Product version matches" on page 109
l
"File version matches" on page 108
SALES: www.beyondtrust.com/contact
SUPPORT: www.beyondtrust.com/support
DOCUMENTATION: www.beyondtrust.com/docs
117
©2003-2024 BeyondTrust Corporation. All Rights Reserved. Other trademarks identified on this page are owned by their respective owners. BeyondTrust is not a chartered bank or trust company, or
depository institution. It is not authorized to accept deposits or trust accounts and is not licensed or regulated by any state or federal banking authority.
TC: 8/27/2024
PRIVILEGE MANAGEMENT FOR WINDOWS
24.4 ADMINISTRATION GUIDE

l
"Trusted ownership matches" on page 110
l
"Application requires elevation (UAC)" on page 106
l
"Parent process matches" on page 108
l
"Source URL matches" on page 110
l
"BeyondTrust Zone Identifier exists" on page 107
l
"Advanced options" on page 111
SALES: www.beyondtrust.com/contact
SUPPORT: www.beyondtrust.com/support
DOCUMENTATION: www.beyondtrust.com/docs
118
©2003-2024 BeyondTrust Corporation. All Rights Reserved. Other trademarks identified on this page are owned by their respective owners. BeyondTrust is not a chartered bank or trust company, or
depository institution. It is not authorized to accept deposits or trust accounts and is not licensed or regulated by any state or federal banking authority.
TC: 8/27/2024
PRIVILEGE MANAGEMENT FOR WINDOWS
24.4 ADMINISTRATION GUIDE

Insert executables
1. Select the Application Group you want to add the application to.
2. Right-click and select Insert Application > Executable.
3. You can leave the File or Folder Name field blank to match on all applications of this type, type in a specific name or path
manually, or click Browse File, Browse Folder, or Template.
4. Enter a description, if required. By default, this is the name of the application you're inserting.
5. You need to configure the matching criteria for the executable. You can configure:
l
File or Folder Name matches
l
Command Line matches
l
Drive matches
l
File Hash (SHA-1 Fingerprint) matches
l
File Hash (SHA-256) matches
l
Product Name matches
l
Publisher matches
l
Product Description matches
l
Product Version matches
l
File Version matches
l
Trusted Ownership matches
l
Application Requires Elevation (UAC)
l
Parent Process matches
l
Source URL matches
l
BeyondTrust Zone Identifier exists
6. You need to configure the Advanced Options for the application. You can configure:
l
Allow child processes will match this application definition
l
Force standard user rights on File Open/Save common dialogs
7. ClickOK. The application is added to the Application Group.
For more information, see the following:
l
"Insert applications from templates" on page 138
l
"File or folder name matches" on page 108
l
"Command line matches" on page 107
l
"Drive matches" on page 107
l
"File hash (SHA-1) matches" on page 108
l
"Product name matches" on page 109
l
"Publisher matches" on page 109
l
"Product description matches" on page 109
l
"Product version matches" on page 109
l
"File version matches" on page 108
SALES: www.beyondtrust.com/contact
SUPPORT: www.beyondtrust.com/support
DOCUMENTATION: www.beyondtrust.com/docs
119
©2003-2024 BeyondTrust Corporation. All Rights Reserved. Other trademarks identified on this page are owned by their respective owners. BeyondTrust is not a chartered bank or trust company, or
depository institution. It is not authorized to accept deposits or trust accounts and is not licensed or regulated by any state or federal banking authority.
TC: 8/27/2024
PRIVILEGE MANAGEMENT FOR WINDOWS
24.4 ADMINISTRATION GUIDE

l
"Trusted ownership matches" on page 110
l
"Application requires elevation (UAC)" on page 106
l
"Parent process matches" on page 108
l
"Source URL matches" on page 110
l
"BeyondTrust Zone Identifier exists" on page 107
l
"Advanced options" on page 111
SALES: www.beyondtrust.com/contact
SUPPORT: www.beyondtrust.com/support
DOCUMENTATION: www.beyondtrust.com/docs
120
©2003-2024 BeyondTrust Corporation. All Rights Reserved. Other trademarks identified on this page are owned by their respective owners. BeyondTrust is not a chartered bank or trust company, or
depository institution. It is not authorized to accept deposits or trust accounts and is not licensed or regulated by any state or federal banking authority.
TC: 8/27/2024
PRIVILEGE MANAGEMENT FOR WINDOWS
24.4 ADMINISTRATION GUIDE

Insert installer packages
Endpoint Privilege Management for Windows allows standard users to install and uninstall Windows Installer packages that normally
require local admin rights. Endpoint Privilege Management for Windows supports the following package types:
l
Microsoft Software Installers (MSI)
l
Microsoft Software Updates (MSU)
l
Microsoft Software Patches (MSP)
When a Windows Installer package is added to an Application Group, and assigned to an Application Rule or On-Demand Application
Rule, the action is applied to both the installation of the file, and also uninstallation when using Add/Remove Programs or Programs and
Features.
Installer packages typically create child processes as part of the overall installation process. Therefore, we recommend when elevating
MSI, MSU, or MSP packages, that the advanced option Allow child processes will match this application definition be enabled.
Note: If you want to apply more granular control over installer packages and their child processes, use the Child Process
validation rule to allowlist or blocklist those processes that you want or do not want to inherit privileges from the parent
software installation.
1. Select the Application Group you want to add the installer package to.
2. Right-click and select Insert Application > Installer Package.
3. You can leave the File or Folder Name blank to match on all applications of this type, type in a specific name or path manually, or
click Browse File, Browse Folder or Template.
4. Enter a description, if required. By default, this is the name of the application you're inserting.
5. You need to configure the matching criteria for the installer package. You can configure:
l
File or Folder Name matches
l
Command Line matches
l
Drive matches
l
File Hash (SHA-1 Fingerprint) matches
l
File Hash (SHA-256) matches
l
Product Name matches
l
Publisher matches
l
Product Version matches
l
Product Code matches
l
Upgrade Code matches
l
Trusted Ownership matches
l
Application Requires Elevation (UAC)
l
Parent Process matches
l
Source URL matches
l
BeyondTrust Zone Identifier exists
SALES: www.beyondtrust.com/contact
SUPPORT: www.beyondtrust.com/support
DOCUMENTATION: www.beyondtrust.com/docs
121
©2003-2024 BeyondTrust Corporation. All Rights Reserved. Other trademarks identified on this page are owned by their respective owners. BeyondTrust is not a chartered bank or trust company, or
depository institution. It is not authorized to accept deposits or trust accounts and is not licensed or regulated by any state or federal banking authority.
TC: 8/27/2024
PRIVILEGE MANAGEMENT FOR WINDOWS
24.4 ADMINISTRATION GUIDE

6. You need to configure the Advanced Options for the application. You can configure:
l
Allow child processes will match this application definition
l
Force standard user rights on File Open/Save common dialogs
7. Click OK. The application is added to the Application Group.
For more information, see the following:
l
"Insert applications from templates" on page 138
l
"File or folder name matches" on page 108
l
"Command line matches" on page 107
l
"Drive matches" on page 107
l
"File hash (SHA-1) matches" on page 108
l
"Product name matches" on page 109
l
"Publisher matches" on page 109
l
"Product version matches" on page 109
l
"Product code matches" on page 109
l
"Upgrade code matches" on page 110
l
"Trusted ownership matches" on page 110
l
"Application requires elevation (UAC)" on page 106
l
"Parent process matches" on page 108
l
"Source URL matches" on page 110
l
"BeyondTrust Zone Identifier exists" on page 107
l
"Advanced options" on page 111
SALES: www.beyondtrust.com/contact
SUPPORT: www.beyondtrust.com/support
DOCUMENTATION: www.beyondtrust.com/docs
122
©2003-2024 BeyondTrust Corporation. All Rights Reserved. Other trademarks identified on this page are owned by their respective owners. BeyondTrust is not a chartered bank or trust company, or
depository institution. It is not authorized to accept deposits or trust accounts and is not licensed or regulated by any state or federal banking authority.
TC: 8/27/2024
PRIVILEGE MANAGEMENT FOR WINDOWS
24.4 ADMINISTRATION GUIDE

Insert Endpoint Privilege Management policy editor snap-ins
1. Select the Application Group you want to add the application to.
2. Right-click and select Insert Application > Management Console....
3. You can leave the File or Folder Name blank to match on all applications of this type, type in a specific name or path manually, or
click Browse File, Browse Folder, or Template.
4. Enter a description, if required. By default, this is the name of the application you're inserting.
5. You need to configure the matching criteria for the management console snap-ins. You can configure:
l
File or Folder Name matches
l
Command Line matches
l
Drive matches
l
File Hash (SHA-1 Fingerprint) matches
l
File Hash (SHA-256) matches
l
Publisher matches
l
Trusted Ownership matches
l
Application Requires Elevation (UAC)
l
Parent Process matches
l
Source URL matches
l
BeyondTrust Zone Identifier exists
For more information, see the following:
l
"Insert applications from templates" on page 138
l
"File or folder name matches" on page 108
l
"Command line matches" on page 107
l
"Drive matches" on page 107
l
"File hash (SHA-1) matches" on page 108
l
"Publisher matches" on page 109
l
"Trusted ownership matches" on page 110
l
"Application requires elevation (UAC)" on page 106
l
"Parent process matches" on page 108
l
"Source URL matches" on page 110
l
"BeyondTrust Zone Identifier exists" on page 107
l
"Advanced options" on page 111
6. You need to configure the Advanced Options for the application. You can configure:
l
Allow child processes will match this application definition
l
Force standard user rights on File Open/Save common dialogs
7. Click OK. The application is added to the Application Group.
SALES: www.beyondtrust.com/contact
SUPPORT: www.beyondtrust.com/support
DOCUMENTATION: www.beyondtrust.com/docs
123
©2003-2024 BeyondTrust Corporation. All Rights Reserved. Other trademarks identified on this page are owned by their respective owners. BeyondTrust is not a chartered bank or trust company, or
depository institution. It is not authorized to accept deposits or trust accounts and is not licensed or regulated by any state or federal banking authority.
TC: 8/27/2024
PRIVILEGE MANAGEMENT FOR WINDOWS
24.4 ADMINISTRATION GUIDE

Insert PowerShell scripts
Endpoint Privilege Management for Windows allows you to target specific PowerShell scripts and assign privileges to the script without
granting local administration rights to the user. Scripts can also be blocked if they are not authorized or allowed.
1. Select the Application Group you want to add the PowerShell script to.
2. Right-click and select Insert Application > PowerShell Script .
3. You can leave the File or Folder Name blank to match on all applications of this type, type in a specific name or path manually, or
click Browse File, Browse Folder or Template.
4. Enter a description, if required. By default, this is the name of the application you're inserting.
5. You need to configure the matching criteria for the PowerShell script. You can configure:
l
File or Folder Name matches
l
Command Line matches
l
Drive matches
l
File Hash (SHA-1 Fingerprint) matches
l
File Hash (SHA-256) matches
l
Publisher matches
l
Trusted Ownership matches
l
Parent Process matches
l
Source URL matches
l
BeyondTrust Zone Identifier exists
6. You need to configure the Advanced Options for the application. You can configure:
l
Allow child processes will match this application definition
l
Force standard user rights on File Open/Save common dialogs
7. Click OK. The application is added to the Application Group.
Note: A PowerShell script that contains only a single line is interpreted and matched as a PowerShell command, and does not
match a PowerShell script definition. We recommend PowerShell that your scripts contain at least two lines of commands to
ensure they are correctly matched as PowerShell scripts. This cannot be achieved by adding a comment to a script.
For more information, see the following:
l
"Insert applications from templates" on page 138
l
"File or folder name matches" on page 108
l
"Command line matches" on page 107
l
"Drive matches" on page 107
l
"File hash (SHA-1) matches" on page 108
l
"Publisher matches" on page 109
l
"Trusted ownership matches" on page 110
l
"Parent process matches" on page 108
SALES: www.beyondtrust.com/contact
SUPPORT: www.beyondtrust.com/support
DOCUMENTATION: www.beyondtrust.com/docs
124
©2003-2024 BeyondTrust Corporation. All Rights Reserved. Other trademarks identified on this page are owned by their respective owners. BeyondTrust is not a chartered bank or trust company, or
depository institution. It is not authorized to accept deposits or trust accounts and is not licensed or regulated by any state or federal banking authority.
TC: 8/27/2024
PRIVILEGE MANAGEMENT FOR WINDOWS
24.4 ADMINISTRATION GUIDE

l
"Source URL matches" on page 110
l
"BeyondTrust Zone Identifier exists" on page 107
l
"Advanced options" on page 111
Example PowerShell configurations
Example: Create New Configuration, Save to Local File
# Import both Defendpoint cmdlet module
Import-Module 'C:\Program Files\Avecto\Privilege Guard
Client\PowerShell\Avecto.Defendpoint.Cmdlets\Avecto.Defendpoint.Cmdlets.dll'
# Create a new variable containing a new Defendpoint Configuration Object
$PGConfig = New-Object Avecto.Defendpoint.Settings.Configuration
## Add License ##
# Create a new license object
$PGLicence = New-Object Avecto.Defendpoint.Settings.License
# Define license value
$PGLicence.Code = "5461E0D0-DE30-F282-7D67-A7C6-B011-2200"
# Add the License object to the local PG Config file
$PGConfig.Licenses.Add($PGLicence)
## Add Application Group ##
# Create an Application Group object
$AppGroup = new-object Avecto.Defendpoint.Settings.ApplicationGroup
# Define the value of the Application Group name
$AppGroup.name = "New App Group"
# Add the Application Group object to the local PG Config file
$PGConfig.ApplicationGroups.Add($AppGroup)
## Add Application ##
# Create an application object
$PGApplication = new-object Avecto.Defendpoint.Settings.Application $PGConfig
# Use the Get-DefendpointFileInformation to target Windows Calculator
$PGApplication = Get-DefendpointFileInformation -Path C:\windows\system32\calc.exe
# Add the application to the Application group
$PGConfig.ApplicationGroups[0].Applications.AddRange($PGApplication)
## Add Message ##
# Create a new message object
$PGMessage = New-Object Avecto.Defendpoint.Settings.message $PGConfig
#Define the message Name, Description and OK action and the type of message
$PGMessage.Name = "Elevation Prompt"
$PGMessage.Description = "An elevation message"
$PGMessage.OKAction = [Avecto.Defendpoint.Settings.Message+ActionType]::Proceed
$PGMessage.Notification = 0
# Define whether the message is displayed on a secure desktop
$PGMessage.ShowOnIsolatedDesktop = 1
# Define How the message contains
SALES: www.beyondtrust.com/contact
SUPPORT: www.beyondtrust.com/support
DOCUMENTATION: www.beyondtrust.com/docs
125
©2003-2024 BeyondTrust Corporation. All Rights Reserved. Other trademarks identified on this page are owned by their respective owners. BeyondTrust is not a chartered bank or trust company, or
depository institution. It is not authorized to accept deposits or trust accounts and is not licensed or regulated by any state or federal banking authority.
TC: 8/27/2024
PRIVILEGE MANAGEMENT FOR WINDOWS
24.4 ADMINISTRATION GUIDE

$PGMessage.HeaderType = [Avecto.Defendpoint.Settings.message+MsgHeaderType]::Default
$PGMessage.HideHeaderMessage = 0
$PGMessage.ShowLineOne = 1
$PGMessage.ShowLineTwo = 1
$PGMessage.ShowLineThree = 1
$PGMessage.ShowReferLink = 0
$PGMessage.ShowCancel = 1
$PGMessage.ShowCRInfoTip = 0
# Define whether a reason settings
$PGMessage.Reason = [Avecto.Defendpoint.Settings.message+ReasonType]::None
$PGMessage.CacheUserReasons = 0
# Define authorization settings
$PGMessage.PasswordCheck =
Avecto.Defendpoint.Settings.message+AuthenticationPolicy]::None
$PGMessage.AuthenticationType =
[Avecto.Defendpoint.Settings.message+MsgAuthenticationType]::Any
$PGMessage.RunAsAuthUser = 0
# Define Message strings
$PGMessage.MessageStrings.Caption = "This is an elevation message"
$PGMessage.MessageStrings.Header = "This is an elevation message header"
$PGMessage.MessageStrings.Body = "This is an elevation message body"
$PGMessage.MessageStrings.ReferURL = "http:\\www.bbc.co.uk"
$PGMessage.MessageStrings.ReferText = "This is an elevation message refer"
$PGMessage.MessageStrings.ProgramName = "This is a test Program Name"
$PGMessage.MessageStrings.ProgramPublisher = "This is a test Program Publisher"
$PGMessage.MessageStrings.PublisherUnknown = "This is a test Publisher Unknown"
$PGMessage.MessageStrings.ProgramPath = "This is a test Path"
$PGMessage.MessageStrings.ProgramPublisherNotVerifiedAppend = "This is a test
verification failure"
$PGMessage.MessageStrings.RequestReason = "This is a test Request Reason"
$PGMessage.MessageStrings.ReasonError = "This is a test Reason Error"
$PGMessage.MessageStrings.Username = "This is a test Username"
$PGMessage.MessageStrings.Password = "This is a test Password"
$PGMessage.MessageStrings.Domain = "This is a test Domain"
$PGMessage.MessageStrings.InvalidCredentials = "This is a test Invalid Creds"
$PGMessage.MessageStrings.OKButton = "OK"
$PGMessage.MessageStrings.CancelButton = "Cancel"
# Add the PG Message to the PG Configuration
$PGConfig.Messages.Add($PGMessage)
## Add custom Token ##
# Create a new custom Token object
$PGToken = New-Object Avecto.Defendpoint.Settings.Token
# Define the Custom Token settings
$PGToken.Name = "Custom Token 1"
$PGToken.Description = "Custom Token 1"
$PGToken.ClearInheritedPrivileges = 0
$PGToken.SetAdminOwner = 1
$PGToken.EnableAntiTamper = 0
$PGToken.IntegrityLevel = Avecto.Defendpoint.Settings.Token+IntegrityLevelType]::High
# Add the Custom Token to the PG Configuration
$PGConfig.Tokens.Add($PGToken)
SALES: www.beyondtrust.com/contact
SUPPORT: www.beyondtrust.com/support
DOCUMENTATION: www.beyondtrust.com/docs
126
©2003-2024 BeyondTrust Corporation. All Rights Reserved. Other trademarks identified on this page are owned by their respective owners. BeyondTrust is not a chartered bank or trust company, or
depository institution. It is not authorized to accept deposits or trust accounts and is not licensed or regulated by any state or federal banking authority.
TC: 8/27/2024
PRIVILEGE MANAGEMENT FOR WINDOWS
24.4 ADMINISTRATION GUIDE

## Add Policy ##
# Create new policy object
$PGPolicy = new-object Avecto.Defendpoint.Settings.Policy $PGConfig
# Define policy details
$PGPolicy.Disabled = 0
$PGPolicy.Name = "Policy 1"
$PGPolicy.Description = "Policy 1"
# Add the policy to the PG Configurations
$PGConfig.Policies.Add($PGPolicy)
## Add Policy Rule ##
# Create a new policy rule
$PGPolicyRule = New-Object Avecto.Defendpoint.Settings.ApplicationAssignment PGConfig
# Define the Application rule settings
$PGPolicyRule.ApplicationGroup = $PGConfig.ApplicationGroups[0]
$PGPolicyRule.BlockExecution = 0
$PGPolicyRule.ShowMessage = 1
$PGPolicyRule.Message = $PGConfig.Messages[0]
$PGPolicyRule.TokenType =
[Avecto.Defendpoint.Settings.Assignment+TokenTypeType]::AddAdmin
$PGPolicyRule.Audit = [Avecto.Defendpoint.Settings.Assignment+AuditType]::On
$PGPolicyRule.PrivilegeMonitoring =
[Avecto.Defendpoint.Settings.Assignment+AuditType]::Off
$PGPolicyRule.ForwardEPO = 0
$PGConfig.Policies[0].ApplicationAssignments.Add($PGPolicyRule)
## Set the Defendpoint configuration to a local file and prompt for user confirmation ##
Set-DefendpointSettings -SettingsObject $PGConfig -Localfile –Confirm
Example: Open Local User Policy, Modify then Save
# Import the Defendpoint cmdlet module
Import-Module 'C:\Program Files\Avecto\Privilege Guard
Client\PowerShell\Avecto.Defendpoint.Cmdlets\Avecto.Defendpoint.Cmdlets.dll'
# Get the local file policy Defendpoint Settings
$PGConfig = Get-DefendpointSettings -LocalFile
# Disable a policy
$PGPolicy = $PGConfig.Policies[0]
$PGPolicy.Disabled = 1
$PGConfig.Policies[0] = $PGPolicy
# Remove the PG License
$TargetLicense = $PGConfig.Licenses[0]
$PGConfig.Licenses.Remove($TargetLicense)
# Update an existing application definition to match on Filehash
$UpdateApp = $PGConfig.ApplicationGroups[0].Applications[0]
$UpdateApp.CheckFileHash = 1
$PGConfig.ApplicationGroups[0].Applications[0] = $UpdateApp
# Set the Defendpoint configuration to the local file policy and prompt for user
confirmation
Set-DefendpointSettings -SettingsObject $PGConfig -LocalFile -Confirm
SALES: www.beyondtrust.com/contact
SUPPORT: www.beyondtrust.com/support
DOCUMENTATION: www.beyondtrust.com/docs
127
©2003-2024 BeyondTrust Corporation. All Rights Reserved. Other trademarks identified on this page are owned by their respective owners. BeyondTrust is not a chartered bank or trust company, or
depository institution. It is not authorized to accept deposits or trust accounts and is not licensed or regulated by any state or federal banking authority.
TC: 8/27/2024
PRIVILEGE MANAGEMENT FOR WINDOWS
24.4 ADMINISTRATION GUIDE

Example: Open Local Configuration and Save to Domain GPO
# Import the Defendpoint cmdlet module
Import-Module 'C:\Program Files\Avecto\Privilege Guard
Client\PowerShell\Avecto.Defendpoint.Cmdlets\Avecto.Defendpoint.Cmdlets.dll'
# get the local Defendpoint configuration and set this to the domain computer policy,
ensuring the user is prompted to confirm the change
Get-DefendpointSettings -LocalFile | Set-DefendpointSettings -Domain -LDAP
"LDAP://My.Domain/CN={GUID},CN=Policies,CN=System,DC=My,DC=domain" –Confirm
SALES: www.beyondtrust.com/contact
SUPPORT: www.beyondtrust.com/support
DOCUMENTATION: www.beyondtrust.com/docs
128
©2003-2024 BeyondTrust Corporation. All Rights Reserved. Other trademarks identified on this page are owned by their respective owners. BeyondTrust is not a chartered bank or trust company, or
depository institution. It is not authorized to accept deposits or trust accounts and is not licensed or regulated by any state or federal banking authority.
TC: 8/27/2024
PRIVILEGE MANAGEMENT FOR WINDOWS
24.4 ADMINISTRATION GUIDE

Insert registry settings
1. Select the Application Group you want to add the application to.
2. Right-click and select Insert Application > Registry Settings .
3. You can leave the File or Folder Name blank to match on all applications of this type, type in a specific name or path manually, or
click Browse File, Browse Folder, or Template.
4. Enter a description, if required. By default, this is the name of the application you're inserting.
5. You need to configure the matching criteria for the application. You can configure:
l
File or Folder Name matches
l
Command Line matches
l
Drive matches
l
File Hash (SHA-1 Fingerprint) matches
l
File Hash (SHA-256) matches
l
Trusted Ownership matches
l
Application Requires Elevation (UAC)
l
Parent Process matches
l
Source URL matches
l
BeyondTrust Zone Identifier exists
6. You need to configure the Advanced Options for the application. You can configure:
l
Allow child processes will match this application definition
l
Force standard user rights on File Open/Save common dialogs
7. Click OK. The application is added to the Application Group.
For more information, see the following:
l
"Insert applications from templates" on page 138
l
"File or folder name matches" on page 108
l
"Command line matches" on page 107
l
"Drive matches" on page 107
l
"File hash (SHA-1) matches" on page 108
l
"Trusted ownership matches" on page 110
l
"Application requires elevation (UAC)" on page 106
l
"Parent process matches" on page 108
l
"Source URL matches" on page 110
l
"BeyondTrust Zone Identifier exists" on page 107
l
"Advanced options" on page 111
SALES: www.beyondtrust.com/contact
SUPPORT: www.beyondtrust.com/support
DOCUMENTATION: www.beyondtrust.com/docs
129
©2003-2024 BeyondTrust Corporation. All Rights Reserved. Other trademarks identified on this page are owned by their respective owners. BeyondTrust is not a chartered bank or trust company, or
depository institution. It is not authorized to accept deposits or trust accounts and is not licensed or regulated by any state or federal banking authority.
TC: 8/27/2024
PRIVILEGE MANAGEMENT FOR WINDOWS
24.4 ADMINISTRATION GUIDE

Insert remote PowerShell commands
Endpoint Privilege Management for Windows provides an additional level of granularity for management of remote PowerShell cmdlets to
ensure you can execute these commands without local administrator privileges on the target computer.
Get-service -Name *time* | restart-Service –PassThru
Endpoint Privilege Management for Windows allows you to target specific command strings and assign privileges to the command without
granting local admin rights to the user. Commands can also be blocked if they are not authorized or allowed. All remote PowerShell
commands are fully audited for visibility.
Note: We recommend allowlisting remote PowerShell commands with a general block rule to ensure unauthorized command
variations are blocked.
To allow standard users to connect to a remote computer with Windows Remote Management, or WinRM (a privilege normally reserved
for local administrator accounts), it is necessary to enable the General Rule Enable Windows Remote Management Connections. This
rule grants standard users, who match the Endpoint Privilege Management for Windows Workstyle, the ability to connect using WinRM,
and can be targeted to specific users, groups of users, or computers using Workstyle filters.
1. Select the Application Group you want to add the application to.
2. Right-click and select Insert Application > Remote PowerShell Command.
3. You can leave the Select reference script file blank to match on all applications of this files, type in a specific name or path
manually, or click Browse Cmdlets. This lists the PowerShell cmdlets for the version of PowerShell that you installed. If the
cmdlet you want to use is not listed because the target version of PowerShell is different, you can manually enter it.
4. Enter a description, if required. By default, this is the name of the application you're inserting.
5. You need to configure the matching criteria for the PowerShell command. You can configure:
l
Command Line matches: PowerShell removes double quotes from the Command Line before it is sent to the target.
Command Line definitions that include double quotes are not matched by Endpoint Privilege Management for Windows
for remote PowerShell commands.
6. Click OK. The application is added to the Application Group.
For more information, see the following:
l
"Command line matches" on page 107
l
On management of remote PowerShell scripts instead of a single cmdlet, "Insert remote PowerShell scripts" on page
131
Messaging
Endpoint Privilege Management for Windows end user messaging includes limited support for remote PowerShell sessions; block
messages can be assigned to Workstyle rules, which block remote PowerShell scripts and commands. If a block message is assigned to a
Workstyle, which blocks a script or command, then the body message text of an assigned message is displayed in the remote console
session as an error.
SALES: www.beyondtrust.com/contact
SUPPORT: www.beyondtrust.com/support
DOCUMENTATION: www.beyondtrust.com/docs
130
©2003-2024 BeyondTrust Corporation. All Rights Reserved. Other trademarks identified on this page are owned by their respective owners. BeyondTrust is not a chartered bank or trust company, or
depository institution. It is not authorized to accept deposits or trust accounts and is not licensed or regulated by any state or federal banking authority.
TC: 8/27/2024
PRIVILEGE MANAGEMENT FOR WINDOWS
24.4 ADMINISTRATION GUIDE

Insert remote PowerShell scripts
From within a remote PowerShell session, a script (.PS1) can be executed from a remote computer against a target computer. Normally
this requires local administrator privileges on the target computer, with little control over the scripts that are executed, or the actions that
the script performs.
Example:
Invoke-Command -ComputerName RemoteServer -FilePath c:\script.ps1 –Credential xxx
Endpoint Privilege Management for Windows allows you to target specific PowerShell scripts remotely and assign privileges to the script
without granting local administration rights to the user. Scripts can also be blocked if they are not authorized or allowed. All remote
PowerShell scripts executed are fully audited for visibility.
Note: You must use the Invoke-Command cmdlet to run remote PowerShell scripts. Endpoint Privilege Management for
Windows cannot target PowerShell scripts that are executed from a remote PowerShell session. Remote PowerShell scripts
must be matched by either a SHA-1 File Hash or a Publisher (if the script has been digitally signed).
Endpoint Privilege Management for Windows allows you to elevate individual PowerShell scripts and commands which are executed from
a remote machine. This eliminates the need for users to be logged on with an account which has local admin rights on the target computer.
Instead, elevated privileges are assigned to specific commands and scripts which are defined in Application Groups, and applied by a
Workstyle.
PowerShell scripts and commands can be allowed to block the use of unauthorized scripts, commands, and cmdlets. Granular auditing of
all remote PowerShell activity provides an accurate audit trail of remote activity.
PowerShell definitions for scripts and commands are treated as separate application types, which allows you to differentiate between
predefined scripts authorized by IT, and session-based ad hoc commands.
To allow standard users to connect to a remote computer with Windows Remote Management, or WinRM (a privilege normally reserved
for local administrator accounts), it is necessary to enable the General Rule Enable Windows Remote Management Connections. This
rule grants standard users who match the Endpoint Privilege Management for Windows Workstyle the ability to connect using WinRM,
and can be targeted to specific users, groups of users, or computers using Workstyle filters.
1. Select the Application Group you want to add the Remote PowerShell script to.
2. Right-click and select Insert Application > Remote PowerShell Script.
3. You can leave the Select reference script file blank to match on all applications of this files, type in a specific name or path
manually, or click Browse File.
4. Enter a description, if required. By default, this is the name of the application you're inserting.
5. You need to configure the matching criteria for the PowerShell script. You can configure:
l
File Hash (SHA-1 Fingerprint) matches
l
File Hash (SHA-256) matches
l
Publisher matches
6. Click OK. The application is added to the Application Group.
SALES: www.beyondtrust.com/contact
SUPPORT: www.beyondtrust.com/support
DOCUMENTATION: www.beyondtrust.com/docs
131
©2003-2024 BeyondTrust Corporation. All Rights Reserved. Other trademarks identified on this page are owned by their respective owners. BeyondTrust is not a chartered bank or trust company, or
depository institution. It is not authorized to accept deposits or trust accounts and is not licensed or regulated by any state or federal banking authority.
TC: 8/27/2024
PRIVILEGE MANAGEMENT FOR WINDOWS
24.4 ADMINISTRATION GUIDE

Note: Remote PowerShell scripts that contain only a single line are interpreted and matched as a Remote PowerShell
Command, and fail to match a PowerShell script definition. We therefore recommend PowerShell scripts contain at least two
lines of commands to ensure they are correctly matched as a script. This cannot be achieved by adding a comment to the
script.
For more information, see the following:
l
"File hash (SHA-1) matches" on page 108
l
"Publisher matches" on page 109
Messaging
Endpoint Privilege Management for Windows end user messaging includes limited support for remote PowerShell sessions; block
messages can be assigned to Workstyle rules which block remote PowerShell scripts and commands. If a block message is assigned to a
Workstyle which blocks a script or command, then the body message text of an assigned message is displayed in the remote console
session as an error.
SALES: www.beyondtrust.com/contact
SUPPORT: www.beyondtrust.com/support
DOCUMENTATION: www.beyondtrust.com/docs
132
©2003-2024 BeyondTrust Corporation. All Rights Reserved. Other trademarks identified on this page are owned by their respective owners. BeyondTrust is not a chartered bank or trust company, or
depository institution. It is not authorized to accept deposits or trust accounts and is not licensed or regulated by any state or federal banking authority.
TC: 8/27/2024
PRIVILEGE MANAGEMENT FOR WINDOWS
24.4 ADMINISTRATION GUIDE

Insert uninstaller (MSI or EXE)
Endpoint Privilege Management for Windows allows standard users to uninstall Microsoft Software Installers (MSIs) and executables
(EXEs) that would normally require local admin rights.
When the Uninstaller application type is added to an Application Group and assigned to an Application Rule in the Endpoint Privilege
Management for Windows policy, the end user can uninstall applications using Programs and Features or, in Windows 10, Apps and
Features.
The Uninstaller application type allows you to uninstall any EXE or MSI when it is associated with an Application Rule. As the process of
uninstalling a file requires admin rights, you need to ensure when you target the Application Group in the Application Rules you set the
access token to Add Full Admin.
Note: The Uninstaller type must be associated with an Application Rule. It does not apply to On-Demand Application Rules.
You cannot use the Uninstaller application type to uninstall the BeyondTrust Endpoint Privilege Management for Windows or the
BeyondTrust EPM Adapter using Endpoint Privilege Management for Windows, irrespective of your user rights. The anti-tamper
mechanism built into Endpoint Privilege Management for Windows prevents users from uninstalling Endpoint Privilege Management for
Windows, and an uninstall attempt fails with an error message.
Note: If a user attempts to use Endpoint Privilege Management for Windows to modify the installation of Endpoint Privilege
Management for Windows, for example, uninstall it, and they do not have an anti-tamper token applied, the default behavior
for the user is used. For example, if Windows UAC is configured, the associated Windows prompt is displayed.
If you want to allow users to uninstall either BeyondTrust's Endpoint Privilege Management for Windows or the BeyondTrust EPM
Adapter, you can do this by either:
l
Logging in as a full administrator
l
Elevating the Programs and Features control panel (or other controlling application) using a Custom access token that has anti-
tamper disabled.
For more information, see "Anti-tamper protection" on page 169.
Upgrade considerations
Any pre 5.7 Uninstaller Application Groups which match all uninstallations are automatically upgraded when loaded by the Policy Editor to
File or Folder Name matches *. These are honored by Endpoint Privilege Management for Windows.
Pre 5.7 versions of Endpoint Privilege Management for Windows no longer match the upgraded rules; the behavior is that of the native
operating system in these cases.
If you do not want the native operating system behavior for uninstallers, please ensure that your clients are upgraded to the latest version
before you deploy any policy which contains upgraded uninstaller rules.
1. Select the Application Group you want to add the uninstaller to.
2. Right-click and select Insert Application > Uninstaller.
3. Enter a description, if required. By default, this is the name of the application you're inserting.
4. Click Browse File to select an uninstaller file and populate the available matching criteria for the selected uninstaller file.
SALES: www.beyondtrust.com/contact
SUPPORT: www.beyondtrust.com/support
DOCUMENTATION: www.beyondtrust.com/docs
133
©2003-2024 BeyondTrust Corporation. All Rights Reserved. Other trademarks identified on this page are owned by their respective owners. BeyondTrust is not a chartered bank or trust company, or
depository institution. It is not authorized to accept deposits or trust accounts and is not licensed or regulated by any state or federal banking authority.
TC: 8/27/2024
PRIVILEGE MANAGEMENT FOR WINDOWS
24.4 ADMINISTRATION GUIDE

5. Configure the matching criteria for the executable. You can configure:
l
File or Folder Name matches
l
Product Name matches
l
Publisher matches
l
Upgrade Code matches
For more information, see the following:
l
"File or folder name matches" on page 108
l
"Product name matches" on page 109
l
"Publisher matches" on page 109
l
"Upgrade code matches" on page 110
SALES: www.beyondtrust.com/contact
SUPPORT: www.beyondtrust.com/support
DOCUMENTATION: www.beyondtrust.com/docs
134
©2003-2024 BeyondTrust Corporation. All Rights Reserved. Other trademarks identified on this page are owned by their respective owners. BeyondTrust is not a chartered bank or trust company, or
depository institution. It is not authorized to accept deposits or trust accounts and is not licensed or regulated by any state or federal banking authority.
TC: 8/27/2024
PRIVILEGE MANAGEMENT FOR WINDOWS
24.4 ADMINISTRATION GUIDE

Insert Windows services
The Windows service type permits individual service operations to be allowed, so that standard users can start, stop, and configure
services without the need to elevate tools such as the Service Control Manager.
1. Select the Application Group you want to add the application to.
2. Right-click and select Insert Application > Window Service.
3. You can leave the Service Name blank to match on all applications of this type, type in a specific name or path manually, or click
Browse Services to browse the services on the local computer.
4. Enter a description, if required. By default, this is the name of the application you're inserting.
5. You need to configure the matching criteria for the windows services. You can configure:
l
File or Folder Name matches
l
Command Line matches
l
Drive matches
l
File Hash (SHA-1 Fingerprint) matches
l
File Hash (SHA-256) matches
l
Product Name matches
l
Publisher matches
l
Product Description matches
l
Product Version matches
l
File Version matches
l
Service Name matches
l
Service Display Name matches
l
Service Actions match
For more information, see the following:
l
"File or folder name matches" on page 108
l
"Command line matches" on page 107
l
"Drive matches" on page 107
l
"File hash (SHA-1) matches" on page 108
l
"File hash (SHA-256) matches" on page 108
l
"Product name matches" on page 109
l
"Publisher matches" on page 109
l
"Product description matches" on page 109
l
"Product version matches" on page 109
l
"File version matches" on page 108
l
"Service name matches" on page 110
l
"Service display name matches" on page 110
l
"Service actions matches" on page 109
6. Click OK. The application is added to the Application Group.
SALES: www.beyondtrust.com/contact
SUPPORT: www.beyondtrust.com/support
DOCUMENTATION: www.beyondtrust.com/docs
135
©2003-2024 BeyondTrust Corporation. All Rights Reserved. Other trademarks identified on this page are owned by their respective owners. BeyondTrust is not a chartered bank or trust company, or
depository institution. It is not authorized to accept deposits or trust accounts and is not licensed or regulated by any state or federal banking authority.
TC: 8/27/2024
PRIVILEGE MANAGEMENT FOR WINDOWS
24.4 ADMINISTRATION GUIDE

Insert Windows Store applications
The Windows Store application type can be used to elevate or block Windows Store applications.
Keep the following in mind when elevating Windows Store apps:
l
Elevation of Store apps is only supported for Application Rules, not On-Demand Application Rules.
l
Only Centennial Windows apps can be elevated. In the Microsoft
Store, identity a Centennial app by checking for the following
permission: Uses all system resources.
Note: When you use Endpoint Privilege Management for Windows to block a Windows Store application from launching and
assign a block message to the Application Rule, the native Windows block message overrides the Endpoint Privilege
Management for Windows block message, meaning it is not displayed. Event number 116 is still triggered if you have events
set up in the Application Rule.
1. Select the Application Group you want to add the application to.
2. Right-click and select Insert Application > Windows Store Application.
3. Select the app to match on and click Next. You can specify an app by typing in a name or path manually, or by clicking Browse
File, Browse Folder, or Template. Alternatively, you can leave the text box containing the File or Folder name blank to match on
all applications of this type.
4. Enter a description, if required, and then click Next. By default, this is the name of the application you're inserting.
5. Select the Application Definition criteria you want to use for this app. The default is Package name, and you can also specify
Publisher, Application Version, or Drive.
6. Select any Child Process options required for the app.
7. To add the application to the Application Group, click Finish.
For more information, see "Insert applications from templates" on page 138.
SALES: www.beyondtrust.com/contact
SUPPORT: www.beyondtrust.com/support
DOCUMENTATION: www.beyondtrust.com/docs
136
©2003-2024 BeyondTrust Corporation. All Rights Reserved. Other trademarks identified on this page are owned by their respective owners. BeyondTrust is not a chartered bank or trust company, or
depository institution. It is not authorized to accept deposits or trust accounts and is not licensed or regulated by any state or federal banking authority.
TC: 8/27/2024
PRIVILEGE MANAGEMENT FOR WINDOWS
24.4 ADMINISTRATION GUIDE

Insert Windows scripts
1. Select the Application Group you want to add the application to.
2. Right-click and select Insert Application > Windows Script.
3. You can leave the File or Folder Name blank to match on all applications of this files, type in a specific name or path manually, or
click Browse File, Browse Folder, or Template.
4. Enter a description, if required. By default, this is the name of the application you're inserting.
5. You need to configure the matching criteria for the executable. You can configure:
l
File or Folder Name matches
l
Command Line matches
l
Drive matches
l
File Hash (SHA-1 Fingerprint) matches
l
File Hash (SHA-256) matches
l
Publisher matches
l
Trusted Ownership matches
l
Application Requires Elevation (UAC)
l
Parent Process matches
l
Source URL matches
l
BeyondTrust Zone Identifier exists
6. You need to configure the Advanced Options for the application. You can configure:
l
Allow child processes will match this application definition
l
Force standard user rights on File Open/Save common dialogs
7. Click OK. The application is added to the Application Group.
For more information, see the following:
l
"Insert applications from templates" on page 138
l
"File or folder name matches" on page 108
l
"Command line matches" on page 107
l
"Drive matches" on page 107
l
"File hash (SHA-1) matches" on page 108
l
"Publisher matches" on page 109
l
"Trusted ownership matches" on page 110
l
"Application requires elevation (UAC)" on page 106
l
"Parent process matches" on page 108
l
"Source URL matches" on page 110
l
"BeyondTrust Zone Identifier exists" on page 107
l
"Advanced options" on page 111
SALES: www.beyondtrust.com/contact
SUPPORT: www.beyondtrust.com/support
DOCUMENTATION: www.beyondtrust.com/docs
137
©2003-2024 BeyondTrust Corporation. All Rights Reserved. Other trademarks identified on this page are owned by their respective owners. BeyondTrust is not a chartered bank or trust company, or
depository institution. It is not authorized to accept deposits or trust accounts and is not licensed or regulated by any state or federal banking authority.
TC: 8/27/2024
PRIVILEGE MANAGEMENT FOR WINDOWS
24.4 ADMINISTRATION GUIDE

Insert applications from templates
Application templates provide a simple way to pick from a list of known applications. A standard set of templates is provided that covers
basic administrative tasks for all supported operating systems, common ActiveX controls, and software updaters.
There are two ways you can insert applications into Application Groups. If you want to insert multiple applications from the BeyondTrust
templates, you need to add the applications from the template menu.
If you use the template functionality, once you select your application type, the list from BeyondTrust is filtered to just those applications
and you can only add one at a time.
Use the Add Apps to Template menu
1. Select the Application Group you want to add the application to.
2. Right-click and select Insert Applications > Application Templates. Choose one or more applications to add to the Application
Group. You can select multiple rows using standard Windows functionality.
3. Click Save to add the applications or click Finish to exit without adding any applications.
Use the Template option in matching criteria
1. Select the Application Group you want to add the application to.
2. Right-click and select Insert Applications > Application Templates.
3. Click Template next to the Description and choose the application you selected to add to the Application Group.
4. Select the applications you want to add to the Application Group. Each application is highlighted once selected. Use the filter
options Filter Text or Type, at the top of the page to refine the number of applications displayed.
5. Select Save.
You can click on an application description to modify the settings of the application definitions and/or the Advanced Options.
Windows application templates
Endpoint Privilege Management for Windows ships with some standard application templates to simplify the definition of applications that
are part of the operating system, common ActiveX controls, and software updaters. The standard application templates are split into
categories:
l
Browsers
l
COM Classes for 3rd Party Software
l
Com Classes for file, folder and drive operations
l
COM Classes for general Windows operations
l
COM Classes for security features and configurations
l
COM Classes for software installation, uninstallation, and updates
l
COM Classes for network device settings, sharing options, and configurations
l
Common ActiveX controls
l
Content Handler Untrusted
l
Content Handlers
SALES: www.beyondtrust.com/contact
SUPPORT: www.beyondtrust.com/support
DOCUMENTATION: www.beyondtrust.com/docs
138
©2003-2024 BeyondTrust Corporation. All Rights Reserved. Other trademarks identified on this page are owned by their respective owners. BeyondTrust is not a chartered bank or trust company, or
depository institution. It is not authorized to accept deposits or trust accounts and is not licensed or regulated by any state or federal banking authority.
TC: 8/27/2024
PRIVILEGE MANAGEMENT FOR WINDOWS
24.4 ADMINISTRATION GUIDE

l
Installers for common printer driver manufacturers
l
Software updaters
l
Tools and utilities for administrators and developers
l
Windows 10 Default Apps
l
Windows 7/8 and Windows Server 2008 R2 / 2012 / 2012 R2
l
Windows 8.0 Default Apps
l
Windows 8.1 Default Apps
l
Windows Server 2008 R2
Each category then has a list of applications for that category. Picking an application causes the application or ActiveX control dialog
boxes to be prepopulated with the appropriate information.
SALES: www.beyondtrust.com/contact
SUPPORT: www.beyondtrust.com/support
DOCUMENTATION: www.beyondtrust.com/docs
139
©2003-2024 BeyondTrust Corporation. All Rights Reserved. Other trademarks identified on this page are owned by their respective owners. BeyondTrust is not a chartered bank or trust company, or
depository institution. It is not authorized to accept deposits or trust accounts and is not licensed or regulated by any state or federal banking authority.
TC: 8/27/2024
PRIVILEGE MANAGEMENT FOR WINDOWS
24.4 ADMINISTRATION GUIDE

Insert applications from running processes
1. Select the relevant Application Group.
2. Right-click the applications list in the details pane to access the context menu.
3. Select Insert Application and then select the Running Process from the sub-menu.
4. The Running Process dialog box appears.
5. Select Show processes from all users if you want to select a process from another user’s session.
6. Select the relevant process from the list. Click OK.
SALES: www.beyondtrust.com/contact
SUPPORT: www.beyondtrust.com/support
DOCUMENTATION: www.beyondtrust.com/docs
140
©2003-2024 BeyondTrust Corporation. All Rights Reserved. Other trademarks identified on this page are owned by their respective owners. BeyondTrust is not a chartered bank or trust company, or
depository institution. It is not authorized to accept deposits or trust accounts and is not licensed or regulated by any state or federal banking authority.
TC: 8/27/2024
PRIVILEGE MANAGEMENT FOR WINDOWS
24.4 ADMINISTRATION GUIDE

Insert applications from events
The Event Import wizard allows you to search from within any Endpoint Privilege Management for Windows event source, and create
application definitions based on the properties collected by an audit event. The wizard provides a simple and convenient way to find
specific applications based on any or all of the following search criteria:
l
Event Source: Where the event is collected (Local or remote event log, Forwarded event log, or Enterprise reporting Pack
database).
l
Event Type: The type of event you are interested in. Choose Any application or choose from one of the following:
o
Applications that performed privileged operations
n
Event number 100
o
Applications that triggered UAC
n
If the UACTriggered flag on the event was set to 1
o
Applications that were blocked
n
Event number 116
o
Applications that were launched by the Shell Menu
n
Event numbers 101, 104, 107, 110, 114, and 119
l
Timeframe: The period of time to search for applications. Choose from one of the following:
o
From: Pick a range starting from a predefined time period. From here you can also choose Anytime, to include all events.
o
Specific period: Pick an optional From and To date to include events collected during that period of time.
Once the search criteria is entered, the wizard returns a list of unique applications that were audited, matching the criteria you specified.
From here you can browse the list (which is grouped by Publisher), or to find a particular application you can type into the Search
publisher\Description field to instantly filter the list based on the text you enter.
Applications that are already members of the Application Group are highlighted and displayed with a check mark.
After you find an application or applications, select (or multi-select by holding down the Control or Shift key while selecting) and then click
OK to create new application definitions from your selection.
Once the definitions are created, you can edit the definition and modify the matching criteria. All matching criteria are prepopulated with
values collected from the application.
Note: A unique application is based on the product description of the application. So if two or more audited applications share
the same product description, they are displayed as a single application.
SALES: www.beyondtrust.com/contact
SUPPORT: www.beyondtrust.com/support
DOCUMENTATION: www.beyondtrust.com/docs
141
©2003-2024 BeyondTrust Corporation. All Rights Reserved. Other trademarks identified on this page are owned by their respective owners. BeyondTrust is not a chartered bank or trust company, or
depository institution. It is not authorized to accept deposits or trust accounts and is not licensed or regulated by any state or federal banking authority.
TC: 8/27/2024
PRIVILEGE MANAGEMENT FOR WINDOWS
24.4 ADMINISTRATION GUIDE

Content groups
Content control allows you to control the accessibility of privileged content. Content Groups provide a means of targeting specific types of
content, based on file or folder, drive, or controlling process. Rules determining the behavior for that content are applied to each Content
Group in a Workstyle.
There are two main use cases for applying content control:
1. Allow Modification: To allow standard users to modify privileged content, without having to assign admin rights to either the user,
or the application used to modify the content.
Content Groups can be added to Content Rules where the content can be assigned admin rights. When this is done, any user who
receives the Workstyle can modify matching content without requiring an administrator account.
2. Blocked Access: To block access to content or directories.
Content Groups can be added to Content Rules where the ability to open the content can be controlled with a Block action. When
this is done, any user who can normally open and read the content is blocked from opening the content.
Sample file types that can be used in Content Groups:
l
Text documents (files with no extension that are basically just text documents): .txt, .log, .docx
l
Scripts: .ps1, .bat, .cmd
IMPORTANT!
Content Groups cannot modify .exe files.
The following sections explain how to create Content Groups, including content definitions, and how to assign groups to Content Rules to
apply the specific content Control Rules that meet your requirements.
Create content groups
IMPORTANT!
We recommend adding a controlling process for each content definition. If a controlling process is not added to a content definition,
then performance issues can occur on computers the policy is applied to.
To create a Content Group:
1. Navigate to Endpoint Privilege Management Settings > Windows > Content Groups.
2. Right-click and select New Content Group. This creates a Content Group with the default name Content Group x, where x
increments numerically.
3. Right-click on the new Content Group and select Rename. Enter the new name you want and press Return to save your new
Content Group.
SALES: www.beyondtrust.com/contact
SUPPORT: www.beyondtrust.com/support
DOCUMENTATION: www.beyondtrust.com/docs
142
©2003-2024 BeyondTrust Corporation. All Rights Reserved. Other trademarks identified on this page are owned by their respective owners. BeyondTrust is not a chartered bank or trust company, or
depository institution. It is not authorized to accept deposits or trust accounts and is not licensed or regulated by any state or federal banking authority.
TC: 8/27/2024
PRIVILEGE MANAGEMENT FOR WINDOWS
24.4 ADMINISTRATION GUIDE

Duplicate content groups
You can duplicate a Content Group if you need a new Content Group that contains the same content as an existing Content Group. You
can edit a duplicated Content Group independently of the Content Group it was duplicated from.
To duplicate a Content Group:
1. Navigate to Endpoint Privilege Management Settings > Windows > Content Groups.
2. Right-click on the Content Group you want to duplicate and select Copy.
3. Select the Content Groups node, right-click, and select Paste. This makes a new copy of the Content Group and all the Content
rules it contains.
A new duplicate Content Group with an incremental number in brackets appended to the name is created that you can add content to.
Target content definitions
The Content dialog box provides various Content Definitions. Endpoint Privilege Management for Windows must match every definition
you configure before it triggers a match (the rules are combined with a logical AND). The following definitions are available:
File or folder name
Validate applications by matching the file or folder name. You can choose to match based on the following options (wildcard characters ?
and * may be used):
l
Exact Match
l
Starts With
l
Ends With
l
Contains
l
Regular Expressions
Although you can enter relative filenames, we strongly recommend that you enter the full path to a file or the COM server. Environment
variables are also supported.
We do not recommend using the File or Folder Name does NOT Match definition in isolation for executable types, as it results in
matching every application, including hosted types such as Installer packages, scripts, batch files, registry files, management consoles,
and Control Panel applets.
When creating blocking rules for applications or content, and using the File or Folder Name definition as matching criteria against paths
which exist on network shares, use the Universal Naming Convention (UNC) network path rather than a mapped drive letter.
For more information, see "Regular expressions syntax" on page 186.
Drive
Verify the type of disk drive where the file is located. Choose from one of the following options:
l
Fixed disk: Any drive that is identified as being an internal hard disk.
l
Network: Any drive that is identified as a network share.
l
RAM disk: Any drive that is identified as a RAM drive.
SALES: www.beyondtrust.com/contact
SUPPORT: www.beyondtrust.com/support
DOCUMENTATION: www.beyondtrust.com/docs
143
©2003-2024 BeyondTrust Corporation. All Rights Reserved. Other trademarks identified on this page are owned by their respective owners. BeyondTrust is not a chartered bank or trust company, or
depository institution. It is not authorized to accept deposits or trust accounts and is not licensed or regulated by any state or federal banking authority.
TC: 8/27/2024
PRIVILEGE MANAGEMENT FOR WINDOWS
24.4 ADMINISTRATION GUIDE
l
Any Removable Drive or Media: If you want to target any removable drive or media, but are unsure of the specific drive type, this
option will match any of the removable media types below. Alternatively, if you want to target a specific type, choose one of the
following removable media types:
o
Removable Media: Any drive that is identified as removable media.
o
USB: Any drive that is identified as a disk connected via USB.
o
CD/DVD: Any drive that is identified as a CD or DVD drive.
o
eSATA Drive: Any drive that is identified as a disk connected via eSATA.
Controlling process
Use this definition to target content based on the process (application) used to open the content file. The application must have been
added to an Application Group. You can also define whether any parent of the application matches the definition.
For more information, see "Regular expressions syntax" on page 186.
Insert content
To insert a content rule:
1. Select the Content Group you want to add the content control to.
2. Right-click and select Insert Content.
3. Enter a description, if required.
4. You need to configure the matching criteria for the executable and then click Next. You can configure:
l
File or Folder Name
l
Drive
l
Controlling Process
5. Click Finish. The content is added to the Content Group.
SALES: www.beyondtrust.com/contact
SUPPORT: www.beyondtrust.com/support
DOCUMENTATION: www.beyondtrust.com/docs
144
©2003-2024 BeyondTrust Corporation. All Rights Reserved. Other trademarks identified on this page are owned by their respective owners. BeyondTrust is not a chartered bank or trust company, or
depository institution. It is not authorized to accept deposits or trust accounts and is not licensed or regulated by any state or federal banking authority.
TC: 8/27/2024
PRIVILEGE MANAGEMENT FOR WINDOWS
24.4 ADMINISTRATION GUIDE

Messages
You can define any number of end user messages and notifications. Messages and notifications are displayed when a user’s action
triggers a rule (application/on-demand or content rule). Rules can be triggered by an application launch or block, or when content is
modified.
Messages provide an effective way of alerting the user before an action is performed. For example, before elevating an application or
allowing content to be modified, or advising that an application launch or content modification is blocked.
Messages give the user information about the application or content, the action taken, and can be used to request information from the
user. Messages also allow authorization and authentication controls to be enforced before access to an application is granted.
Messages are customizable with visual styles, corporate branding, and display text, so you are offered a familiar and contextual
experience. Messages are assigned to Application Rules. A message can display different properties, depending on which of these
targets it is assigned to. To view the differences, a Preview option allows you to toggle between the Application Preview and the
Content Preview. This is available from the Preview dropdown menu, located in the top-right corner of the details pane.
Once defined, a message may be assigned to an individual rule in the Workstyles Rules tab by editing the rule. Depending on the type of
Workstyle you’ve created, Endpoint Privilege Management for Windows may auto-generate certain messages for you to use.
Types of messages
You can choose from Messages or Notifications. Messages take focus when they're displayed to the user. Message notifications appear
on the user's task bar.
Message notification text is fully customizable, so that users are given concise and relevant information about the action performed. You
can edit the strings in the Message Text tab.
Message notifications are displayed either as a systray bubble (Windows 7), or as a toast notification (Windows 8 and higher).
Note: Message notifications are not supported for SYSTEM processes.
For more information, see "Message text" on page 165.
SALES: www.beyondtrust.com/contact
SUPPORT: www.beyondtrust.com/support
DOCUMENTATION: www.beyondtrust.com/docs
145
©2003-2024 BeyondTrust Corporation. All Rights Reserved. Other trademarks identified on this page are owned by their respective owners. BeyondTrust is not a chartered bank or trust company, or
depository institution. It is not authorized to accept deposits or trust accounts and is not licensed or regulated by any state or federal banking authority.
TC: 8/27/2024
PRIVILEGE MANAGEMENT FOR WINDOWS
24.4 ADMINISTRATION GUIDE

Create messages
You can create two types of messages:
l
Message or Notification
l
ActiveX Message
Message or notification
To create a message or notification:
1. Navigate to Endpoint Privilege Management Settings > Windows > Messages.
2. Right-click and click New Message.
3. Select a message template from either the Use a Message Box template or Use a Notification (balloon) dropdown menus and
click Next.
Note: Messages can be interactive (the user may be asked to input information before an action occurs). Notifications are
descriptive (displaying information about an action that has occurred).
4. Customize the message (more advanced message configuration can be performed after the message is created).
5. Click Finish.
A new message is created. You can further refine the message by selecting it and editing the Design and the Text options available
beneath each message.
ActiveX message
When Endpoint Privilege Management for Windows is configured to elevate the installation of an ActiveX control, a built-in progress dialog
box of the installation process appears. You can create and configure this message in the Messages node.
SALES: www.beyondtrust.com/contact
SUPPORT: www.beyondtrust.com/support
DOCUMENTATION: www.beyondtrust.com/docs
146
©2003-2024 BeyondTrust Corporation. All Rights Reserved. Other trademarks identified on this page are owned by their respective owners. BeyondTrust is not a chartered bank or trust company, or
depository institution. It is not authorized to accept deposits or trust accounts and is not licensed or regulated by any state or federal banking authority.
TC: 8/27/2024
PRIVILEGE MANAGEMENT FOR WINDOWS
24.4 ADMINISTRATION GUIDE

1. Navigate to Endpoint Privilege Management Settings > Windows > Messages.
2. Right-click and click Manage ActiveX Message text.
l
Title: The title text of the progress dialog box.
l
Download Message: The text displayed during the download phase.
l
Install Message: The text displayed during the installation phase.
The display text can be configured for multiple languages. Endpoint Privilege Management for Windows detects the regional language of
the end user, and if ActiveX strings in that language are configured, the correct translation is displayed.
Note: If language settings for the region of the end user are not configured, then the default language text is displayed. To
change the default language, select the desired language and click Set Default.
SALES: www.beyondtrust.com/contact
SUPPORT: www.beyondtrust.com/support
DOCUMENTATION: www.beyondtrust.com/docs
147
©2003-2024 BeyondTrust Corporation. All Rights Reserved. Other trademarks identified on this page are owned by their respective owners. BeyondTrust is not a chartered bank or trust company, or
depository institution. It is not authorized to accept deposits or trust accounts and is not licensed or regulated by any state or federal banking authority.
TC: 8/27/2024
PRIVILEGE MANAGEMENT FOR WINDOWS
24.4 ADMINISTRATION GUIDE

Set ActiveX message text
When Endpoint Privilege Management for Windows is configured to elevate the installation of an ActiveX control, a built-in progress dialog
box of the installation process appears. You can create and configure this message in the Messages node.
Right-click on the Messages node and select Manage ActiveX Message text.
l
Title: The title text of the progress dialog box.
l
Download Message: The text displayed during the download phase.
l
Install Message: The text displayed during the installation phase.
l
Cancel Button: The text displayed for the button that cancels the ActiveX installation.
The display text can be configured for multiple languages. Endpoint Privilege Management for Windows detects the regional language of
the end user, and if ActiveX strings in that language are configured, the correct translation is displayed.
Note: If language settings for the region of the end user are not configured, then the default language text is displayed. To
change the default language, select the desired language and click Set Default.
SALES: www.beyondtrust.com/contact
SUPPORT: www.beyondtrust.com/support
DOCUMENTATION: www.beyondtrust.com/docs
148
©2003-2024 BeyondTrust Corporation. All Rights Reserved. Other trademarks identified on this page are owned by their respective owners. BeyondTrust is not a chartered bank or trust company, or
depository institution. It is not authorized to accept deposits or trust accounts and is not licensed or regulated by any state or federal banking authority.
TC: 8/27/2024
PRIVILEGE MANAGEMENT FOR WINDOWS
24.4 ADMINISTRATION GUIDE

Multifactor authentication using an identity provider
Multifactor authentication (MFA) using an identity provider can be configured for messages in Endpoint Privilege Management. Identity
providers supported by Endpoint Privilege Management include those using OpenID Connect (OIDC) and RADIUS protocols, and
BeyondTrust should be setup as a Native or Desktop app within your Identity Provider configuration.
The RADIUS protocol is supported on Windows OS only.
In Endpoint Privilege Management, messages can be designed with a combination of authentication and authorization settings.
l
Authentication: MFA with an identity provider, user credential, and smart card
l
Authorization: Challenge / response authorization
Authentication and authorization groupings in Endpoint Privilege Management
Groupings support and/or logic:
l
Groupings by authentication: Setting more than one way the end user can authenticate, which can include the typical
authentication methods (user credential, designated user, and smart card) and MFA with an identity provider.
In the Message Designer, pair Step 1a - User Authentication with Step 1b - Multifactor Authentication. This can be and/or
configuration.
l
Groupings by authentication and authorization: Authentication methods paired with authorization always use or logic.
Authorization applies an additional challenge / response layer to the end user accessing an application. The challenge / response
provides an alternative to MFA authentication if that method is unavailable (for example, the browser is unavailable or the end user
phone is not available).
Here are some grouping scenarios:
l
MFA and Designated User or challenge / response: The end user must successfully respond to all authentication prompts to
access an application. Challenge / response is optional.
l
MFA or Designated User or challenge / response: The end user must successfully enter either MFA or Designated User
credentials. Challenge / response is optional.
l
MFA and User authentication or challenge / response: The end user must successfully respond to all authentication prompts to
access an application. Challenge / response is optional. When this authentication is combined, the Step 1c - Authentication
Grouping is automatically set to and logic.
l
MFA or None as the Authentication Type or challenge / response: The end user must access the application through the identity
provider or challenge / response method.
SALES: www.beyondtrust.com/contact
SUPPORT: www.beyondtrust.com/support
DOCUMENTATION: www.beyondtrust.com/docs
149
©2003-2024 BeyondTrust Corporation. All Rights Reserved. Other trademarks identified on this page are owned by their respective owners. BeyondTrust is not a chartered bank or trust company, or
depository institution. It is not authorized to accept deposits or trust accounts and is not licensed or regulated by any state or federal banking authority.
TC: 8/27/2024
PRIVILEGE MANAGEMENT FOR WINDOWS
24.4 ADMINISTRATION GUIDE

Workflow
The workflow depends on the combination of settings configured on the
Message Design page. In the following screen capture, the authentication
methods are joined with and logic.
The end user must click the link which opens the default browser to the
identity provider logon page. The end user must successfully authenticate
with the identity provider, then return to the Confirm Elevation dialog box
to enter the user credential.
Alternatively, the end user enters the response code to gain access.
Add an identity provider
You can configure the identity provider in the following places:
l
Endpoint Privilege Management Settings node
l
Messages node
Identity provider configuration is a global setting and applies to all Windows messages.
To add the identity provider:
1. Expand the Windows node or OS X node.
2. Right-click Messages > Set Idp Authentication.
3. Click the relevant tab for the authentication protocol required by your Identity Provider (OIDC or RADIUS).
4. Enter the identity provider details:
SALES: www.beyondtrust.com/contact
SUPPORT: www.beyondtrust.com/support
DOCUMENTATION: www.beyondtrust.com/docs
150
©2003-2024 BeyondTrust Corporation. All Rights Reserved. Other trademarks identified on this page are owned by their respective owners. BeyondTrust is not a chartered bank or trust company, or
depository institution. It is not authorized to accept deposits or trust accounts and is not licensed or regulated by any state or federal banking authority.
TC: 8/27/2024
PRIVILEGE MANAGEMENT FOR WINDOWS
24.4 ADMINISTRATION GUIDE

l
OIDC Settings
o
Authority URI: The address of your identity provider.
o
Client ID: Must match the same value configured for your
identity provider's BeyondTrust application.
o
Redirect URI: Must match the same value configured for
your identity provider's BeyondTrust application. The format
is http://127.0.0.1:port_number, where port_number is an
open port on your network. The port_number is only needed
if required by your identity provider.
l
RADIUS Settings
o
Authentication Mechanism: The authentication type that
is required by your RADIUS server. Supported
authentication mechanisms are MS-CHAPV2 or PAP.
o
Host: The hostname of your RADIUS server.
o
Port: The port number for connecting to your RADIUS
server.
o
Shared Secret: The secret key required by your RADIUS
server.
You can also configure the identity provider on the Message Design page.
For more information, see "Message design" on page 156.
Add the Endpoint Privilege Management application to Microsoft, Okta, or Ping
Identity
The procedures in this section are specific to OIDC implementations.
Create an app registration in Microsoft Entra ID
Login to your Azure portal https://portal.azure.com.
Note: Microsoft can change functionality at any time. The screen captures in the following procedure were accurate at the time
of writing.
1. Navigate to your Microsoft Entra ID.
2. Click App registrations.
3. Select New registration.
SALES: www.beyondtrust.com/contact
SUPPORT: www.beyondtrust.com/support
DOCUMENTATION: www.beyondtrust.com/docs
151
©2003-2024 BeyondTrust Corporation. All Rights Reserved. Other trademarks identified on this page are owned by their respective owners. BeyondTrust is not a chartered bank or trust company, or
depository institution. It is not authorized to accept deposits or trust accounts and is not licensed or regulated by any state or federal banking authority.
TC: 8/27/2024
PRIVILEGE MANAGEMENT FOR WINDOWS
24.4 ADMINISTRATION GUIDE

4. Enter a name for your app registration. Use a name related to Endpoint Privilege Management.
5. Click Register.
6. Copy and note your Application (Client) ID for use in the Policy
Editor later.
7. Click Add a Redirect URI.
8. Click Add a platform.
9. Select Mobile and Desktop Applications.
10. Add a Custom Redirect URIs and set the value to:
http://127.0.0.1
11. Click Configure.
12. Go back to your newly created app registration.
13. Click Endpoints. The endpoints display on the right.
14. Copy the value from the OpenID Connect metadata
documentbox. Only this part of the URL is required:
https://login.microsoftonline.com/87549b3f-a6ba-4ca4-9d99-
ff2944ac4234/v2.0
The configuration is now complete. The following values are required to configure the IdP in the Endpoint Privilege Management Policy
Editor for both Windows and macOS.
SALES: www.beyondtrust.com/contact
SUPPORT: www.beyondtrust.com/support
DOCUMENTATION: www.beyondtrust.com/docs
152
©2003-2024 BeyondTrust Corporation. All Rights Reserved. Other trademarks identified on this page are owned by their respective owners. BeyondTrust is not a chartered bank or trust company, or
depository institution. It is not authorized to accept deposits or trust accounts and is not licensed or regulated by any state or federal banking authority.
TC: 8/27/2024
PRIVILEGE MANAGEMENT FOR WINDOWS
24.4 ADMINISTRATION GUIDE

l
Authority URI: The value copied in step 14.
l
Client ID: Application (Client) ID from step 6.
l
Redirect URI: Custom redirect URIs set in step 10.
Enforce MFA for every logon attempt
In Entra ID, you might want users to always go through the multi-factor authentication process every time they try to access an application
in a rule (if multi-factor authentication is configured in the message).
For more information, see the BeyondTrust Knowledge Base article, Using Additional Scopes and max_age to enforce
always-auth with messages in Azure AD.
Add Endpoint Privilege Management to Okta
1. Start your Okta instance.
2. Click Create App Integration.
3. In the Create a new app integration section, select OIDC - OpenID Connect.
4. Select Native Application as the application type.
5. Select Authorization code for the Grant type.
6. Add the sign-in and sign-out URIs.
l
Sign-in redirect URI: https://{dns}-services.pm.beyondtrustcloud.com/oauth/signin-oidc
l
Sign-out redirect URI: https://{dns}-services.pm.beyondtrustcloud.com/oauth/signout-callback-oidc
7. Select the controlled access applicable to your organization, and then click Save.
After you add EPM to Okta, you can get the information you need to set up the OpenID Connect authentication.
8. Go to the application instance for Endpoint Privilege Management.
9. Select General Settings, and then click Edit.
10. For the EPM OpenID Connect Setup Wizard, you need to copy the following information from the Edit page:
l
Domain: Prefix the protocol HTTPS://
l
Client ID
l
Client Secret
Note: Confirm the domain name configured in Okta. This domain name might be different than the domain configured for your
email address. For example, while the domain managed in Okta might be domain.com, the email address might be
[email protected]. Both pieces of information are required.
11. You can now visit the set-up URL and enter the domain, client ID, and client secret information.
SALES: www.beyondtrust.com/contact
SUPPORT: www.beyondtrust.com/support
DOCUMENTATION: www.beyondtrust.com/docs
153
©2003-2024 BeyondTrust Corporation. All Rights Reserved. Other trademarks identified on this page are owned by their respective owners. BeyondTrust is not a chartered bank or trust company, or
depository institution. It is not authorized to accept deposits or trust accounts and is not licensed or regulated by any state or federal banking authority.
TC: 8/27/2024
PRIVILEGE MANAGEMENT FOR WINDOWS
24.4 ADMINISTRATION GUIDE

Add Endpoint Privilege Management for Mac to Ping Identity
Note: We currently support PingOne, the SaaS service from Ping Identity.
1. Start your Ping Identity instance.
2. In the menu, click Connections, and then click Applications.
3. At the right of the Applications title, click the plus sign (+) to add an application.
4. Enter a name for the application (required), and then add a short description (optional).
5. Select OIDC Web App and click Save.
6. Click the Configuration tab.
7. To edit the configuration, click the pencil/edit icon.
8. Under Redirect URLs, click + Add, and then add the sign-in and sign-out URLs. If you are modifying an existing instance, you
might need to open the General section dropdown first.
l
Sign-in redirect URL: https://{dns}-services.pm.beyondtrustcloud.com/oauth/signin-oidc
l
Sign-out redirect URL: https://{dns}-services.pm.beyondtrustcloud.com/oauth/signout-callback-oidc
9. Under Token Endpoint Authentication Method, select Client Secret Post, and then click Save.
10. Click the Resources tab.
11. To edit the resource, click the pencil/edit icon.
12. In the Scopes list, click the + next to profile openID to add it to the Allowed Scopes. You can also filter the list of options by
OpenID to access this option.
13. Click Save.
14. To close the panel, at the top right of the Edit panel, click the X.
15. At the right of the new application entry, toggle the switch to on to give access to users.
16. Click the Configuration tab again. For the EPM OpenID Connect set-up wizard, you need to copy the following information from
the Configuration page.
The Ping identify provider (IdP) configuration is now complete. The following values are required to configure the IdP in the Endpoint
Privilege Management Policy Editor for both Windows and macOS.
l
Issuer: Prefix the protocol HTTPS://
l
Client ID
l
Client secret
SALES: www.beyondtrust.com/contact
SUPPORT: www.beyondtrust.com/support
DOCUMENTATION: www.beyondtrust.com/docs
154
©2003-2024 BeyondTrust Corporation. All Rights Reserved. Other trademarks identified on this page are owned by their respective owners. BeyondTrust is not a chartered bank or trust company, or
depository institution. It is not authorized to accept deposits or trust accounts and is not licensed or regulated by any state or federal banking authority.
TC: 8/27/2024
PRIVILEGE MANAGEMENT FOR WINDOWS
24.4 ADMINISTRATION GUIDE

Message name and description
You may edit a message name or description by clicking on either element:
1. Select the Message (in either the left or right pane).
2. Select either the Message Design tab or the Message Text tab to make further changes to your message.
For more information, see the following:
l
"Message design" on page 156
l
"Message text" on page 165
SALES: www.beyondtrust.com/contact
SUPPORT: www.beyondtrust.com/support
DOCUMENTATION: www.beyondtrust.com/docs
155
©2003-2024 BeyondTrust Corporation. All Rights Reserved. Other trademarks identified on this page are owned by their respective owners. BeyondTrust is not a chartered bank or trust company, or
depository institution. It is not authorized to accept deposits or trust accounts and is not licensed or regulated by any state or federal banking authority.
TC: 8/27/2024
PRIVILEGE MANAGEMENT FOR WINDOWS
24.4 ADMINISTRATION GUIDE

Message design
Messages have a wide array of configuration options, which are detailed below.
As you change the various message options, the preview message is automatically updated. To test the message box, use the preview
facility (program and content information contains appropriate placeholders).
Once you configure the message options, you should configure the Message Text for the message, which includes full multi-lingual
support.
Design settings
Message header settings
l
Header Style: Select the type of header, which can be No header, Endpoint Privilege Management, Warning, Question, or
Error.
l
Show Title Text: Determines whether to show the title text.
l
Text Color: Select the color for the title text (the automatic color is based on the Header Style).
l
Background Type: Set the background of the header, which can be Solid background, Gradient background, or Custom
image (the default Background Type is Custom Image, making the Color 1 and Color 2 options initially unavailable).
l
Color 1: Select the color for a Solid background or the first color for a Gradient background (the automatic color is based on
the Header Style).
l
Color 2: Select the second color for a Gradient background (the automatic color is based on the selected Header Style).
l
Custom Image: Select the image for a Custom image background. This option is only enabled if you have selected Custom
Image for the Background Type. Click the ellipsis (…) button to import, export, modify, or delete images using the Image
Manager.
Image manager
The Image Manager associated with message creation allows you to Add, Modify, Export, and Delete images that are referenced in
message headers. All images are stored inside the Workstyles as compressed and encoded images.
We recommend you delete any unused images to minimize the size of the policies, as Endpoint Privilege Management for Windows does
not automatically delete unreferenced images.
The Image Manager is accessible from the Message Design tab. Click the Manage Images button next to the Custom Image dropdown
menu.
To upload an image:
1. Click Upload Image. The Import Image status dialog box appears. Click Choose file and browse to the location of the file.
2. Select the image and enter an Image Description. Click OK.
3. The image is uploaded into Image Manager.
Note: Images must be *.png format. The recommended size is 450x50.
To edit an image:
SALES: www.beyondtrust.com/contact
SUPPORT: www.beyondtrust.com/support
DOCUMENTATION: www.beyondtrust.com/docs
156
©2003-2024 BeyondTrust Corporation. All Rights Reserved. Other trademarks identified on this page are owned by their respective owners. BeyondTrust is not a chartered bank or trust company, or
depository institution. It is not authorized to accept deposits or trust accounts and is not licensed or regulated by any state or federal banking authority.
TC: 8/27/2024
PRIVILEGE MANAGEMENT FOR WINDOWS
24.4 ADMINISTRATION GUIDE

1. In the Custom Image field, select Manage Images.
2. Select the image in the list and click Edit.
3. The Image Properties dialog box appears.
4. Alter the description and click OK.
To delete an image:
1. Select the image in the list and click Delete.
2. When prompted, click Yes to delete the image.
Note: If an image is referenced by any messages, you are not allowed to delete it.
Message body settings
The Message Body Settings display specific information about the program or content. These can be configured on the Message Text
tab; they can display Automatic default values or Custom values. The Automatic default values are:
l
Show Line One: The Program Name or the Content Name.
l
Show Line Two: The Program Publisher or the Content Owner.
l
Show Line Three: The Program Path or the Content Program.
Custom values are configured on the Message Text tab.
l
Show reference Hyperlink: This option determines whether to show a hyperlink in the message below the body settings (the
hyperlink is configured on the Message Text tab).
Authentication and authorization settings
For more information about using authentication and authorization settings, see "Authentication and authorization groupings in
Endpoint Privilege Management" on page 149.
Step 1a - user authentication
l
Authentication Type: Set this option to User must authenticate to force the user to reauthenticate before proceeding. If you
want to use this option for over the shoulder administration, then set this option to Designated user must authenticate.
l
Password or Smart Card: Set this option to Any to allow authentication using any method available to the user. If you want to
enforce a specific authentication method, then set to either Password only or Smart card only.
l
Windows Hello: Set this option to Yes to allow authentication using the Windows Hello service. For this service to work, Windows
Hello must first be set up on the user's endpoint.
o
Windows Hello is not supported with the Designated User option.
o
Set Authentication to the Password or Smartcard or Password only option.
o
Windows Hello is unavailable when using Secure Desktop.
SALES: www.beyondtrust.com/contact
SUPPORT: www.beyondtrust.com/support
DOCUMENTATION: www.beyondtrust.com/docs
157
©2003-2024 BeyondTrust Corporation. All Rights Reserved. Other trademarks identified on this page are owned by their respective owners. BeyondTrust is not a chartered bank or trust company, or
depository institution. It is not authorized to accept deposits or trust accounts and is not licensed or regulated by any state or federal banking authority.
TC: 8/27/2024
PRIVILEGE MANAGEMENT FOR WINDOWS
24.4 ADMINISTRATION GUIDE

Note: If you select a method that is not available to the user, then the user cannot authenticate the message.
l
Designated Users: If the Authentication Type is set to Designated user must authenticate, then click the ellipsis (…) button
to add one or more user accounts or groups of users that are allowed to authenticate the message. A designated user can be
selected from a local account, Active Directory domain, or Microsoft Entra ID (groups only). Entra ID is only supported on the EPM
platform.
l
Run application as Authenticating User: If the Authentication Type is set to Designated user must authenticate, then this
option determines whether the application runs in the context of the logged on user or in the context of the authenticating user. The
default is to run in the context of the logged on user as opposed to the authenticating user.
Note: When Run application as Authenticating User is set to Yes, Endpoint Privilege Management for Windows attempts
to match a Workstyle of the same type (Application Rule or on-demand rule) for the authenticating user. If no Workstyle is
matched, Endpoint Privilege Management for Windows falls back to the original user Workstyle.
Designated user must authenticate
When this option is enabled, a designated user, such as a system administrator, can authorize the elevation in place of (or in addition to) a
Challenge Response code.
Input Outcome
Valid Challenge/Response code only is provided Application runs as logged on user
Valid Challenge/Response code is provided and valid (but not required)
credentials are provided
Application runs as logged on user
Invalid Challenge/Response code is provided but valid credentials are provided Application runs as authorizing user
No Challenge/Response code is provided but valid credentials are provided Application runs as authorizing user
Note: In Endpoint Privilege Management for Windows 22.9 and later, when authenticating as a Designated User using
Microsoft Entra ID credentials, use your UPN as the username: "[email protected]"
Step 1b - multifactor authentication
l
Identity Provider: To use an identity provider, select Idp - Yes from the list. If you have not already set up your global identity
provider settings, then you are prompted to add these now.
l
Authentication Context Class References values (acr values): Enter the acr value. The value is optional and required only if
your identity provider uses it.
l
Suppress Message when Authenticated for (Mins): Enter a value (maximum 720) to set the number of minutes that the
authentication message will be suppressed. The message will not be shown again for the given number of minutes after a
successful authentication.
SALES: www.beyondtrust.com/contact
SUPPORT: www.beyondtrust.com/support
DOCUMENTATION: www.beyondtrust.com/docs
158
©2003-2024 BeyondTrust Corporation. All Rights Reserved. Other trademarks identified on this page are owned by their respective owners. BeyondTrust is not a chartered bank or trust company, or
depository institution. It is not authorized to accept deposits or trust accounts and is not licensed or regulated by any state or federal banking authority.
TC: 8/27/2024
PRIVILEGE MANAGEMENT FOR WINDOWS
24.4 ADMINISTRATION GUIDE

IMPORTANT!
The Suppress Message when Authenticated for (Mins) setting does not support messages that are configured to use multiple
authentication types using the AND operator. For example, if the message requires "user authentication And MFA", then the
message is not suppressed. However, if the message uses "user authentication Or MFA", then the message is suppressed.
For more information, see "Add an identity provider" on page 150.
Step 1c - authentication grouping
l
Requirements: Select a requirement from the list. You can combine authentication methods. The authentication grouping can be
and/or logic. For example, you can require that your users provide both a user name and password and authenticate with an
identity provider. In this case, the end user is required to successfully authenticate with user credentials and with the identity
provider. In the "or" scenario, the user is required to authenticate using at least one of the authentication methods.
Step 2 - authorization
l
Challenge Response (C/R): Set this option to Yes to present the user with a challenge code. For the user to proceed, they must
enter a matching response code. You can click Edit Key to change the shared key for this message.
Note: When this option is enabled for the first time, you are requested to enter a shared key.
l
Authorization Period (per-application): Set this option to determine the length of time a successfully returned challenge code is
active for. Choose from:
o
One use Only: A new challenge code is presented to the user on every attempt to run the application.
o
Entire Session: A new challenge code is presented to the user on the first attempt to run the application. After a valid
response code is entered, the user is not presented with a new challenge code for subsequent uses of that application until
they next log on.
o
As defined by helpdesk: A new challenge code is presented to the user on the first attempt to run the application. If this
option is selected, the responsibility of selecting the authorization period is delegated to the helpdesk user at the time of
generating the response code. The helpdesk user can select one of the three above authorization periods. After a valid
response code is entered, the user does not receive a new challenge code for the duration of time specified by the
helpdesks.
l
Suppress messages once authorized: If the Authorization Period is not set to One Use Only the Suppress messages once
authorized option is enabled and configurable.
l
Show Information tip: This option determines whether to show an information tip in the challenge box.
l
Maximum Attempts: This option determines how many attempts the user has to enter a successful response code for each new
challenge. Set this option to Three Attempts to restrict the user to three attempts, otherwise set this option to Unlimited.
SALES: www.beyondtrust.com/contact
SUPPORT: www.beyondtrust.com/support
DOCUMENTATION: www.beyondtrust.com/docs
159
©2003-2024 BeyondTrust Corporation. All Rights Reserved. Other trademarks identified on this page are owned by their respective owners. BeyondTrust is not a chartered bank or trust company, or
depository institution. It is not authorized to accept deposits or trust accounts and is not licensed or regulated by any state or federal banking authority.
TC: 8/27/2024
PRIVILEGE MANAGEMENT FOR WINDOWS
24.4 ADMINISTRATION GUIDE

Note: After the third failure to enter a valid response code, the message is canceled and the challenge code is rejected. The
next time the user attempts to run the application, they are presented with a new challenge code. Failed attempts are
accumulated even if the user clicks Cancel between attempts.
For more information, see the following:
l
"Challenge/response authorization" on page 162
l
On how to configure the text of the information tip, "Message text" on page 165
Step 3 - user authentication & authorization grouping
l
Requirements: Select a grouping from the list. You can use authentication and authorization settings together, grouped by and/or
logic. This always uses or logic when the Identity Provider (Idp) value is set to IdP - Yes.
Additonal settings
Miscellaneous settings
l
Show message on secure desktop: Select this option to show the message on the secure desktop. We recommend this if the
message is being used to confirm the elevation of a process, for enhanced security. Secure desktop cannot be used with Identity
Provider configurations; using Identity Provider for authentication requires opening the user's browser.
User reason settings
This option determines whether to prompt the end user to enter a reason before an application launches (Allow Execution message
type) or to request a blocked application (Block Execution message type).
l
Show User Reason Prompt: Select between Text box and dropdown menu. The Text Box allows users to write a reason or
request. The dropdown allows users to select a predefined reason or request from a dropdown menu. The predefined dropdown
entries can be configured on the Message Text tab.
l
Remember User Reasons (per-application): Reasons are stored per-user in the registry.
Email settings
The email settings are only enabled for blocking messages.
l
Allow user to email an application request: Select this option to allow the user to email a request to run an application (only
available for the Block Execution message type).
l
Mail To: Email address to send the request to (separate multiple email addresses with semicolons).
l
Subject: Subject line for the email request.
The Mail To and Subject fields can include parameterized values, which can be used with email based automated helpdesk systems.
SALES: www.beyondtrust.com/contact
SUPPORT: www.beyondtrust.com/support
DOCUMENTATION: www.beyondtrust.com/docs
160
©2003-2024 BeyondTrust Corporation. All Rights Reserved. Other trademarks identified on this page are owned by their respective owners. BeyondTrust is not a chartered bank or trust company, or
depository institution. It is not authorized to accept deposits or trust accounts and is not licensed or regulated by any state or federal banking authority.
TC: 8/27/2024
PRIVILEGE MANAGEMENT FOR WINDOWS
24.4 ADMINISTRATION GUIDE

For information on using parameters, see "Windows QuickStart policy summary" on page 55.
SALES: www.beyondtrust.com/contact
SUPPORT: www.beyondtrust.com/support
DOCUMENTATION: www.beyondtrust.com/docs
161
©2003-2024 BeyondTrust Corporation. All Rights Reserved. Other trademarks identified on this page are owned by their respective owners. BeyondTrust is not a chartered bank or trust company, or
depository institution. It is not authorized to accept deposits or trust accounts and is not licensed or regulated by any state or federal banking authority.
TC: 8/27/2024
PRIVILEGE MANAGEMENT FOR WINDOWS
24.4 ADMINISTRATION GUIDE

Challenge/response authorization
Challenge/Response authorization provides an additional level of control for access to applications and privileges, by presenting users
with a challenge code in an end user message. For the user to progress, they must enter a corresponding response code into the
message.
Any policy that has a message in with challenge/response needs a shared key. This key is defined when you set up the first
challenge/response message in your policy, although you can change it later if required. If you create a Workstyle containing a
challenge/response message or you create a new challenge/response message and you are not prompted to create a shared key, then
there is already a shared key for the policy. You cannot view this shared key, however you can change it if required in the Design page of
a Message.
Challenge/Response authorization is configured as part of an end user message, and can be used in combination with any other
authorization and authentication features of Endpoint Privilege Management for Windows messaging.
Authorization is applied per user, per token, per application, meaning that each user is presented with challenge codes that when
authorized, only apply to them, the token used to request access, and the specific application.
If there is still a valid Endpoint Privilege Management for Windows response code available to the endpoint when the user runs the
application with a Power Rule assigned to it, the application opens using the existing Endpoint Privilege Management for Windows
response code and the Rule Script is not run.
Challenge and response codes are presented as 8 digit numbers, to minimize the possibility of incorrect entry. When a user is presented
with a challenge code, the message may be canceled without invalidating the code. If the user runs the same application, they are
presented with the same challenge code. This allows users to request a response code from IT helpdesks who may not be immediately
available to provide a response.
For more information, see the following:
l
"Shared key" on page 162
l
On configuring challenge/response authorization enabled end user messages, "Message design" on page 156
Shared key
The first time you create an Endpoint Privilege Management for Windows end user message with a challenge, you are asked to create a
shared key. The shared key is used by Endpoint Privilege Management for Windows to generate challenge codes at the endpoint.
Once you enter a shared key, it is applied to all end user messages that have challenge/response authorization enabled in the same
Endpoint Privilege Management for Windows settings.
To change the shared key:
1. Right-click the Messages node of a Workstyle and select Set Challenge/Response Shared Key.
2. In the Challenge/Response Shared Key dialog box, edit the Enter Key and Confirm Key with the new shared Key.
3. Click OK to complete. If the key entered is not exact, you will be presented with a warning message.
Note: We recommend your shared key be at least 15 characters and include a combination of alphanumeric, symbolic, upper,
and lowercase characters. As a best practice, the shared key should be changed periodically.
SALES: www.beyondtrust.com/contact
SUPPORT: www.beyondtrust.com/support
DOCUMENTATION: www.beyondtrust.com/docs
162
©2003-2024 BeyondTrust Corporation. All Rights Reserved. Other trademarks identified on this page are owned by their respective owners. BeyondTrust is not a chartered bank or trust company, or
depository institution. It is not authorized to accept deposits or trust accounts and is not licensed or regulated by any state or federal banking authority.
TC: 8/27/2024
PRIVILEGE MANAGEMENT FOR WINDOWS
24.4 ADMINISTRATION GUIDE

Generate a response code
There are two ways to generate a response code. You can either use the PGChallengeResponseUI.exe utility that is installed as part of
the Endpoint Privilege Management Policy Editor, or you can generate the the codes in the MMC.
Note: To generate a response code, you must have set a Challenge/Response shared key. You are prompted to do this when
you create any policy that has a Challenge/Response message assigned to it. Alternatively, you can set the
Challenge/Response shared key from the home page of the Endpoint Privilege Management Settings node by clicking Set
Challenge/Response Shared Key.
You can generate a response code from the Endpoint Privilege Management Policy Editor. This launches a tool called
PGChallengeResponseUI.exe. This tool is part of your installation and can be used independently of the Endpoint Privilege
Management Policy Editor. The tool is installed to the <Installation Dir>\Avecto\Privilege Guard Management Consoles\ path:
To generate a response code in the Endpoint Privilege Management Policy Editor:
1. Click the Endpoint Privilege Management Settings node and then Tools on the right side.
2. Click Response Code Generator.
3. Enter the shared key you defined, and the challenge code from the end user.
4. The response code is generated once both the Shared Key and the 8 character challenge code are entered.
The response value can then be sent to the end user to enter into their challenge dialog box.
Generate a response code from the command line
Response codes can also be generated from the command line using the PGChallengeResponse.exe command line utility, which is
installed as part of the Endpoint Privilege Management Policy Editor installation, and is located in the <Installation
Dir>\Avecto\Privilege Guard Management Consoles\ directory:
To generate a response code from the command line:
1. Open the Command Prompt by clicking the Start Menu and typing cmd.exe.
2. In the Command Prompt, type the following command, then press Enter:
cd "\program files\avecto\privilege guard management consoles"
3. Once you open the privilege guard management consoles directory, type the following command (where <challenge> is the
challenge code presented to a user):
pgchallengeresponse.exe <challenge>
4. At the Shared Key prompt, enter the correct shared key, then press Enter.
Note: PGChallengeResponseUI.exe is a standalone utility and can be distributed separately from the Endpoint Privilege
Management Policy Editor.
SALES: www.beyondtrust.com/contact
SUPPORT: www.beyondtrust.com/support
DOCUMENTATION: www.beyondtrust.com/docs
163
©2003-2024 BeyondTrust Corporation. All Rights Reserved. Other trademarks identified on this page are owned by their respective owners. BeyondTrust is not a chartered bank or trust company, or
depository institution. It is not authorized to accept deposits or trust accounts and is not licensed or regulated by any state or federal banking authority.
TC: 8/27/2024
PRIVILEGE MANAGEMENT FOR WINDOWS
24.4 ADMINISTRATION GUIDE

Automating response code generation
The PGChallengeResponse.exe utility supports full command line use, allowing it to be easily integrated into any third party workflow
that supports the execution of command line executables. The command line is as follows:
PGChallengeResponse.exe <challenge code> <shared key> <duration>
Note: The duration parameter is optional.
In the command line argument above, <challenge code> is the code presented to the user and <shared key> is the key that was
configured within the Endpoint Privilege Management for Windows settings which presented the end user message.
The utility returns the response code as an exit code, so it can be captured from within a custom script or wrapper application. The options
for the optional <duration> parameter are once | session.
SALES: www.beyondtrust.com/contact
SUPPORT: www.beyondtrust.com/support
DOCUMENTATION: www.beyondtrust.com/docs
164
©2003-2024 BeyondTrust Corporation. All Rights Reserved. Other trademarks identified on this page are owned by their respective owners. BeyondTrust is not a chartered bank or trust company, or
depository institution. It is not authorized to accept deposits or trust accounts and is not licensed or regulated by any state or federal banking authority.
TC: 8/27/2024
PRIVILEGE MANAGEMENT FOR WINDOWS
24.4 ADMINISTRATION GUIDE

Message text
All of the text in the message can be configured in the Message Text section. You can add an additional language here and localize the
text that you enter for the message text.
We recommend you change the default text strings, as they are all English placeholders. After you change the message text, click Update
to see your changes applied to the preview message.
The text in any text string can include parameterized values which provide more personalized messages for users.
For more information, see the following:
l
"Languages" on page 165
l
On how to use parameters, "Windows QuickStart policy summary" on page 55
Languages
You can configure the text in the messages to display a language of your choice. To add a new language, click Add Languages and
select the language you want to use from the dropdown list. You can set this language to be the default language by clicking Set As
Default.
Endpoint Privilege Management for Windows checks the locale of the user's language and tries to match it to a language that you've set
up in Endpoint Privilege Management for Windows. If it finds a match, the strings for that language are displayed for the message text. If it
doesn't find a match, the language you have assigned to be the default language is used.
Note: Endpoint Privilege Management for Windows doesn't localize the text into the language you selected. You must edit the
message text in your chosen language.
If you have more than one language, you can set the default language. This is the language that will be used if an end user is using a
language that is not defined. The default language is set to English, but you may change the default language:
1. Select the language you want to set as the default language.
2. Click Set As Default.
Note: If you delete a language that has been set to the default language, the language at the top of the language list is set to
the default language. You must always have at least one language defined.
General
l
Caption controls the text at the top of the dialog box.
l
Header Message controls the text to the right of the icon in the header if it's shown.
l
Body Message controls the text at the top of the main message.
l
Refer URL controls the hyperlink for the Reference URL if you selected to show it in the Message Design.
l
Refer Text controls the text of the hyperlink for Reference URL if you selected to show it in the Message Design.
SALES: www.beyondtrust.com/contact
SUPPORT: www.beyondtrust.com/support
DOCUMENTATION: www.beyondtrust.com/docs
165
©2003-2024 BeyondTrust Corporation. All Rights Reserved. Other trademarks identified on this page are owned by their respective owners. BeyondTrust is not a chartered bank or trust company, or
depository institution. It is not authorized to accept deposits or trust accounts and is not licensed or regulated by any state or federal banking authority.
TC: 8/27/2024
PRIVILEGE MANAGEMENT FOR WINDOWS
24.4 ADMINISTRATION GUIDE

Information
l
Message Mode determines where the message can be assigned. Messages can be assigned to Application Rules, On-Demand
Application Rules, and Content Rules. Select Automatic to allow the rule type to determine the information that is displayed
(Application or Content). Select Manual to enter your own information in the custom fields. This information is displayed
irrespective of the type of rule.
l
Application Line One Label controls the first line. For Automatic mode, this is the Application Program Name.
l
Application Line Two Label controls the second line. For Automatic mode, this is the Application Program Publisher.
l
Application Line Three Label controls the third line. For Automatic mode, this is the Application Program Path.
l
Content Line One Label controls the first line. For Automatic mode, this is the Control Content Name.
l
Content Line Two Label controls the second line. For Automatic mode, this is the Content Owner.
l
Content Line Three Label controls the third line. For Automatic mode, this is the Control Program.
Publisher
l
Program Publisher (Unknown) controls the text that is displayed for the variable [PG_PROG_PUBLISHER] if it's not known.
l
Verification Failure controls the text that is displayed next to Publisher if the publisher verification fails.
Endpoint Privilege Management for Windows verifies the publisher by checking that there is a publisher and also checking that the
certificate associated with that publisher is signed. Endpoint Privilege Management for Windows does not check to see if the certificate
has been revoked due to the length of the lookup process that would rely on network connectivity. Instead, Endpoint Privilege
Management for Windows relies on the certificate store to be kept up to date with revoked certificates, which would be a standard
operation as the full chain should be in the local certificate store.
User reason
l
Reason controls the text above the field where the end user can enter their reason.
l
Reason Error Message controls the text that is displayed if the end user clicks Yes and doesn't enter a reason.
l
dropdown list prompt controls the text above the user reason prompt.
l
User Reason List allows you to select from the user reasons. You can modify the User Reason List using the Add, Edit, and
Delete buttons.
User authentication
l
User name controls the text adjacent to the field where the user enters their user name.
l
Password controls the text adjacent to the field where the user enters their password.
l
Domain controls the text below the password field that introduces the domain.
l
Unauthorized credentials controls the text that is displayed if the end user enters credentials that aren't valid for the requested
operation.
SALES: www.beyondtrust.com/contact
SUPPORT: www.beyondtrust.com/support
DOCUMENTATION: www.beyondtrust.com/docs
166
©2003-2024 BeyondTrust Corporation. All Rights Reserved. Other trademarks identified on this page are owned by their respective owners. BeyondTrust is not a chartered bank or trust company, or
depository institution. It is not authorized to accept deposits or trust accounts and is not licensed or regulated by any state or federal banking authority.
TC: 8/27/2024
PRIVILEGE MANAGEMENT FOR WINDOWS
24.4 ADMINISTRATION GUIDE

Challenge / response authorization
l
Header text controls the text that introduces the challenge/response authorization.
l
Hint text controls the text that is in the response code field for challenge/response messages.
l
Information Tip Text controls the text above the challenge and response code fields.
l
Error Message Text controls the text that is displayed to the end user if they enter an incorrect response code and click Yes.
l
Maximum Attempts Exceeded Message Text controls the text that is displayed to the end user if they exceed the allowed
number of challenge/response attempts.
Smart card authorization
l
Card Prompt controls the text that introduces the card prompt.
l
Card Reading controls the text that is displayed when the card is being read.
l
Card Pin controls the text that is displayed when the card pin is provided.
l
Card Error controls the text that is displayed if there is an error reading the card.
l
No Certificate Error controls the text that is displayed when there is no certificate.
l
Incorrect Certificate Error controls the text that is displayed when there is an incorrect certificate.
Buttons
Depending on the message options the message box has either one or two buttons:
l
For a prompt, the message box has OK and Cancel buttons.
l
For a blocking message with Allow user to email an application request enabled, the message box has OK and Cancel
buttons. We recommend you change the OK button text to Email, unless you make it clear in the message text that the OK button
sends an email request when clicked.
l
For a blocking message with Allow user to email an application request disabled, the message box has only an OK button.
You can change the OK Button and Cancel Button text. For instance, you can change it to Yes and No if you are asking the end user a
question.
SALES: www.beyondtrust.com/contact
SUPPORT: www.beyondtrust.com/support
DOCUMENTATION: www.beyondtrust.com/docs
167
©2003-2024 BeyondTrust Corporation. All Rights Reserved. Other trademarks identified on this page are owned by their respective owners. BeyondTrust is not a chartered bank or trust company, or
depository institution. It is not authorized to accept deposits or trust accounts and is not licensed or regulated by any state or federal banking authority.
TC: 8/27/2024
PRIVILEGE MANAGEMENT FOR WINDOWS
24.4 ADMINISTRATION GUIDE

Custom tokens
Access tokens (and Custom Tokens) are assigned to an application, or when content is being edited, to modify the privileges of that
activity. Within an access token is a collection of settings that specify the group memberships, associated privileges, integrity level, and
process access rights.
Endpoint Privilege Management for Windows includes a set of built-in access tokens that can be used to add administrator rights, remove
administrator rights, or enforce the users default privileges. A passive access token is also available that does not change the privileges
of the activity, but still applies anti-tamper protection.
Access tokens are assigned to applications or content through rules within a Workstyle. For more advanced configurations, Custom
Tokens can be created where group memberships, privileges, permissions, and integrity can be manually specified. You can optionally
define any number of Custom Tokens.
Create custom tokens
To create a new Custom Token:
1. Navigate to Endpoint Privilege Management Settings > Windows > Custom Tokens.
2. Right-click and select New Custom Token. Select from the following options:
l
Create a token which adds Administrator rights
l
Create a token which removes Administration rights
l
Create a blank token
3. For the first two options, the Windows privileges that are assigned to that token are preselected for you, although you can change
them if required. You can enter text in the Filter box to filter the list in real time.
4. Click Finish when you have assigned the required privileges to the token.
The new Custom Token is displayed beneath the Custom Tokens node. Click the new token to display the Token Summary.
You may now define the Groups, Privileges, Integrity Level, and Process Access Rights for the Custom Token.
Edit custom tokens
Groups
The Groups section of the Custom Token specifies the groups that will be added or removed from the token.
To insert a group:
1. Select Groups from the top tab. The token groups appear in the right pane.
2. Right-click and select Add a new account.
3. Enter the object names and click Check Names to validate it.
4. By default, when you insert a group, the Add Account box is checked, and the group is added to the Custom Token. If you want to
remove the group from the Custom Token, check the Remove box instead.
Domain and well-known groups display a Security Identifier (SID). The SID is used by Endpoint Privilege Management for Windows,
which avoids account lookup operations. For local groups, the name is used by Endpoint Privilege Management for Windows, and the SID
is looked up when the Custom Token is created by the client. Local Account appears in the SID column of the groups list for local groups.
SALES: www.beyondtrust.com/contact
SUPPORT: www.beyondtrust.com/support
DOCUMENTATION: www.beyondtrust.com/docs
168
©2003-2024 BeyondTrust Corporation. All Rights Reserved. Other trademarks identified on this page are owned by their respective owners. BeyondTrust is not a chartered bank or trust company, or
depository institution. It is not authorized to accept deposits or trust accounts and is not licensed or regulated by any state or federal banking authority.
TC: 8/27/2024
PRIVILEGE MANAGEMENT FOR WINDOWS
24.4 ADMINISTRATION GUIDE

Setting the token owner
By default, the owner of a Custom Token that includes the administrators group has the owner set to the administrators group. If the
administrators group is not present in the Custom Token, then the user is set as the owner.
If you want the user to be the owner, regardless of the presence of the administrators group, check the Ensure the User is always the
Token Owner box.
Anti-tamper protection
By default, Endpoint Privilege Management for Windows prevents elevated processes from tampering with the files, registry, and service
that make up the client installation. It also prevents any elevated process from reading or writing to the local Endpoint Privilege
Management for Windows policy cache.
IMPORTANT!
Domain Controllers don't have the Local Users and Groups databases once they're promoted to a Domain Controller. Therefore,
Endpoint Privilege Management for Windows cannot offer the Anti-Tamper feature for Domain Controllers.
If you want to disable anti-tamper protection, uncheck the Enable anti-tamper protection box.
Note: Under normal circumstances, this option should remain enabled, except in scenarios where elevated tasks require
access to protected areas. For instance, if you are using an elevated logon script to update the local Endpoint Privilege
Management for Windows policy.
Privileges
The Privileges section of the Custom Token specifies the privileges that are added to or removed from the Custom Token.
If you want to add a privilege to the Custom Token, then check the Add box for the relevant privilege. If you want to remove a privilege
from the Custom Token, check the Remove box for the relevant privilege.
You can also select multiple privileges and use the following options on the right-click menu:
l
Reset Privilege
l
Add Privilege
l
Remove Privilege
l
Add Admin Privileges
l
Remove Admin Privileges
To clear all of the privileges in the Custom Token before applying privileges, check the Remove all existing privileges in access token
before applying privileges box. If this box is left unchecked, the privileges are added or removed from the user’s default Custom Token.
Integrity level
The Integrity Level section of the Custom Token specifies the integrity level for the Custom Token.
To set the integrity level:
SALES: www.beyondtrust.com/contact
SUPPORT: www.beyondtrust.com/support
DOCUMENTATION: www.beyondtrust.com/docs
169
©2003-2024 BeyondTrust Corporation. All Rights Reserved. Other trademarks identified on this page are owned by their respective owners. BeyondTrust is not a chartered bank or trust company, or
depository institution. It is not authorized to accept deposits or trust accounts and is not licensed or regulated by any state or federal banking authority.
TC: 8/27/2024
PRIVILEGE MANAGEMENT FOR WINDOWS
24.4 ADMINISTRATION GUIDE

1. Select the Integrity Level node in the left pane. The integrity levels appear in the right pane as radio buttons.
2. Set the appropriate integrity level.
The integrity level should be set as follows:
Integrity Level Description
System Included for completion and should not be required
High Set the integrity level associated with an administrator
Medium Set the integrity level associated with a standard user
Low Set the integrity level associated with protected mode (an application may fail to run or function in
protected mode)
Untrusted Included for completion and should not be required
Process access rights
The Process Access Rights section of a Custom Token allows you to specify which rights other processes has over a process launched
with that Custom Token.
Tokens that include the administrators group have a secure set of access rights applied by default, which prevents code injection attacks
on elevated processes initiated by processes running with standard user rights in the same session.
Check or uncheck the Access Right Name box to enable or disable a specific access right.
You can also select multiple privileges and use the following options on the right-click menu:
l
Reset all to default
l
Add Right
l
Remove Right
The access rights should be set as follows:
Access Rights Description
GENERIC_HEAD Read access.
PROCESS_CREATE_
PROCESS
Required to create a process.
PROCESS_CREATE_THREAD Required to create a thread.
PROCESS_DUP_HANDLE Required to duplicate a handle using DuplicateHandle.
PROCESS_QUERY_
INFORMATION
Required to retrieve certain information about a process, such as its token, exit code, and priority
class.
PROCESS_QUERY_LIMITED_
INFORMATION
Required to retrieve certain information about a process.
PROCESS_SET_
INFORMATION
Required to set certain information about a process, such as its priority class.
PROCESS_SET_QUOTA Required to set memory limits using SetProcessWorkingSetSize.
PROCESS_SUSPEND_
RESUME
Required to suspend or resume a process.
PROCESS_TERMINATE Required to terminate a process using TerminateProcess.
SALES: www.beyondtrust.com/contact
SUPPORT: www.beyondtrust.com/support
DOCUMENTATION: www.beyondtrust.com/docs
170
©2003-2024 BeyondTrust Corporation. All Rights Reserved. Other trademarks identified on this page are owned by their respective owners. BeyondTrust is not a chartered bank or trust company, or
depository institution. It is not authorized to accept deposits or trust accounts and is not licensed or regulated by any state or federal banking authority.
TC: 8/27/2024
PRIVILEGE MANAGEMENT FOR WINDOWS
24.4 ADMINISTRATION GUIDE

Access Rights Description
PROCESS_VM_OPERATION Required to perform an operation on the address space of a process.
PROCESS_VM_READ Required to read memory in a process using ReadProcessMemory.
PROCESS_VM_WRITE Required to write to memory in a process using WriteProcessMemory.
READ_CONTROL Required to read information in the security descriptor for the object, not including the information in
the SACL.
SYNCHRONIZE Required to wait for the process to terminate using the wait functions.
SALES: www.beyondtrust.com/contact
SUPPORT: www.beyondtrust.com/support
DOCUMENTATION: www.beyondtrust.com/docs
171
©2003-2024 BeyondTrust Corporation. All Rights Reserved. Other trademarks identified on this page are owned by their respective owners. BeyondTrust is not a chartered bank or trust company, or
depository institution. It is not authorized to accept deposits or trust accounts and is not licensed or regulated by any state or federal banking authority.
TC: 8/27/2024
PRIVILEGE MANAGEMENT FOR WINDOWS
24.4 ADMINISTRATION GUIDE

ServiceNow user request integration
ServiceNow integration is supported on the Endpoint Privilege Management platform and the MMC snap-in platform.
For more information about the MMC platform integration with ServiceNow, see ServiceNow and Endpoint Privilege
Management Integration at https://www.beyondtrust.com/docs/privilege-management/integration/servicenow/index.htm.
EPM and ServiceNow integration
You can configure a new message type in Endpoint Privilege Management that allows end users to raise a request for access to an
application or installer directly in ServiceNow. This ticket can then be reviewed and approved (or denied) in ServiceNow.
On the next check-in from the endpoint to EPM, this exception is automatically applied and the end user is approved to perform their
action. (Or if the Service Desk operator denied the request, the user is not allowed to continue the action).
Typically an endpoint checks in with EPM every 60 minutes, and receives any ticket decisions at this point. To update immediately to the
endpoint, use the Force Policy Refresh feature.
This integration is supported on the EPM platform only. All configuration occurs in EPM.
For more information, see Force Update Policy for End Users and ServiceNow User Request Integration in the EPM
Administration Guide, at https://www.beyondtrust.com/docs/privilege-management/console/pm-cloud/index.htm.
SALES: www.beyondtrust.com/contact
SUPPORT: www.beyondtrust.com/support
DOCUMENTATION: www.beyondtrust.com/docs
172
©2003-2024 BeyondTrust Corporation. All Rights Reserved. Other trademarks identified on this page are owned by their respective owners. BeyondTrust is not a chartered bank or trust company, or
depository institution. It is not authorized to accept deposits or trust accounts and is not licensed or regulated by any state or federal banking authority.
TC: 8/27/2024
PRIVILEGE MANAGEMENT FOR WINDOWS
24.4 ADMINISTRATION GUIDE

Deploy Endpoint Privilege Management for Windows policy
This section provides information on the ways to deploy Endpoint Privilege Management for Windows policy to your endpoints, including
the following:
l
Group Policy Management Console (GPMC)
l
Standalone Policy Editor
l
PowerShell API
l
Web services
Deploy Workstyles using GPMC
Endpoint Privilege Management for Windows is implemented as an extension to Group Policy, enabling policy settings to be managed
using GPMC. GPMC is the standard tool for managing Group Policy Objects (GPOs).
Endpoint Privilege Management for Windows also supports:
l
Local Computer Policy which can be edited in the Group Policy Editor. This is only recommended for small environments or for test
purposes.
l
Advanced Group Policy Management (AGPM ) from versions 2.5 to 4.0.
Create Endpoint Privilege Management for Windows settings
You can add Endpoint Privilege Management for Windows settings to existing GPOs or create new GPOs.
When working in GPMC, the Endpoint Privilege Management Settings are available in both the Computer Configuration and the
User Configuration nodes, which allow you to set either computer or user settings, respectively.
l
Computer settings are updated when a computer starts up.
l
User settings are updated when a user logs on.
By default, a background refresh occurs every 90 minutes which will update settings while the user is logged on.
To edit a GPO from the GPMC:
1. Launch the GPMC (gpmc.msc).
2. In the GPMC tree, double-click Group Policy Objects in the forest
and domain containing the GPO you want to edit.
3. Right-click the GPO and click Edit. The Group Policy Management
Editor appears.
SALES: www.beyondtrust.com/contact
SUPPORT: www.beyondtrust.com/support
DOCUMENTATION: www.beyondtrust.com/docs
173
©2003-2024 BeyondTrust Corporation. All Rights Reserved. Other trademarks identified on this page are owned by their respective owners. BeyondTrust is not a chartered bank or trust company, or
depository institution. It is not authorized to accept deposits or trust accounts and is not licensed or regulated by any state or federal banking authority.
TC: 8/27/2024
PRIVILEGE MANAGEMENT FOR WINDOWS
24.4 ADMINISTRATION GUIDE

Once a client updates its Endpoint Privilege Management for Windows settings through Group Policy, the settings are applied
dynamically. Any logged on users do not need to log off for the changes to take effect.
Note: Endpoint Privilege Management Settings will either appear directly under the Computer Configuration and User
Configuration nodes, or under the Policies sub-node, if it exists.
To create Endpoint Privilege Management for Windows settings for a GPO:
1. In the Group Policy Management Editor, select the Endpoint Privilege Management Settings node for either the Computer
Configuration or the User Configuration section.
2. On the Group Policy Management Editor Action menu, click Create Endpoint Privilege Management Settings.
3. Right-click the Workstyles node and select Create Workstyle. Choose a controlling or a blank Workstyle.
4. Click Finish.
For information about Workstyles, see "Workstyles" on page 71.
Endpoint Privilege Management settings scope
When deploying Endpoint Privilege Management for Windows settings with Active Directory Group Policy, there are two factors to
consider:
l
The management scope of the GPO you selected.
l
The user or group accounts listed on the account filter section of a Workstyle.
When you create a Workstyle, you can apply a filter that either targets Standard users only or Everyone, including administrators.
Add account filters to refine a subset of users that the Workstyle targets. Define filters on the Filters tab of the Workstyle where you add
groups and users (domain or local). A Workstyle applies to everyone if the account filters are empty.
Add multiple account filters to a Workstyle if you need to add AND logic to your filtering. For example, to target a user who is a member of
GroupA AND GroupB, add two account filters to an account filter, and select the box All items below must match.
You can also use computer filters to apply the Workstyle to specific computers and connecting client devices. These can be used in
combination with account filters to provide more specific targeting of user and computer combinations, if required.
For more information, see "Filters" on page 98.
GPO precedence and inheritance rules
Endpoint Privilege Management for Windows settings are associated with an Active Directory GPO and are distributed to all the
computers and users under the management scope of the GPO. As a result, Endpoint Privilege Management for Windows settings are
subject to the same Group Policy processing and precedence rules as standard Active Directory GPOs.
Order of processing
Group Policy settings are processed in the following order:
SALES: www.beyondtrust.com/contact
SUPPORT: www.beyondtrust.com/support
DOCUMENTATION: www.beyondtrust.com/docs
174
©2003-2024 BeyondTrust Corporation. All Rights Reserved. Other trademarks identified on this page are owned by their respective owners. BeyondTrust is not a chartered bank or trust company, or
depository institution. It is not authorized to accept deposits or trust accounts and is not licensed or regulated by any state or federal banking authority.
TC: 8/27/2024
PRIVILEGE MANAGEMENT FOR WINDOWS
24.4 ADMINISTRATION GUIDE

1. Local Group Policy Object: Each computer has exactly one GPO that is stored locally. This applies to both computer and user
Group Policy processing.
2. Site: Any GPOs that are linked to the site that the computer belongs to are processed next. Processing is in the order that is
specified by the administrator, on the Linked Group Policy Objects tab for the site in GPMC. The GPO with the lowest link order
is processed last, and therefore has the highest precedence.
3. Domain: Processing of multiple domain-linked GPOs is in the order specified by the administrator, on the Linked Group Policy
Objects tab for the domain in GPMC. The GPO with the lowest link order is processed last, and therefore has the highest
precedence.
4. Organizational Units: GPOs that are linked to the organizational unit that is highest in the Active Directory hierarchy are
processed first, then GPOs that are linked to its child organizational unit, and so on. Finally, the GPOs that are linked to the
organizational unit that contains the user or computer are processed.
At the level of each organizational unit in the Active Directory hierarchy, one, many, or no GPOs can be linked. If several GPOs are linked
to an organizational unit, their processing is in the order that is specified by the administrator, on the Linked Group Policy Objects tab
for the organizational unit in GPMC. The GPO with the lowest link order is processed last, and therefore has the highest precedence.
This order means the local GPO is processed first, and GPOs that are linked to the organizational unit of which the computer or user is a
direct member are processed last, which overwrites settings in the earlier GPOs if there are conflicts.
Endpoint Privilege Management for Windows merges settings so settings with a higher precedence will be processed first. Once an
application matches a Workstyle, no further Workstyles will be processed for that application, so it is important to keep this in mind when
multiple GPOs are applied.
Exceptions to default order of processing
The default order for processing settings is subject to the following exceptions:
l
A GPO link may be enforced, or disabled, or both. By default, a GPO link is neither enforced nor disabled.
l
A GPO may have its user settings disabled, its computer settings disabled, or all settings disabled. By default, neither user settings
nor computer settings are disabled on a GPO.
l
An organizational unit or a domain may have a Block Inheritance set. By default, Block Inheritance is not set.
For information about the above modifications to default behavior, see Managing inheritance of Group Policy at
https://docs.microsoft.com/en-us/previous-versions/windows/it-pro/windows-server-2003/cc757050(v=ws.10).
A computer that is a member of a Workgroup processes only the local GPO.
Endpoint Privilege Management settings storage and backup
Endpoint Privilege Management for Windows stores its settings within Active Directory’s SYSVOL folder, within the storage area for the
relevant GPOs, which are identified by their GUIDs. The settings are stored in an XML file and Active Directory is then used as the
distribution mechanism.
Endpoint Privilege Management for Windows settings can be backed up by one of the following methods:
1. A standard System State backup which organizations should be performing as part of their standard backup routines.
2. Manually backing up a GPO from the GPMC which backs up the GPO settings and Endpoint Privilege Management for Windows
XML files.
3. Manually exporting and saving to a location of your choice.
SALES: www.beyondtrust.com/contact
SUPPORT: www.beyondtrust.com/support
DOCUMENTATION: www.beyondtrust.com/docs
175
©2003-2024 BeyondTrust Corporation. All Rights Reserved. Other trademarks identified on this page are owned by their respective owners. BeyondTrust is not a chartered bank or trust company, or
depository institution. It is not authorized to accept deposits or trust accounts and is not licensed or regulated by any state or federal banking authority.
TC: 8/27/2024
PRIVILEGE MANAGEMENT FOR WINDOWS
24.4 ADMINISTRATION GUIDE

For more information on how to perform an export or import of policies, see "Export" on page 48.
Disconnected users
Disconnected users are fully supported by Endpoint Privilege Management for Windows. When receiving its settings from a GPO,
Endpoint Privilege Management for Windows automatically caches all the information required to work offline, so the settings are still
applied if the client is not connected to the corporate network. Any changes to the policy are not propagated to the disconnected computer
until it reconnects to the domain and receives a Group Policy refresh. This behavior is identical to most of the standard Microsoft Group
Policy settings.
Endpoint Privilege Management for Windows also supports a completely standalone configuration mode, where the settings are
configured by a Local Group Policy for that machine, or deployed in a standalone XML configuration file. These settings contain all of the
information required to apply these policies offline.
Deploy Workstyles using standalone policy editor
Although the Endpoint Privilege Management Policy Editor is implemented as a Group Policy extension, it also supports a standalone
mode, which is independent of Group Policy.
Use the Standalone mode to deploy the Endpoint Privilege Management for Windows settings with an XML file. You need a suitable
deployment mechanism to distribute the XML file to your client computers.
To run the Endpoint Privilege Management Policy Editor in standalone mode:
1. Launch mmc.exe.
2. Select Add/Remove Snap-in from the File menu.
3. Select Endpoint Privilege Management Settings from the available snap-ins and click Add.
4. Click OK.
The Endpoint Privilege Management Policy Editor is now running in standalone mode and is not connected to a Group Policy Object
(GPO).
On Windows 7 onwards, the Endpoint Privilege Management for Windows settings will be saved to the following local XML file:
%ALLUSERSPROFILE%\Avecto\Privilege Guard\PrivilegeGuardConfig.xml
If you installed Endpoint Privilege Management for Windows when you installed the Endpoint Privilege Management Policy Editor, then
the client will automatically apply the policies in this XML file. For this reason we strongly recommend you do not install the client if you will
use the policy editor in standalone mode, unless you want the settings to be applied to your management computer. This may be the case
if you are evaluating Endpoint Privilege Management for Windows.
The Endpoint Privilege Management for Windows settings are edited in the same way as when editing GPO based policies. To distribute
the XML file to multiple clients, you will need to export the policies to an XML file and then deploy it to the location specified above.
Endpoint Privilege Management for Windows monitors this directory and will automatically load the XML file.
You must name the settings file PrivilegeGuardConfig.xml once it is deployed, otherwise Endpoint Privilege Management for Windows
will not load the settings. If you make changes to the Endpoint Privilege Management for Windows settings, redeploy the modified XML file
and Endpoint Privilege Management for Windows will automatically reload the settings.
SALES: www.beyondtrust.com/contact
SUPPORT: www.beyondtrust.com/support
DOCUMENTATION: www.beyondtrust.com/docs
176
©2003-2024 BeyondTrust Corporation. All Rights Reserved. Other trademarks identified on this page are owned by their respective owners. BeyondTrust is not a chartered bank or trust company, or
depository institution. It is not authorized to accept deposits or trust accounts and is not licensed or regulated by any state or federal banking authority.
TC: 8/27/2024
PRIVILEGE MANAGEMENT FOR WINDOWS
24.4 ADMINISTRATION GUIDE

Deploy Workstyles using PowerShell API
Use the Endpoint Privilege Management for Windows PowerShell API to configure Endpoint Privilege Management for Windows using
PowerShell scripts. This enables integrations with external systems, and provides an alternative to using the BeyondTrust management
consoles.
You can create and modify Endpoint Privilege Management for Windows configuration within Domain Group Policy, Local Group Policy,
or any local configuration. The PowerShell API is available on any computer where the Endpoint Privilege Management Policy Editor or
Endpoint Privilege Management for Windows is installed.
For more information, see:
l
Endpoint Privilege Management Powershell API Reference Guide at https://www.beyondtrust.com/docs/privilege-
management/windows/api/index.htm
l
PowerShell API.chm located in the Policy Editor install directory: C:\Program Files\Avecto\Privilege Guard
Endpoint Privilege Management Policy Editors\PowerShell\
Windows PowerShell execution policy
The default PowerShell execution policy is Restricted, which stops any scripts running. To set the execution policy:
1. Open PowerShell as an elevated application.
2. Navigate to the Deployment folder in the EPM package.
3. Run Set-ExecutionPolicy unrestricted -scope CurrentUser -f
For information on how to configure the setting using Group Policy, see the Microsoft document Set-ExecutionPolicy at
https://docs.microsoft.com/en-us/powershell/module/Microsoft.PowerShell.Security/Set-ExecutionPolicy?view=powershell-
5.1.
Execute PowerShell configurations
PowerShell scripts and commands which use the Get-DefendpointSettings, Set-DefendpointSettings, and Get-
DefendpointFileInformation cmdlets must be executed with admin rights on the target computer. If you are elevating scripts and
commands with the Endpoint Privilege Management for Windows Remote PowerShell API, you must ensure an Add Administrator
Rights Custom Token has been assigned, and includes the following Groups settings:
l
Enable anti-tamper protection box is unchecked.
l
Make sure the users is always the token owner box is checked.
When using the PowerShell API to apply changes to Endpoint Privilege Management for Windows configurations stored in Active
Directory Group Policy, you require domain level write access to the Group Policy Object.
Note: Configurations created and edited with PowerShell are not backwards compatible with older Endpoint Privilege
Management for Windows versions. We recommend only configurations targeting version 4.0 Clients are managed through
PowerShell scripting.
SALES: www.beyondtrust.com/contact
SUPPORT: www.beyondtrust.com/support
DOCUMENTATION: www.beyondtrust.com/docs
177
©2003-2024 BeyondTrust Corporation. All Rights Reserved. Other trademarks identified on this page are owned by their respective owners. BeyondTrust is not a chartered bank or trust company, or
depository institution. It is not authorized to accept deposits or trust accounts and is not licensed or regulated by any state or federal banking authority.
TC: 8/27/2024
PRIVILEGE MANAGEMENT FOR WINDOWS
24.4 ADMINISTRATION GUIDE

Deploy Workstyles using web services
For instances where Active Directory Group Policy is not suitable, such as for clients outside of the corporate network, Endpoint Privilege
Management for Windows configurations may be hosted on a webserver using HTTP or HTTPS. Endpoint Privilege Management for
Windows can be configured to download configurations on a schedule.
Note: Webserver configurations should be implemented as a complement to other configuration deployment methods.
Workstyle precedence can be customized so that webserver configurations are evaluated with the correct priority. For more
information, see "Workstyle precedence" on page 74.
Endpoint Privilege Management for Windows may be configured to pull an XML configuration from a webserver during the installation of
the Client MSI or EXE, or for existing installations, can be configured using the Windows Registry.
For information on how to create an XML configuration for deployment from a webserver, see the following:
l
"Export" on page 48
l
"Import" on page 48
Webserver enabled client installation
To install Endpoint Privilege Management for Windows with webserver configurations enabled, use the following command line
arguments:
Argument Description
WEBSERVERMODE= Enables webserver functionality (Required, 1 = Enabled)
WSP_URL= The full URL (including XML filename) to the webserver configuration (required)
WSP_INTERVAL= Refresh interval for new configuration check in minutes (optional, default 90 minutes)
WSP_LOGON= Check for new configuration at user logon (optional, default 1 = Enabled)
WSP_CERT= The Common Name for a webserver certificate. When added, restricts webserver downloads only if
the common name matches the webserver certificate, and the certificate is valid.
WSP_CERTAUTHMODE= The type of HTTPS authentication that is used:
0 = server authentication only (default)
1= client authentication and server authentication
When client authentication is used, Endpoint Privilege Management for Windows uses the FQDN of
the machine to find the client certificate in the local machine certificate store.
DOWNLOADAUDITMODE= The level of auditing for attempts to download webserver configurations; 0 = No auditing, 1 = Failures
only, 2 = Successes only, 3 = audit both (default)
POLICYENABLED= The policy deployment methods which are enabled. Add this value to allow a webserver policy to be
used by the Endpoint Privilege Management for Windows: WEBSERVER.
For more information, see "Deployment methods" on page 180.
Example:
SALES: www.beyondtrust.com/contact
SUPPORT: www.beyondtrust.com/support
DOCUMENTATION: www.beyondtrust.com/docs
178
©2003-2024 BeyondTrust Corporation. All Rights Reserved. Other trademarks identified on this page are owned by their respective owners. BeyondTrust is not a chartered bank or trust company, or
depository institution. It is not authorized to accept deposits or trust accounts and is not licensed or regulated by any state or federal banking authority.
TC: 8/27/2024
PRIVILEGE MANAGEMENT FOR WINDOWS
24.4 ADMINISTRATION GUIDE

Msiexec.exe /i PrivilegeManagementForWindows_x86.msi /qn /norestart WEBSERVERMODE=1 WSP_
URL="http://MyWebServer.Internal/WebConfig.xml" WSP_INTERVAL=90
POLICYPRECEDENCE="WEBSERVER,GPO,LOCAL"
PrivilegeManagementForWindows_x86.exe /s /v" WEBSERVERMODE=1 WSP_
URL=\"http://MyWebServer.Internal/WebConfig.xml\" WSP_INTERVAL=90
POLICYPRECEDENCE=\"WEBSERVER,GPO,LOCAL\""
Enable Webserver policy download using the registry
At any time after Endpoint Privilege Management for Windows is installed, webserver configuration may be set using the Windows
registry. The following registry entries are valid:
HKEY_LOCAL_MACHINE\Software\Avecto\Privilege Guard Client\
Value Data Data
WebServerPolicyUrl REG_SZ Specifies the full URL (including xml filename) to the webserver
configuration (Required)
WebServerPolicyRefreshIntervalMins DWORD Refresh interval for new configuration check in minutes (Optional, default
90 minutes)
WebServerPolicyRefreshAtUserLogon DWORD Check for new configuration at user logon (Optional, default 1 = Enabled)
WebServerCertificateDisplayName REG_SZ The Common Name for a webserver certificate. When added, restricts
webserver downloads only if the common name matches the webserver
certificate, and the certificate is valid.
WebServerCertificateAuthMode DWORD The type of HTTPS authentication that is used:
0 = server authentication only (default)
1= client authentication and server authentication
When client authentication is used, Endpoint Privilege Management for
Windows uses the FQDN of the machine to find the client certificate in the
local machine certificate store.
WebServerClientCertificateIssuers REG_MULTI_SZ List of Common Names of certificates that issued a client authentication
certificate. When added, the issuer is also checked when retrieving the
client certificate in the local machine certificate store against the given
Common Names, ordered top to bottom.
DownloadAuditMode DWORD The level of auditing for attempts to download webserver configurations
(0 = No auditing, 1 = Failures only, 2 = Successes only, 3 = audit both
(default))
PolicyEnabled REG_SZ The policy deployment methods which are enabled. Add this value to
allow a webserver policy to be used by the Endpoint Privilege
Management for Windows: WEBSERVER.
For more information, see "Deployment methods" on page
180.
SALES: www.beyondtrust.com/contact
SUPPORT: www.beyondtrust.com/support
DOCUMENTATION: www.beyondtrust.com/docs
179
©2003-2024 BeyondTrust Corporation. All Rights Reserved. Other trademarks identified on this page are owned by their respective owners. BeyondTrust is not a chartered bank or trust company, or
depository institution. It is not authorized to accept deposits or trust accounts and is not licensed or regulated by any state or federal banking authority.
TC: 8/27/2024
PRIVILEGE MANAGEMENT FOR WINDOWS
24.4 ADMINISTRATION GUIDE

Configuration precedence
Endpoint Privilege Management for Windows can accept multiple simultaneous configurations from any combination of the supported
deployment methods:
l
Group Policy: Configurations that are stored in Group Policy Objects, configured with GPMC (Active Directory Group Policy) and
GPEdit (Local Group Policy). Group Policy based configurations are evaluated according to GPO precedence rules.
l
Local Policy: A standalone configuration, which is stored locally, configured with MMC.
l
Webserver Policy: A configuration located on a web server, accessible using HTTP, HTTPS, or FTP.
l
Trellis ePO Policy: A configuration that is stored within Trellis ePO, configured with the ePO policy catalog.
l
BeyondInsight: A web-based console where you configure and launch vulnerability assessment scans. As a scan completes, a
report is automatically generated. Results can be navigated interactively in the console.
Endpoint Privilege Management for Windows uses a logical precedence to evaluate each configuration for matching rules. By default, the
client applies the following precedence:
ePO Policy > BeyondInsight > Webserver Policy > Group Policy > Local Policy.
Configuration precedence settings can be configured either as part of the client installation or with the Windows Registry, once the client is
installed.
To modify configuration precedence at client installation, use one of the following command lines to install Endpoint Privilege
Management for Windows with a specific configuration precedence:
msiexec /i PrivilegeManagementForWindows_x(XX).msi POLICYPRECEDENCE="EPO,WEBSERVER,GPO,LOCAL"
PrivilegeManagementForWindows_x(XX).exe /s /v" POLICYPRECEDENCE=\"EPO,WEBSERVER,GPO,LOCAL\""
Note: In the command line arguments above, (XX) represents 86 or 64 in relation to the 32-bit or 64-bit installation
respectively.
To modify configuration using the Registry, run regedit.exe with elevated privileges (ensuring you are using an Endpoint Privilege
Management for Windows token with anti-tamper disabled) and navigate to the following key:
HKEY_LOCAL_MACHINE\Software\Avecto\Privilege Guard Client
REG_SZ PolicyPrecedence = "EPO,WEBSERVER,GPO,LOCAL"
Deployment methods
Certain types of deployment methods may be enabled or disabled. By default, all deployment types are enabled.
To include or exclude a deployment method from evaluation, edit the entries in the registry value below. If this key does not already exist,
the default behavior is to include all methods:
HKEY_LOCAL_MACHINE\Software\Avecto\Privilege Guard Client
REG_SZ PolicyEnabled = "EPO,BeyondInsight,WEBSERVER,GPO,LOCAL"
In the entry above, EPO,BeyondInsight,WEBSERVER,GPO,LOCAL are the available deployment methods.
SALES: www.beyondtrust.com/contact
SUPPORT: www.beyondtrust.com/support
DOCUMENTATION: www.beyondtrust.com/docs
180
©2003-2024 BeyondTrust Corporation. All Rights Reserved. Other trademarks identified on this page are owned by their respective owners. BeyondTrust is not a chartered bank or trust company, or
depository institution. It is not authorized to accept deposits or trust accounts and is not licensed or regulated by any state or federal banking authority.
TC: 8/27/2024
PRIVILEGE MANAGEMENT FOR WINDOWS
24.4 ADMINISTRATION GUIDE

For more information, see:
l
"Advanced agent settings" on page 69 to deploy Registry settings using the Advanced Agent Settings feature.
l
"Configuration precedence" on page 180 to apply a configuration deployment method using Advanced Agent
Settings, the setting must be applied to a type of configuration that is already part of the configuration precedence
order.
Automate the update of multiple GPOs
Use the PGUpdateGPO.exe command line utility to automate updates to Endpoint Privilege Management for Windows settings in
multiple computer or user GPOs.
PGUpdateGPO.exe COMPUTER GPODSPath [SourceXMLFile]
PGUpdateGPO.exe USER GPODSPath [SourceXMLFile]
Where:
l
GPODSPath is the LDAP path to the GPO
l
SourceXMLFile is the location of the Endpoint Privilege Management for Windows settings XML file on disk
The following command shows how to copy an XML file from the current directory to the computer section of a GPO stored in
BeyondTrust.test:
PGUpdateGPO.exe COMPUTER "LDAP://BeyondTrust.test/cn={97B1DB2E-D68B-45EA-98FF-
D71F9971F44C},cn=policies,cn=system,DC=BeyondTrust,DC=test" PrivilegeGuardConfig.xml
Where:
l
{97B1DB2E-D68B-45EA-98FF-D71F9971F44C} is the GUID of the GPO.
SALES: www.beyondtrust.com/contact
SUPPORT: www.beyondtrust.com/support
DOCUMENTATION: www.beyondtrust.com/docs
181
©2003-2024 BeyondTrust Corporation. All Rights Reserved. Other trademarks identified on this page are owned by their respective owners. BeyondTrust is not a chartered bank or trust company, or
depository institution. It is not authorized to accept deposits or trust accounts and is not licensed or regulated by any state or federal banking authority.
TC: 8/27/2024
PRIVILEGE MANAGEMENT FOR WINDOWS
24.4 ADMINISTRATION GUIDE

Audits and reports
Endpoint Privilege Management for Windows sends events to the local Application event log, depending on the audit and privilege
monitoring settings within the Endpoint Privilege Management for Windows policy.
Additionally, BeyondTrust provides an enterprise level, scalable reporting solution in Endpoint Privilege Management Reporting. Endpoint
Privilege Management Reporting includes a rich set of dashboards and reports designed to simplify the centralized management and
auditing of Endpoint Privilege Management for Windows activity throughout the desktop and server estate. Each dashboard provides
detailed and summarized information regarding Application, User, Host, and Workstyle usage.
Events
The following events are logged by Endpoint Privilege Management for Windows:
Event ID Description
0 Service Control Success.
1 Service Error.
2 Service Warning.
100 Process has started with admin rights added to token.
101 Process has been started from the shell context menu with admin rights added to token.
103 Process has started with admin rights dropped from token.
104 Process has been started from the shell context menu with admin rights dropped from token.
106 Process has started with no change to the access token (passive mode).
107 Process has been started from the shell context menu with no change to the access token (passive mode).
109 Process has started with user’s default rights enforced.
110 Process has started from the shell context menu with user’s default rights enforced.
112 Process requires elevated rights to run.
113 Process has started with custom token applied.
114 Process has started from the shell context menu with user’s custom token applied.
116 Process execution was blocked.
118 Process started in the context of the authorizing user.
119 Process started from the shell menu in the context of the authorizing user.
120 Process execution was canceled by the user.
150 Endpoint Privilege Management for Windows handled service control start action.
151 Endpoint Privilege Management for Windows handled service control stop action.
152 Endpoint Privilege Management for Windows handled service control pause/resume action.
153 Endpoint Privilege Management for Windows handled service control configuration action.
154 Endpoint Privilege Management for Windows blocked a service control start action.
155 Endpoint Privilege Management for Windows blocked a service control stop action.
156 Endpoint Privilege Management for Windows blocked a service control pause/resume action.
SALES: www.beyondtrust.com/contact
SUPPORT: www.beyondtrust.com/support
DOCUMENTATION: www.beyondtrust.com/docs
182
©2003-2024 BeyondTrust Corporation. All Rights Reserved. Other trademarks identified on this page are owned by their respective owners. BeyondTrust is not a chartered bank or trust company, or
depository institution. It is not authorized to accept deposits or trust accounts and is not licensed or regulated by any state or federal banking authority.
TC: 8/27/2024
PRIVILEGE MANAGEMENT FOR WINDOWS
24.4 ADMINISTRATION GUIDE

Event ID Description
157 Endpoint Privilege Management for Windows blocked a service control configuration action.
158 Endpoint Privilege Management for Windows service control action run in the context of the authorizing user.
159 Endpoint Privilege Management for Windows service control start action canceled.
160 Endpoint Privilege Management for Windows service control stop action canceled.
161 Endpoint Privilege Management for Windows service control pause/resume action canceled.
162 Endpoint Privilege Management for Windows service control configuration action canceled.
198 Privileged group modification blocked.
199 Process execution was blocked, the maximum number of challenge / response failures was exceeded.
Configuration Events
10 License Error.
200 Config Config Load Success.
201 Config Config Load Warning.
202 Config Config Load Error.
210 Config Config Download Success.
211 Config Config Download Error.
User / Computer Events
300 User User Logon.
400 Service Endpoint Privilege Management for Windows Service Start.
401 Service Endpoint Privilege Management for Windows Service Stop.
Content Events
600 Content has been updated with Add Admin Rights token.
601 Content has been updated with a custom token.
602 Content has been updated with Drop Admin Rights token.
603 Content has been updated with Passive token.
604 Content has been updated with Enforce User's Default Rights token.
605 Content access was blocked.
606 Content access was canceled by the user.
706 Process Passive Audit DLL.
716 Process Block DLL.
720 Process Cancel DLL Audit.
801 Rule Script Failure.
802 Password Safe Integration Error.
Each process event contains the following information:
l
Command line for the process
l
Process ID for the process (if applicable)
l
Parent process ID of the process
l
Workstyle that applied
SALES: www.beyondtrust.com/contact
SUPPORT: www.beyondtrust.com/support
DOCUMENTATION: www.beyondtrust.com/docs
183
©2003-2024 BeyondTrust Corporation. All Rights Reserved. Other trademarks identified on this page are owned by their respective owners. BeyondTrust is not a chartered bank or trust company, or
depository institution. It is not authorized to accept deposits or trust accounts and is not licensed or regulated by any state or federal banking authority.
TC: 8/27/2024
PRIVILEGE MANAGEMENT FOR WINDOWS
24.4 ADMINISTRATION GUIDE

l
Application Group that contained the process
l
End user reason (if applicable)
l
Custom access token (if applicable)
l
File hash
l
Certificate (if applicable)
Note: Each process event also contains product properties, where applicable, but these can only be viewed in the Endpoint
Privilege Management Reporting Console.
Audit with custom scripts
When an application is allowed, elevated, or blocked, Endpoint Privilege Management for Windows logs an event to the Application event
log to record details of the action. If you want to record the action in a bespoke or third-party tracking system that supports PowerShell or
JScript based submissions, you can use the Run a Script setting within an Application Rule.
To add a new auditing script:
1. Create a new or edit an existing Application Rule within a Workstyle.
2. In Run a Script, click on the Off value and in the dropdown menu, select Manage Scripts to open the Script Manager.
3. In the Script Manager, click New in the left tree view. A new script is added to the tree. Click the name New Script once to
rename the script.
4. In the right script editor, enter your script code either manually, by copy and paste, or you can import a script from file by clicking
Import.
5. In the Script Language dropdown menu, select either PowerShell or Javascript, depending on the code format you entered.
Note: PowerShell audit scripts can only be run in the system context.
6. Select a Timeout for how long the script will be allowed to execute, before it is terminated. By default, this is set to Infinite.
7. Select whether the script should be executed in the System context or the current User context from the Script Context
dropdown menu.
8. Click OK to finish.
The new script is automatically selected in the Run a Script setting.
Note: If you have any existing scripts, these can be selected in the dropdown menu.
The auditing script supports the use of parameters within the script. Parameters are expanded using the COM interface PGScript.
Example:
strUserName = PGScript.GetParameter("[PG_USER_NAME]")
strCommandLine = PGScript.GetParameter("[PG_PROG_CMD_LINE]")
strAgentVersion = PGScript.GetParameter("[PG_AGENT_VERSION]")
SALES: www.beyondtrust.com/contact
SUPPORT: www.beyondtrust.com/support
DOCUMENTATION: www.beyondtrust.com/docs
184
©2003-2024 BeyondTrust Corporation. All Rights Reserved. Other trademarks identified on this page are owned by their respective owners. BeyondTrust is not a chartered bank or trust company, or
depository institution. It is not authorized to accept deposits or trust accounts and is not licensed or regulated by any state or federal banking authority.
TC: 8/27/2024
PRIVILEGE MANAGEMENT FOR WINDOWS
24.4 ADMINISTRATION GUIDE

Note: Scripts created in the script editor can be reused in multiple Application Rules and On-Demand Application Rules. Any
modification to an existing script affects all Workstyle rules that have been configured to execute that script.
For a list of available parameters, see "Windows QuickStart policy summary" on page 55.
SALES: www.beyondtrust.com/contact
SUPPORT: www.beyondtrust.com/support
DOCUMENTATION: www.beyondtrust.com/docs
185
©2003-2024 BeyondTrust Corporation. All Rights Reserved. Other trademarks identified on this page are owned by their respective owners. BeyondTrust is not a chartered bank or trust company, or
depository institution. It is not authorized to accept deposits or trust accounts and is not licensed or regulated by any state or federal banking authority.
TC: 8/27/2024
PRIVILEGE MANAGEMENT FOR WINDOWS
24.4 ADMINISTRATION GUIDE

Regular expressions syntax
Use regular expressions to control applications at a granular level. Endpoint Privilege Management uses the CAtlRegExp library, which is
part of the Microsoft ATL Server implementation, and makes use of the regex parser and engine.
Examples
The following examples are from Endpoint Privilege Management QuickStart Templates.
Application
Definition Regular Expression Application
File / Folder Name %ProgramFiles%( \(x86\))*\\webex\\productivity tools\\ptupdate.exe Cisco WebEx ptUpdate
File / Folder Name vcredist_x[0-9][0-9]\.exe
Microsoft Visual C++
Redistributable Setup
File / Folder Name ((rdbgsetup)|(msvsmon))\.exe
Microsoft Visual Studio Remote
Debugger
Command line
(powershell_ise.exe)|(powershell.exe)|(cmd.exe)|(wscript.exe)|
(cscript)|(mshta.exe)
Any Trusted Executable
Command line
arguments
-[rfRM].*[rfRM]\s\W* rm
Syntax
Metacharacter Meaning Example
Any character
except [\^$.|?*+()
All characters except the listed special characters match a single instance of
themselves. To match one of these listed characters use a backslash escape
character (see below).
abc matches abc
\ (backslash) Escape character: interpret the next character literally. a\+b matches a+b
. (dot) Matches any single character. a.b matches aab, abb or
acb, etc.
[ ] Indicates a character class. Matches any character inside the brackets (for example,
[abc] matches a, b, and c).
[abc] matches a, b, or c
^ (caret) If this metacharacter occurs at the start of a character class, it negates the character
class. A negated character class matches any character except those inside the
brackets (for example, [^abc] matches all characters except a, b, and c).
If ^ is at the beginning of the regular expression, it matches the beginning of the input
(for example, ^[abc] will only match input that begins with a, b, or c).
[^abc] matches all
characters except a, b, and
c
- (minus character) In a character class, indicates a range of characters (for example, [0-9] matches any
of the digits 0 through 9).
[0-9] matches any of the
digits 0 through 9
? Indicates that the preceding expression is optional: it matches once or not at all (for
example, [0-9][0-9]? matches 2 and 12).
ab?c matches ac or abc
SALES: www.beyondtrust.com/contact
SUPPORT: www.beyondtrust.com/support
DOCUMENTATION: www.beyondtrust.com/docs
186
©2003-2024 BeyondTrust Corporation. All Rights Reserved. Other trademarks identified on this page are owned by their respective owners. BeyondTrust is not a chartered bank or trust company, or
depository institution. It is not authorized to accept deposits or trust accounts and is not licensed or regulated by any state or federal banking authority.
TC: 8/27/2024
PRIVILEGE MANAGEMENT FOR WINDOWS
24.4 ADMINISTRATION GUIDE
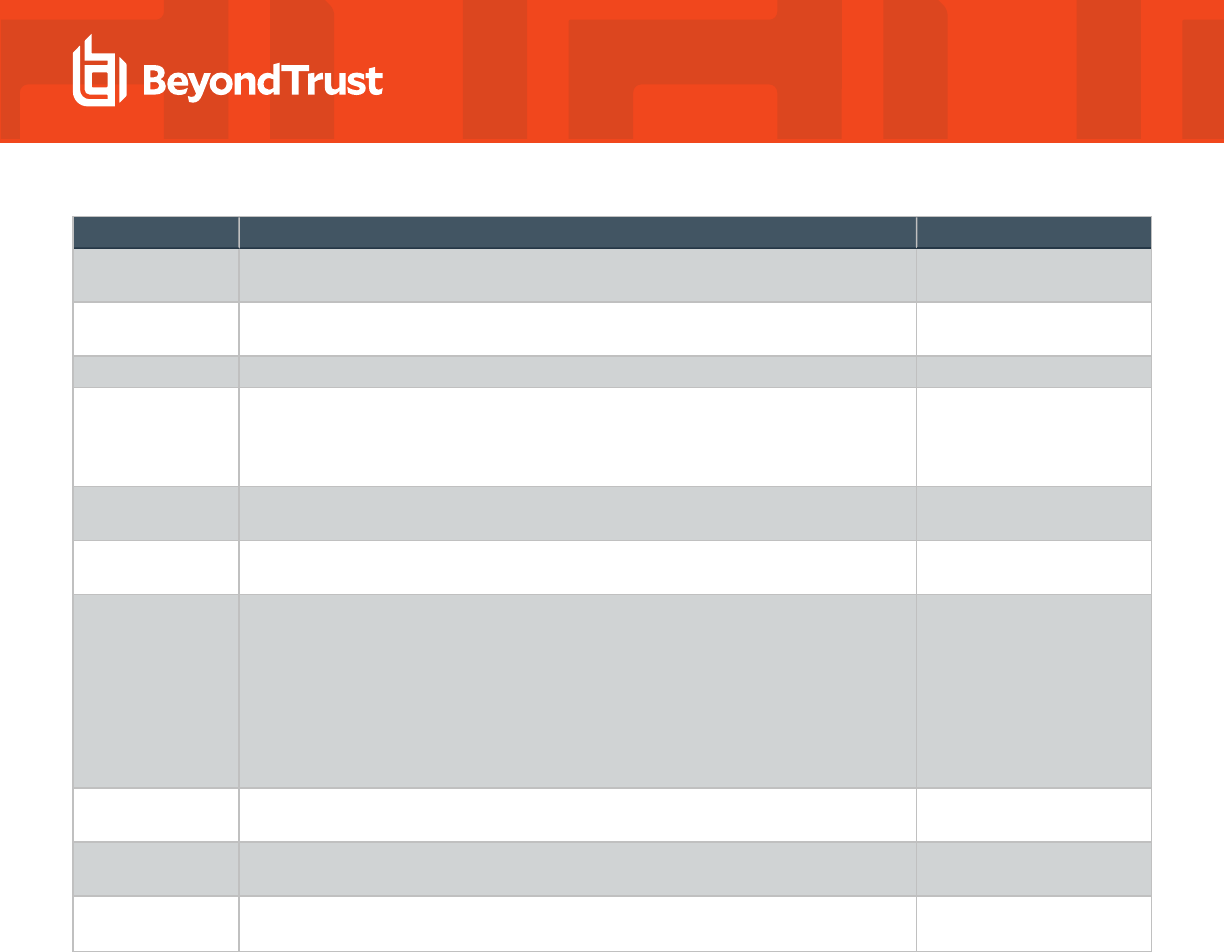
Metacharacter Meaning Example
+ Indicates that the preceding expression matches one or more times (for example, [0-
9]+ matches 1, 13, 999, and so on).
ab+c matches abc and
abbc, abbbc, etc.
* (asterisk) Indicates that the preceding expression matches zero or more times ab*c matches ac and abc,
abbc, etc.
| (vertical pipe) Alternation operator: separates two expressions, exactly one of which matches. a|b matches a or b
??, +?, *? Non-greedy versions of ?, +, and *. These match as little as possible, unlike the
greedy versions which match as much as possible. Example: given the input
<abc><def>, <.*?> matches <abc> while <.*> matches <abc><def>.
Given the input
<abc><def>, <.*?>
matches <abc> while <.*>
matches <abc><def>.
( ) Grouping operator. Example: (\d+,)*\d+ matches a list of numbers separated by
commas, such as 1 or 1,23,456.
(One)|(Two) matches One
or Two
{ } Indicates a match group. The actual text in the input that matches the expression
inside the braces can be retrieved through the CAtlREMatchContext object.
\ Escape character: interpret the next character literally. For example, [0-9]+ matches
one or more digits, but [0-9]\+ matches a digit followed by a plus character. Also
used for abbreviations, such as \a for any alphanumeric character; see table below.
If \ is followed by a number n, it matches the nth match group (starting from 0).
Example: <{.*?}>.*?</\0> matches "<head>Contents</head>".
Note that in C++ string literals, two backslashes must be used: "\\+", "\\a", "<
{.*?}>.*?</\\0>".
<{.*?}>.*?</\0> matches
<head>Contents</head>
$ At the end of a regular expression, this character matches the end of the input.
Example: [0-9]$ matches a digit at the end of the input.
[0-9]$ matches a digit at the
end of the input
| Alternation operator: separates two expressions, exactly one of which matches. For
example, T|the matches The or the.
T|the matches The or the
! Negation operator: the expression following ! does not match the input. Example: a!b
matches a not followed by b.
a!b matches a not followed
by b
SALES: www.beyondtrust.com/contact
SUPPORT: www.beyondtrust.com/support
DOCUMENTATION: www.beyondtrust.com/docs
187
©2003-2024 BeyondTrust Corporation. All Rights Reserved. Other trademarks identified on this page are owned by their respective owners. BeyondTrust is not a chartered bank or trust company, or
depository institution. It is not authorized to accept deposits or trust accounts and is not licensed or regulated by any state or federal banking authority.
TC: 8/27/2024
PRIVILEGE MANAGEMENT FOR WINDOWS
24.4 ADMINISTRATION GUIDE

Database sizing and resource consumption
Data retention considerations
The Audit Event and Microsoft SQL Server Reporting Services databases used to support BeyondTrust Endpoint Privilege Management
Reporting may be hosted and scaled independently.
It's important to identify the length of time that Endpoint Privilege Management for Windows audit event data must be retained in the
Endpoint Privilege Management for Windows database as it drives resource utilization projections, and initial allocation.
Endpoint Privilege Management Reporting is designed to report on activity in recent time, not as a long term archival data storage
solution.
l
Endpoint Privilege Management for Windows provides a database purge utility that may be used to purge data manually, or
automatically on a configured period to ensure database growth is capped.
l
Unlimited database growth inevitably reduces query execution performance, and increases resource utilization for queries.
Note: Prior to purging large sets of data, please ensure your SQL Transaction logs are able to grow to accommodate. It may
be necessary to delete data in stages when setting this up for the first time.
In order to facilitate your decision making regarding retention time in the Endpoint Privilege Management for Windows database, please
refer to the following sections in our standard documentation:
l
Description of the views of data exposed in Endpoint Privilege Management Reporting.
l
Description of the events audited by Endpoint Privilege Management for Windows.
l
Description of the Workstyle parameters. You may consider these as the fields that are collected in the audit events, eventually
stored in the Endpoint Privilege Management for Windows Audit Events database.
For more information, see the following:
l
Reporting Dashboard Guide at https://www.beyondtrust.com/docs/privilege-management/windows/index.htm
l
"Events" on page 182
l
"Windows QuickStart policy summary" on page 55
Database sizing
The Audit Event database has to be sized to accommodate substantial data volume, matching the number of clients generating audit data
and the desired retention period.
Database storage requirements may be estimated roughly using the following calculation:
Number of hosts
× Number of events per host per day
× 5Kb per event
× Number of retention days
Number of hosts × Number of events per host per day
× 5Kb per event
× Number of retention days
SALES: www.beyondtrust.com/contact
SUPPORT: www.beyondtrust.com/support
DOCUMENTATION: www.beyondtrust.com/docs
188
©2003-2024 BeyondTrust Corporation. All Rights Reserved. Other trademarks identified on this page are owned by their respective owners. BeyondTrust is not a chartered bank or trust company, or
depository institution. It is not authorized to accept deposits or trust accounts and is not licensed or regulated by any state or federal banking authority.
TC: 8/27/2024
PRIVILEGE MANAGEMENT FOR WINDOWS
24.4 ADMINISTRATION GUIDE

For example, an organization of 10,000 hosts, with each host generating an average of 15 events per day, requiring a 30 day retention
would require a database capacity of:
10,000 × 15 × 5 × 30 = 22,500,000Kb, or 21.5Gb
A typical event volume would be 10-20 events per host per day and varies based on Endpoint Privilege Management for Windows auditing
configuration, user job function (role/Workstyle) and user activity patterns.
Note: See the Endpoint Privilege Management for Windows Database sizing calculator to further explore database sizing and
growth expectations.
Database resource utilization (CPU, Memory) is highly variable depending on the hardware platform.
Example use case volumes
Based on an organization of 10,000 hosts requiring a 42 day (six weeks) retention.
Discovery: Between 40 – 60 events per machine per day
(4.6K per event (based on real world data))
Average total: 67.06GB
Production: Between 2 – 10 events per machine per day
(4.6K per event (based on real world data))
Average total: 5.66GB
Note: If the number of events "per machine per day" is raised to 15, then the Average total increases to 16.99GB.
Key considerations
Volume of inbound audit event records
As seen above, the number of events per hour may be estimated following simple calculations.
Queries triggered from MSFT SQL Reporting Services Reports
As the database grows in size, the resource impact of the reporting platform queries becomes important.
The volume of data maintained in the audit event database will affect the duration and
resource cost of these queries.
To maintain good performance, we recommend the ER Purge Utility is used to limit the timespan of audit event data retained in the
database.
SALES: www.beyondtrust.com/contact
SUPPORT: www.beyondtrust.com/support
DOCUMENTATION: www.beyondtrust.com/docs
189
©2003-2024 BeyondTrust Corporation. All Rights Reserved. Other trademarks identified on this page are owned by their respective owners. BeyondTrust is not a chartered bank or trust company, or
depository institution. It is not authorized to accept deposits or trust accounts and is not licensed or regulated by any state or federal banking authority.
TC: 8/27/2024
PRIVILEGE MANAGEMENT FOR WINDOWS
24.4 ADMINISTRATION GUIDE
Finer-grained audit data management and clean-up is possible using the Endpoint Privilege Management for Windows Database
Administration Dashboard. The Database Administration Dashboard allows the purging of audits related to specific applications and
suppression of incoming audit items related to those applications.
Prior to purging large sets of data, please ensure your SQL Transaction logs are able to grow to accommodate. It may be necessary to
delete data in stages when setting this up for the first time.
For more information, see the Database Administration description in the Reporting Dashboard Guide at
www.beyondtrust.com/docs/privilege-management/windows.htm.
Configure remote computer browser
The Endpoint Privilege Management for Windows Workstyle Editor allows you to browse computers on the network for executables,
Windows services and running processes, which can be added to Application Groups. This provides a convenient alternative to manual
entry.
Remote computer browsing leverages Windows Remote Management (WinRM) and PowerShell, which must be configured on each
target endpoint in advance of using the computer browser feature to access the remote computer.
Note: WinRM and Powershell are components of the Windows Management Framework, and are part of Windows 7 and
Windows Server 2008 R2. For older versions of Windows, the Windows Management Framework can be downloaded and
installed as an optional update at https://www.microsoft.com/en-us/download/details.aspx?id=54616.
Configure the ePO Server
Configure WinRM trusted hosts:
1. Open PowerShell (elevated).
2. Type:
winrm s winrm/config/client '@{TrustedHosts="<endpoint>"}'
<endpoint> should be replaced with the hostname or IP Address of the network computer to be trusted. A wildcard (*) can also be
used.
3. Press Enter.
Configure a network computer
Verify PS-Remoting is enabled:
1. Open PowerShell (elevated).
2. Type Enable-PSRemoting, and then type A to accept all defaults (this can also be enabled with AD Group Policy).
SALES: www.beyondtrust.com/contact
SUPPORT: www.beyondtrust.com/support
DOCUMENTATION: www.beyondtrust.com/docs
190
©2003-2024 BeyondTrust Corporation. All Rights Reserved. Other trademarks identified on this page are owned by their respective owners. BeyondTrust is not a chartered bank or trust company, or
depository institution. It is not authorized to accept deposits or trust accounts and is not licensed or regulated by any state or federal banking authority.
TC: 8/27/2024
PRIVILEGE MANAGEMENT FOR WINDOWS
24.4 ADMINISTRATION GUIDE

Configure WinRM to allow remote connections
1. In the same PowerShell window, type winrm qc and press Enter.
2. Type:
winrm set winrm/config/service @{AllowUnencrypted="true"}
3. Press Enter.
Test for a successful connection
From the ePO server, run this command:
>winrm identify -r:http://<endpoint>:5985 -u:<username> -p:<password>
<endpoint> should be replaced with the hostname or IP Address of the network computer. Replace <username> and <password> with
administrator credentials on the network computer.
If the connection is unsuccessful, edit the local security policy to enable classic mode authentication for network logons.
1. Open Local Security Policy from Control Panel > Administrative Tools.
2. Navigate to Local Policies > Security Options.
3. Double click Network Access: Sharing and Security Model for local accounts.
4. Set to classic.
Mixed environments:
1. Open PowerShell (elevated).
2. Type the following:
new-itemproperty -name LocalAccountTokenFilterPolicy -path
HKLM:\SOFTWARE\Microsoft\Windows\CurrentVersion\Policies\System -propertyType DWord -value 1
3. Press Enter.
SALES: www.beyondtrust.com/contact
SUPPORT: www.beyondtrust.com/support
DOCUMENTATION: www.beyondtrust.com/docs
191
©2003-2024 BeyondTrust Corporation. All Rights Reserved. Other trademarks identified on this page are owned by their respective owners. BeyondTrust is not a chartered bank or trust company, or
depository institution. It is not authorized to accept deposits or trust accounts and is not licensed or regulated by any state or federal banking authority.
TC: 8/27/2024
PRIVILEGE MANAGEMENT FOR WINDOWS
24.4 ADMINISTRATION GUIDE

Troubleshoot
Resultant set of policy
Endpoint Privilege Management for Windows provides support for Resultant Set of Policy (RSoP). RSoP is usually accessed through the
Group Policy Management Console (GPMC).
The GPMC supports the following mode of operation for RSoP: Group Policy Results (RSoP logging mode)
RSoP can be used to establish which policy applies to a particular user or computer to aid troubleshooting. Detailed HTML reports are
generated, which may also be exported to aid policy documentation.
Group Policy results
To run a Group Policy Results query (RSoP logging), perform the following steps from the GPMC:
1. Double-click the forest in which you want to create a Group Policy Results query.
2. Right-click Group Policy Results and click Group Policy Results wizard.
3. In the Group Policy Results wizard click Next and enter the appropriate information.
4. After completing the wizard, click Finish.
5. Right-click the node for the completed query in the console tree, and click Advanced View to launch the Resultant Set of Policy
window.
6. Select the Endpoint Privilege Management Settings node under the Computer Configuration node or the User
Configuration node to view the RSoP HTML report for Endpoint Privilege Management for Windows.
Endpoint Privilege Management also appears in the Summary tab of the Group Policy Results node. Expand the Component
Status section of the HTML report to find out whether RSoP data has been collected for Endpoint Privilege Management for Windows.
Endpoint Privilege Management does not appear in the Settings tab of the Group Policy Results node, as third-party Group Policy
extensions are not detailed in this HTML report. You must use the Advanced View, as outlined above, to view Endpoint Privilege
Management for Windows Workstyles for an RSoP query.
Check Endpoint Privilege Management for Windows is installed and
functioning
If you are having problems, the first step is to check that you installed the client and the client is working.
l
BeyondTrust Endpoint Privilege Management System Tray: The UI of Endpoint Privilege Management for Windows on the
system tray for messages and end user interaction.
l
Avecto Defendpoint Service: The Endpoint Privilege Management for Windows service that manages interaction with PGDriver.
l
PGDriver: A kernel driver that communicates with Avecto Defendpoint Service.
The easiest way to determine the client is installed and working is to check for the existence of the Avecto Defendpoint Service in the
Services app provided by Windows. Ensure this service is both present and started. The Avecto Defendpoint Service is installed by
Endpoint Privilege Management for Windows and should start automatically.
SALES: www.beyondtrust.com/contact
SUPPORT: www.beyondtrust.com/support
DOCUMENTATION: www.beyondtrust.com/docs
192
©2003-2024 BeyondTrust Corporation. All Rights Reserved. Other trademarks identified on this page are owned by their respective owners. BeyondTrust is not a chartered bank or trust company, or
depository institution. It is not authorized to accept deposits or trust accounts and is not licensed or regulated by any state or federal banking authority.
TC: 8/27/2024
PRIVILEGE MANAGEMENT FOR WINDOWS
24.4 ADMINISTRATION GUIDE

Note: The Endpoint Privilege Management for Windows service requires MSXML6 to load the Endpoint Privilege
Management for Windows settings, but the service still runs even if MSXML6 is not present.
Check settings are deployed
Assuming Endpoint Privilege Management for Windows is installed and functioning, the next step is to check that you deployed settings to
the computer or user.
You can use RSoP logging mode to determine whether the computer has received settings. Assuming the RSoP query shows that
Endpoint Privilege Management for Windows settings are applied, you should check the contents of the settings (including licensing and
Workstyle precedence).
Check Endpoint Privilege Management for Windows is licensed
One of the most common reasons for Endpoint Privilege Management for Windows not functioning is the omission of a valid license from
the Endpoint Privilege Managementfor Windows settings. If you are creating multiple GPOs, then you must ensure the computer or user
receives at least one GPO that contains a valid license. To avoid problems, it is simpler to add a valid license to every set of Endpoint
Privilege Management for Windows settings that you create.
Check Workstyle precedence
Assuming Endpoint Privilege Management for Windows is functioning and licensed, most other problems are caused by configuration
problems or Workstyle precedence problems.
Once an application matches an Application Group entry in the Application Rules or the On-Demand Application Rules, processing
does not continue for that application. Therefore, it is vital you order your entries correctly:
l
If you create multiple Workstyles, Workstyles higher in the list have a higher precedence.
l
If you have multiple rules in the Application Rules and the On-Demand Application Rules sections of a Workstyle, entries higher in
the list have a higher precedence.
Application Rules are applied to applications that are launched either directly by the user or by a running process. On-Demand
Application Rules are only applied to applications that are launched from the Endpoint Privilege Management for Windows shell menu (if
enabled).
If you have multiple GPOs applying to a user and/or computer, you should ensure GPO precedence rules are not causing the problem. If
multiple GPOs are applied to a computer or user, Endpoint Privilege Management for Windows merges the computer GPOs and user
GPOs by following Group Policy precedence rules. Once merged, the user Workstyles take precedence over the computer Workstyles. In
other words, the computer Workstyles are only processed if an application does not match an entry in the user Workstyles.
For this reason, we strongly recommended you do not create over-complex rules that rely on the merging of many GPOs, as this can
become difficult to troubleshoot. If, however, it makes sense to split rules over multiple GPOs, you should make use of RSoP to ensure
Workstyles are combined correctly. You must also remember that computer and user Workstyles are processed separately, with user
Workstyles always processed ahead of computer Workstyles, if both exist.
SALES: www.beyondtrust.com/contact
SUPPORT: www.beyondtrust.com/support
DOCUMENTATION: www.beyondtrust.com/docs
193
©2003-2024 BeyondTrust Corporation. All Rights Reserved. Other trademarks identified on this page are owned by their respective owners. BeyondTrust is not a chartered bank or trust company, or
depository institution. It is not authorized to accept deposits or trust accounts and is not licensed or regulated by any state or federal banking authority.
TC: 8/27/2024
PRIVILEGE MANAGEMENT FOR WINDOWS
24.4 ADMINISTRATION GUIDE

Windows and macOS OS technical support statement
At BeyondTrust, we strive to offer technical support for all operating systems (OS), but we acknowledge the limitations that may arise
when using outdated operating systems.
At our sole discretion, we may make commercially reasonable efforts to provide limited technical support for supported EPM (Endpoint
Privilege Management) agents installed on outdated Windows OS or macOS. However, it's essential to note that according to
BeyondTrust’s End of Life Policy, we are not committed to providing any security, functional, or operational code fixes for agents installed
on unsupported or outdated OS versions.
We highly recommend keeping your operating systems up-to-date to ensure the security, stability, and optimal performance of your
systems and applications. Running outdated OS versions may expose your organization to various security risks and vulnerabilities, as
they may lack essential security patches and updates provided by the OS vendor.
In the event that you encounter issues with EPM agents installed on outdated Windows OS or macOS, BeyondTrust will make every effort
to provide guidance and assistance within the constraints of our End of Life Policy.
We remain committed to supporting our customers in their cybersecurity efforts and are here to assist you in navigating any challenges
you may encounter. If you have any questions or require further assistance regarding technical support for EPM agents, please don't
hesitate to contact our support team.
SALES: www.beyondtrust.com/contact
SUPPORT: www.beyondtrust.com/support
DOCUMENTATION: www.beyondtrust.com/docs
194
©2003-2024 BeyondTrust Corporation. All Rights Reserved. Other trademarks identified on this page are owned by their respective owners. BeyondTrust is not a chartered bank or trust company, or
depository institution. It is not authorized to accept deposits or trust accounts and is not licensed or regulated by any state or federal banking authority.
TC: 8/27/2024
PRIVILEGE MANAGEMENT FOR WINDOWS
24.4 ADMINISTRATION GUIDE
