
Created 1/4/2022
DocuSign for
Electronic Signatures
Beginning on January 25, 2022, the National Institutes of Health (NIH) will require all investigators to electronically sign
their Other Support documentation. The University has a site license for DocuSign and will require that Other Support
disclosures for all NIH proposal and Just-in-Time submissions be signed through DocuSign. Other forms of electronic
signature will not be accepted.
How to Use DocuSign
You will receive an email from DocuSign that will notify you of access to the system. Investigators who receive the
Other Support document for their signature do not need an account to sign the document.
How to sign in to DocuSign for JHU
1.
Visit URL
2.
Please enter you email address of <YourJHEDID>@jh.edu, click next.
3.
Click “USE COMPANY LOGIN.”
4.
Enter your JHED ID and password
5.
Once authentication is complete, you will arrive at your DocuSign home page.
6.
If your account has access to multiple DocuSign instances, you may need to
navigate to your profile image in
the upper right corner and select “Switch Accounts” and then select “Johns Hopkins University – Research
Administration” account to switch accounts.
How to use Docusign.com
Get started quickly by utilizing the online training information provided by DocuSign.
• Support home
• New user guide
• How to send a document
• How to sign a document
• How to manage documents
• How to download or print your document
Created 1/4/2022
How to Create a DocuSign Document (Envelope) for Signature by an Investigator
• From the DocuSign Home page, select Manage
• Click “New” in the left corner to Start an envelope. You can start with a new envelope, use a template stored in
DocuSign eSignature, or finish a previously saved draft.
• Add your documents. DocuSign eSignature supports a broad variety of file formats. Select files from your local
machine or from cloud storage providers like OneDrive. At a minimum, you should include the completed
(verified as accurate by the investigator) Other Support document and all required supporting documentation
(i.e. copies of any translated contracts required to be submitted per NIH requirements)
• Add recipients. Specify who receives your envelope and what action you want them to take.
• Then place the signature tag.
• Add messages. Enter the email subject and message details for your recipient(s).
• Advanced Options. Set special recipient privileges, reminder settings, and expiration options.
• Add fields. For each recipient, add fields to your documents to gather the desired electronic signatures and
other information, such as title, date signed, and more.
• Preview and send. Review your field setup and send the envelope to your recipients.
•
Once the signature is complete, everyone is alerted and the document is stored electronically. You will receive a
fully signed document and a signature certification in an email.
• To see the status of your document or to access stored documents, just visit your DocuSign home page.
How to Sign a DocuSign Document
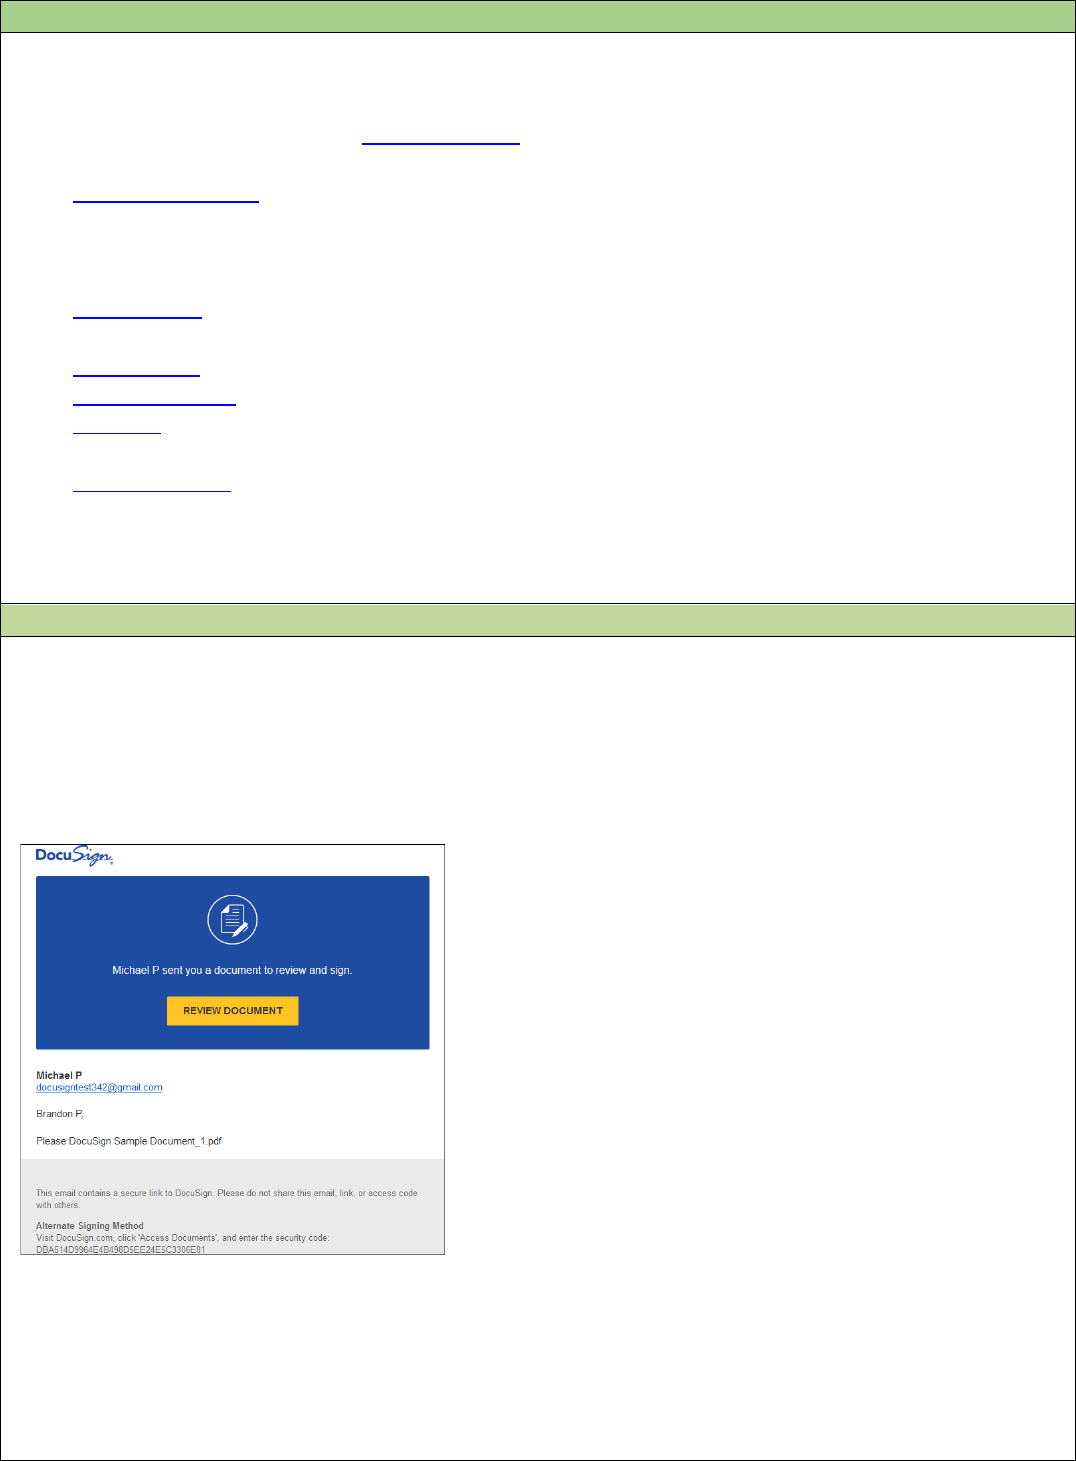
When someone sends you a DocuSign document for your electronic signature, you will first receive an
email from DocuSign sent on behalf of the sender with a link taking you to the document. Do not forward
the email to others, as the link sent is personalized to the investigator for signature.
Step 1 Review the DocuSign email
Open the email and review the message from the sender. Click REVIEW DOCUMENT to begin the
signing process.
The University requires that investigators sign and certify their own Other Support disclosures; faculty cannot assign
this task to an administrator, department staff, or other member of their lab.

Created 1/4/2022
Note: A signer’s experience may vary. New signers have a different experience than returning signers and signers
with a DocuSign account. To learn more, watch the Signing video or read the how-to guide
Signing Documents
Electronically with DocuSign.
Step 2 Agree to sign electronically
Review the consumer disclosure, and select the checkbox I agree to use Electronic Records and Signatures. Click
CONTINUE to begin the signing process.
Important! To view and sign the documents, you must agree to conduct business electronically.
Note: To view additional options, click OTHER ACTIONS. For more information of other actions available, please
review our Signing Documentation.
Step 3 Start the signing process
1. Click the START tag on the left to begin the signing process.
2. Click the SIGN tag. You are asked to Adopt Your Signature. First time DocuSign users will be prompted to
select either a pre-drawn signature or choose to draw their own signature on a mobile device. Please note
that cutting and pasting signatures from another signed document is fraudulent.

Created 1/4/2022
Step 4 Verify your name
Verify that your name and initials are correct. If not, change them as needed.
Step 5 Adopt a signature
Do one of the following:
•
Accept the default signature and initial style, and go to the next step.
•
Click Change Style, and select a different signature option.
•
Click Draw. Draw your signature/initials using a mouse, or your finger or a stylus on a touchscreen.
Step 6 Save your signature
Click ADOPT AND SIGN to adopt and save your signature information and return to the document.

Created 1/4/2022
Step 7 Confirm signing
When you finish clicking all signature tags in the document, confirm signing by clicking FINISH.
A message appears stating that you have completed your document. You can now download a PDF copy or print
a copy of the document. The sender receives an email with the signed document attached, and the signed
document appears in their DocuSign account. The pdf copy with the signature is what gets submitted to
ORA/JHURA for submission to the NIH.
