
123RFID
Mobile Application
User Guide
MN-003765-04EN Rev A

Copyright
2023/10/27
ZEBRA and the stylized Zebra head are trademarks of Zebra Technologies Corporation, registered in many
jurisdictions worldwide. All other trademarks are the property of their respective owners. ©2023 Zebra
Technologies Corporation and/or its affiliates. All rights reserved.
Information in this document is subject to change without notice. The software described in this document
is furnished under a license agreement or nondisclosure agreement. The software may be used or copied
only in accordance with the terms of those agreements.
For further information regarding legal and proprietary statements, please go to:
SOFTWARE: zebra.com/linkoslegal.
COPYRIGHTS: zebra.com/copyright.
PATENTS: ip.zebra.com.
WARRANTY: zebra.com/warranty.
END USER LICENSE AGREEMENT: zebra.com/eula.
Terms of Use
Proprietary Statement
This manual contains proprietary information of Zebra Technologies Corporation and its subsidiaries
(“Zebra Technologies”). It is intended solely for the information and use of parties operating and
maintaining the equipment described herein. Such proprietary information may not be used, reproduced,
or disclosed to any other parties for any other purpose without the express, written permission of Zebra
Technologies.
Product Improvements
Continuous improvement of products is a policy of Zebra Technologies. All specifications and designs are
subject to change without notice.
Liability Disclaimer
Zebra Technologies takes steps to ensure that its published Engineering specifications and manuals are
correct; however, errors do occur. Zebra Technologies reserves the right to correct any such errors and
disclaims liability resulting therefrom.
Limitation of Liability
In no event shall Zebra Technologies or anyone else involved in the creation, production, or delivery of the
accompanying product (including hardware and software) be liable for any damages whatsoever (including,
without limitation, consequential damages including loss of business profits, business interruption, or loss
of business information) arising out of the use of, the results of use of, or inability to use such product, even
if Zebra Technologies has been advised of the possibility of such damages. Some jurisdictions do not allow
the exclusion or limitation of incidental or consequential damages, so the above limitation or exclusion may
not apply to you.

Contents
About this Document...................................................................................................................................... 5
Related Documents................................................................................................................................ 5
Notational Conventions......................................................................................................................... 5
Service Information................................................................................................................................. 6
123RFID Mobile Application........................................................................................................................... 7
Requirements............................................................................................................................................ 7
Installing the 123RFID Mobile Application for Android................................................................. 7
123RFID Mobile Application for Android.......................................................................................... 8
Using the 123RFID Mobile Application for Android.......................................................................8
Navigating 123RFID Mobile...........................................................................................................8
Accessing Battery Statistics........................................................................................................10
Renaming a Reader.......................................................................................................................13
Readers List (Available vs. Connected)...........................................................................................16
Connect a Reader..................................................................................................................................19
Connect to Reader Directly Using USB/Common IO..........................................................20
Connect to Reader Using Bluetooth....................................................................................... 20
RFID Operations....................................................................................................................................30
Rapid Read......................................................................................................................................30
Inventory.......................................................................................................................................... 32
Locate Tag...................................................................................................................................... 42
Basic Pre Filters.............................................................................................................................44
Tag Write......................................................................................................................................... 45
Settings.................................................................................................................................................... 49
General Settings............................................................................................................................50
3

Contents
RFID Settings..................................................................................................................................59
Application Settings......................................................................................................................79
Enabling SGTIN-96....................................................................................................................... 80
U9 Tags........................................................................................................................................... 82
Scan Settings..................................................................................................................................86
Getting Help............................................................................................................................................87
4

About this Document
About this Document
This guide provides detailed information about the 123RFID Mobile Application for Android.
Related Documents
The following documents provide more information about RFID products that support 123RFID Mobile
Application for Android:
• MC3300R RFID Mobile Computer Integrator Guide Supplement, p/n MN-003180-xx
• RFD2000 RFID Sled User Guide, p/n MN-003128-xx
• RFD8500 User Guide, p/n MN002065Axx
• RFD40 Product Reference Guide, p/nMN-004189-xx
• RFD4031 Product Reference Guide, p/n MN-004373-xx
Notational Conventions
The following conventions are used in this document:
• Bold text is used to highlight the following:
• Dialog box, window, and screen names
• Dropdown list and list box names
• Checkbox and radio button names
• Icons on a screen
• Key names on a keypad
• Button names on a screen
• Bullets (•) indicate:
• Action items
• List of alternatives
• Lists of required steps that are not necessarily sequential.
• Sequential lists (for example, those that describe step-by-step procedures) appear as numbered lists.
5

About this Document
Service Information
If you have a problem with your equipment, contact Zebra Global Customer Support for your region.
Contact information is available at: zebra.com/support.
When contacting support, please have the following information available:
• Serial number of the unit
• Model number or product name
• Software type and version number
Zebra responds to calls by email, telephone, or fax within the time limits set forth in support agreements.
If your problem cannot be solved by Zebra Customer Support, you may need to return your equipment for
servicing and will be given specific directions. Zebra is not responsible for any damages incurred during
shipment if the approved shipping container is not used. Shipping the units improperly can possibly void
the warranty.
If you purchased your Zebra business product from a Zebra business partner, contact that business partner
for support.
6

123RFID Mobile Application
123RFID Mobile Application
This chapter describes the enhanced version of the 123RFID Mobile Application for Android which
demonstrates the device's capability and tag operation functionality.
This application is also available as part of Google Play store at:play.google.com/store/apps/details?
id=com.zebra.rfidreaderAPI.demo&hl=en.
Requirements
Requirements for the 123RFID Mobile Application for Android are as follows:
• The recommended Android version on the mobile computer is Nougat version 7 and above.
• Zebra Enterprise RFID mobile computer and Android devices, such as the MC3300xR, compatible with
RFD8500 or Zebra approved mobile computer compatible with the RFD40 Standard RFID and RFD4031
Premium/Premium+ sleds.
• Zebra RFID Manager APK. NOTE: The Zebra RFID Manager APK is only required when using RFD2000
products. Refer to the appropriate guide for more information.
• 123RFID Mobile Application APK.
Installing the 123RFID Mobile Application for Android
Install the 123RFID Mobile Application on the mobile computer from zebra.com/support or from the Google
Play Store. The procedure to install the software on an Android device is dependent upon the Android
version.
To install the software:
1. Connect the Android device to your computer. It is connected as MTP Device and shown as a drive on
the computer.
For information on transferring files using Media Transfer Protocol, refer to the Mobile Computer
Integrator Guide at: zebra.com/support.
2. Navigate to Device Settings > Security and check Unknown Sources to allow installation of
applications from unknown sources.
3. Copy the 123RFID_Mobile_1.0.x.x.apk file to the mobile device.
4. Use the File Manager to locate the 123RFID_Mobile_1.0.x.x.apk file in the folder to which it is copied in
Step 3 and select it.
7

123RFID Mobile Application
5. In the pop-up window, select the Android App installer to begin installation.
123RFID Mobile Application for Android
This application runs on Android mobile devices and demonstrates capability and tag operation
functionality.
The application allows for navigating to all screens at any time, however, some actions are not permitted
while the device is charging. These actions include any operation that involves Tag reading or writing (for
example: Rapid Read, Inventory, Locate Tag, etc.).
Navigate to all screens when the inventory/locate operation is in progress. When the operation is in
progress, the device displays Operation in Progress if additional operations are initiated.
Using the 123RFID Mobile Application for Android
NOTE: By default, the fastest read profile is selected to configure the reader for the maximum
power allowed based on the read profile. However, the dBm can be limited due to the regulatory
requirements of the specified region in which the sled is being used.
To use the application for RFID operations:
1. Launch the 123RFID Mobile Application for Android on the mobile device.
2. Select Regulatory to set the region where the device is operating.
3. From the Readers list, tap the available device listed under Available Readers to connect and view the
Rapid Read screen.
4. Tap Settings > RFID > Advanced Reader Options > Antenna.
Navigating 123RFID Mobile
Navigate using the Home screen, menu, or bottom navigation bar.Switch between the Inventory screen
and the Locate screen, or the Inventory screen and the Rapid Read screen with a single tap of the
appropriate icon.
To exit the application, on the confirmation screen, tap Back, and then click OK.
Home Screen
To access the 123RFID Mobile Application for Android, touch the Zebra RFID Reader icon on the mobile
device to display the Home screen.
Menu
To access the menu, tap . The menu options include:
• Readers
• Battery Statistics
• Firmware Update
• Help
8

123RFID Mobile Application
• Settings
To disconnect the connected reader, tap the Disconnect reader button.
NOTE: The battery life (percentage charged) displays on the menu. Tap the battery icon to
access battery statistics.
Navigation Bar
The Navigation Bar consists of the following tabs:
• Readers - displays a list ofconnected readers and available readers. Upon initial launch of the
application, this is the tab that displays, unless the connection to the reader is over USB/CommonIO.
• RFID -select from RFID Settings, Locate Tag, Pre Filters, and Tag Write.This is thetab that displays
most of the time when launching the application. If the reader has been previously connected to the
app or the reader is connected over USB/Common IO.
• Scan -scan barcodes, view the list of scanned barcodes, or clear the scanned list.
NOTE: Available only on RFID sleds with a built-in imager.
• Settings - configure General, RFID, Application, and Scan settings.
9

123RFID Mobile Application
Accessing Battery Statistics
There are multiple ways to access Battery Statistics.
•
Tap Settings > General Settings and tap Battery Settings or tap on the navigation bar and click
Battery Statistics.
10

123RFID Mobile Application
• Tap the menu icon from the top left and tap Battery Statistics.
11

123RFID Mobile Application
• Tap the Battery icon from the top right corner.
Observe the Battery Statistics screen for details on the state of health, charge capacity, charge status, and
temperature.
12

123RFID Mobile Application
Renaming a Reader
To rename a reader:
13

123RFID Mobile Application
1.
Tap and select Rename Reader.
14

123RFID Mobile Application
2. Update the new name and click OK.
Observe the rename success message.
15

123RFID Mobile Application
NOTE: Repair or reattach the device to the corresponding Bluetooth or CIO connections to
reflect the changes.
Readers List (Available vs. Connected)
The Readers list displays connected readers and available readers. After accessing 123RFID Mobile
application for the first time, when no readers are available or connected, the following screen displays.
16

123RFID Mobile Application
• Available Readers - Lists the already paired devices that the user can choose to connect from.
17

123RFID Mobile Application
• Available options include:
• Connect
• Unpair
NOTE: Tap the ellipses on an Available Reader to connect, unpair or view reader details.
• Connected Readers - Lists the readers that are already connected and ready for use.
18

123RFID Mobile Application
• Available options include:
• Disconnect
• Perform a firmware update
• View reader details for a connected reader.
IMPORTANT: Tap the + button to connect to a reader. You can only connect to one device at
a time.
NOTE: The model name and description display under the reader's name.To view the serial
number, tap Show Serial No. Tap a second time to hide the serial number.
Connect a Reader
NOTE: A reader can be connected directly to the 8 pin common IO port (RFD40/RFD90 sleds
only) or by using one of the three Bluetooth options.
To connect a reader:
1. From the bottom navigation bar, tap the Readers icon.
2. Tap a reader name from the Available Readers list to establish a session with the selected reader.
3. Tap again to terminate the session.
4.
To obtain additional information about the device, tap Reader Details within Connected Readers or
Available Readers.
19

123RFID Mobile Application
See Also
Connect to Reader Directly Using USB
Connect to Reader Using Bluetooth
Connect to Reader Directly Using USB/Common IO
There is no need to go through any manual steps or pairing.When connecting the RFD40 using USB, it
connects directly.
NOTE: Use a USB eConnex pin if using the RFD40, or USB Serialconnection if using the
RFD2000.
1. Connect the RFD40 to USB.
2. Launch 123RFID Mobile App.
The RFID Rapid Read screen displays.
The RFD40 is directly connected.
Connect to Reader Using Bluetooth
Using Bluetooth, you can pair and connect to a reader in the following ways:
• Tap and Pair
• Scan and Pair
• Pair using Barcode
Pair Reader Using NFC Tag (Tap and Pair)
NOTE: Available only on RFD40 Premium and Premium +.
To pair a reader using the NFC tag:
1. From the bottom Navigation Bar, tap Readers.
2. Tap + icon.
20

123RFID Mobile Application
3. To connect via NFC, align the NFC area behind the handle of the sled with the NFC area on the back of
the mobile computer to pair.
4. On the Pair with screen:
a) (Optional)Check Allow access to your contacts and call history.
b) Tap PAIR.
The reader is paired with the mobile computer and the reader displays in the Available Readers list..
Once the sled has paired with a mobile computer, the sled recognizes the device going forward and
automatically connects using the 123RFID Mobile Reader Discovery feature.
From the Readers list, select the checkbox for the paired reader and tap UNPAIR to unpair the reader
from the mobile computer.
21

123RFID Mobile Application
Scan and Pair - RFD40
NOTE: Available only for Zebra Enterprise Mobile Computing devices and not third party Android
devices.
The RFD40 Premium + can connect to a host device over Bluetooth via Scan & Pair.
1. From the bottom Navigation Bar, tap Readers.
2. Tap + icon > Scan.
3. To connect via scan, scan the code on the sled using the mobile computer to obtain the Bluetooth MAC
address to pair the device to the sled or you can scan the serial number of the device.
4. Tap PAIR.
22

123RFID Mobile Application
5. On the Pair with screen:
a) (Optional)Check Allow access to your contacts and call history.
b) Tap PAIR.
The reader is paired with the mobile computer and the reader displays in the Available Readers list..
Once the sled has paired with a mobile computer, the sled recognizes the device going forward and
automatically connects using the 123RFID Mobile Reader Discovery feature.
From the Readers list, select the checkbox for the paired reader and tap UNPAIR to unpair the reader
from the mobile computer.
Scan and Pair - RFD8500
Pairing with the RFD8500 is completed from the Android platform via Bluetooth Settings on the mobile
device.
Prior to pairing the RFD8500 with another device ensure the RFD8500 is charged.
IMPORTANT: For successful pairing of the RFD8500 to an Android device, the yellow trigger on
the RFD8500 must be pressed when the RFD8500 displays in the list of available discoverable
devices, and the RFD8500 Bluetooth LED starts flashing fast.
To pair with an Android device:
1. Power on the device.
2. Touch Settings > Connected devices.
3. Turn Bluetooth on.
4. Touch Search for Devices to display the available discoverable devices.
5. Turn the RFD8500 on and ensure Bluetooth is enabled. If not, press the Bluetooth button on the
RFD8500 for one second to make it discoverable. When discoverable, the Bluetooth LED flashes blue.
NOTE: The RFD8500 is discoverable over Bluetooth for 40 seconds after start up. After
that time Bluetooth suspends and is no longer discoverable. To restart discovery, press the
Bluetooth button for one second.
23

123RFID Mobile Application
6. When the RFD8500 displays in the list of available discoverable devices, tap the RFD8500 device in the
list and press the RFD8500 trigger to pair when the Bluetooth LED starts flashing fast. A beep sounds
when pairing completes successfully.
NOTE: Ensure you choose the correct RFD8500 serial numberfrom the list of discoverable
devices.
7. Exit the Device Settings screen and run the application.
8. From the application, select Readers and confirm that the RFD8500 serial number you paired with is
displayed. Select it in the list of Available Readers. This connects the RFD8500 to the mobile device.
Pair Reader By Scanning a Barcode
NOTE: Available only on RFD40 Premium +.
To pair a reader by scanning a barcode:
1. From the bottom Navigation Bar, tap Readers.
2. Tap + icon > Barcode.
3. The very first time after you install the application, you will need to provide the Bluetooth address of the
mobile computer. Navigate to Settings > About Phone > Status > Bluetooth Address or click the click
here link on the Please Enter Your Bluetooth Address screen.
The Settings screen displays where you can locate the Bluetooth address.
24

123RFID Mobile Application
4. Tap Bluetooth address and tap Copy.
5. Paste the Bluetooth address in the Bluetooth Address field on the Please Enter Your Bluetooth
Address screen.
6. Tap Continue.
Once you do that, it sets the Bluetooth address barcode for you.
7. Scan the barcode using the sled.
8. Tap PAIR.
25

123RFID Mobile Application
9. On the Pair with screen:
a) (Optional)Check Allow access to your contacts and call history.
b) Tap PAIR.
The reader is paired with the mobile computer and the reader displays in the Available Readers list..
Once the sled has paired with a mobile computer, the sled recognizes the device going forward and
automatically connects using the 123RFID Mobile Reader Discovery feature.
From the Readers list, select the checkbox for the paired reader and tap UNPAIR to unpair the reader
from the mobile computer.
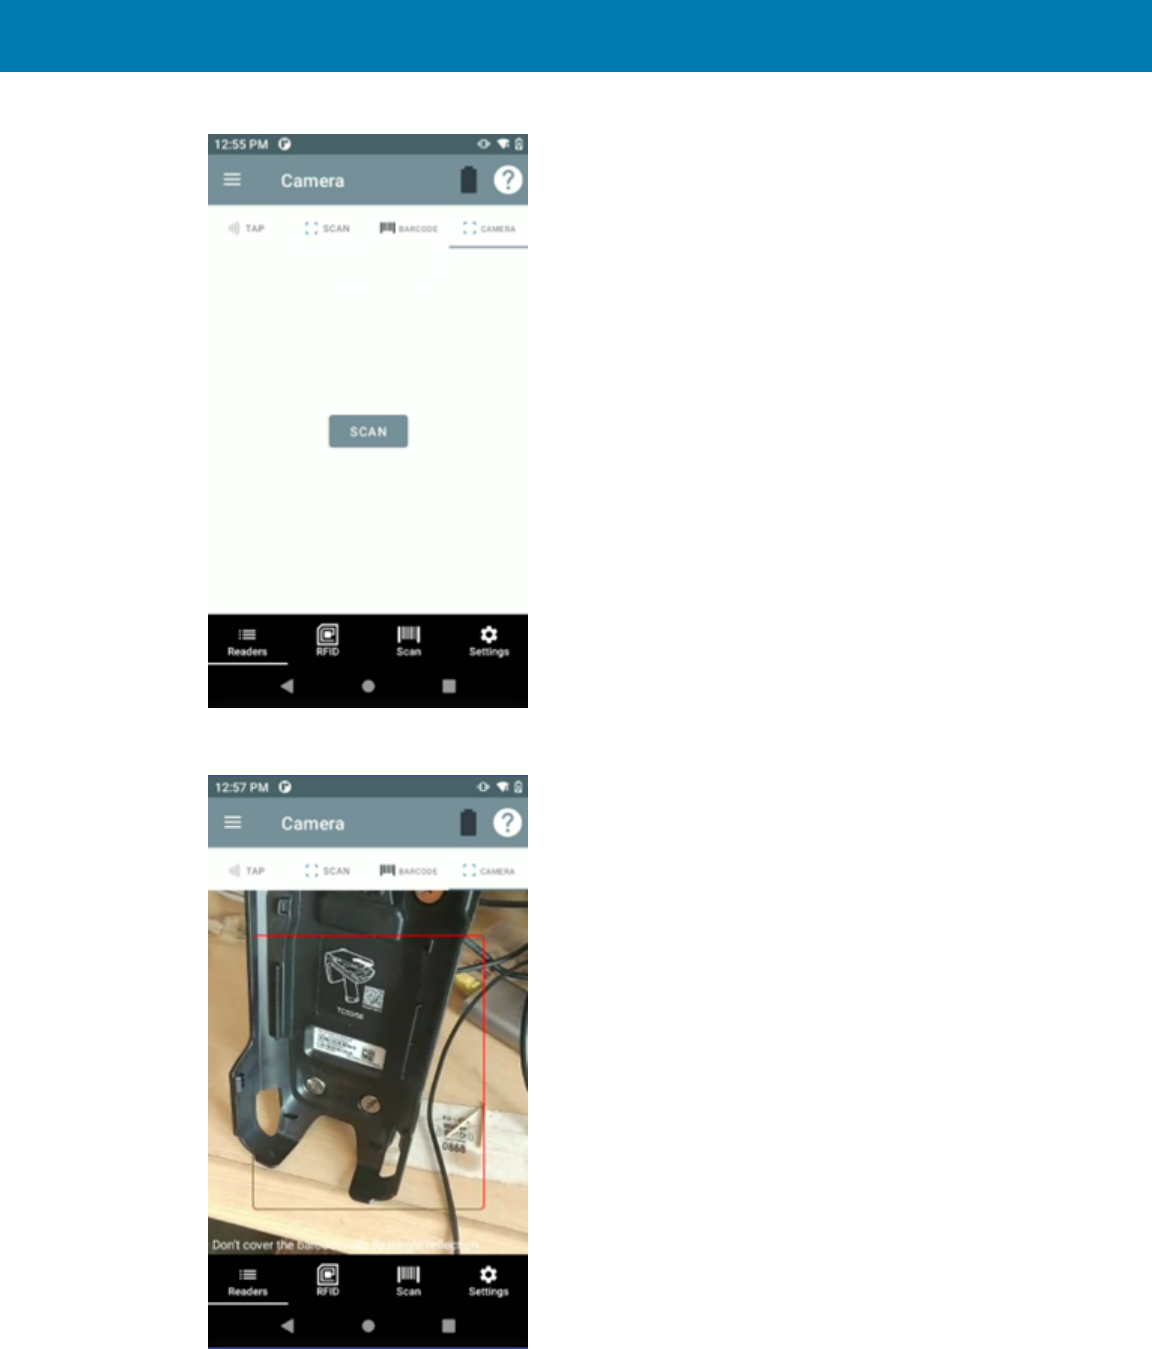
Pairing with the Camera
Use the camera on the mobile computer to pair the device to the sled.
26

123RFID Mobile Application
1. Pair the sled using the camera on the mobile computer by tapping the Camera tab.
27
123RFID Mobile Application
2. On the Camera tab, tap Scan to access the camera on the mobile computer.
3. Once the camera is activated, tap the screen on the mobile computer to capture the barcode on the
sled.
28

123RFID Mobile Application
Pair Reader Manually
If you do not use the Tap and Pair, Scan and Pair, or Scan a Barcode method to pair the reader, you can
pair it manually.
1. Enable Bluetooth.
2. Discover Bluetooth devices.
3. Connect to a Bluetooth device.
See Also
Enabling Bluetooth
Discovering Bluetooth Devices
Connecting to a Bluetooth Device
Enabling Bluetooth
1. Swipe down from the Status bar to open the Notification panel.
2.
Touch to turn Bluetooth on.
Discovering Bluetooth Device(s)
The device can receive information from discovered devices without pairing. However, once paired, the
device and a paired device exchange information automatically when the Bluetooth radio is on.
1. Ensure that Bluetooth is enabled on both devices.
2. Ensure that the Bluetooth device to discover is in discoverable mode.
3. Ensure that the two devices are within 10 meters (32.8 feet) of one another.
4. Swipe down from the Status bar to open the Quick Access panel.
5. Touch and hold Bluetooth.
6. Touch Pair new device. The device begins searching for discoverable Bluetooth devices in the area
and displays them under Available devices.
7. Scroll through the list and select a device. The Bluetooth pairing request dialog box appears.
8. Touch Pair on both devices.
9. The Bluetooth device is added to the Paired devices list and a trusted (“paired”) connection is
established.
Connecting to a Bluetooth Device
Once paired, connect to a Bluetooth device.
1. Go to Settings.
2. Touch Connected devices > Connection preferences > Bluetooth.
3. In the list, touch the unconnected Bluetooth device.
When connected, Connected appears below the device name.
29

123RFID Mobile Application
RFID Operations
NOTE: Tap the Rocket icon to initiate rapid read.
AccessRFID operations for the following:
• Rapid Read - Displays a view of the inventory operation on the reader, including total reads, unique tag
count, tag read rate, and read time.
• Inventory- Displays tag details when tag reading begins.
• Locate Tag- Locates a single tag or multiple tags.Can be accessed from the Inventory screen.
• Tag Write- Allows you to write data to specified tags. Can be accessed from the Inventory screen.
• Pre-Filters - Allows you to set filters for tag data.Can be accessed from the Inventory screen.
• RFID Settings - Allows you to configure specific reader and antenna settings.Can be accessed from the
Rapid Read and Inventory screens, as well as from Settings.
Rapid Read
NOTE: Tap the Inventory Screen icon to begin inventory.
The Rapid Read screen displays the following data:
• Total Reads
• Unique tag count
• Read time (mm:ss)
• Tag read rate (tags/sec).
30

123RFID Mobile Application
The Rapid Read and Inventory screens present two different views of the inventory operation on the
reader. The Start/Stop functionality can be used interchangeably on both screens. For example, when
operation starts on the Rapid Read screen and you navigate to the Inventory screen, the button available
on the Inventory screen is Stop. The same is true when the operation starts on the Inventory screen. During
the rapid read process, you can navigate to the Inventory screen to view tag details along with tag counts
for each tag. The statistics displayed are maintained on the Rapid Read and Inventory screens regardless
of the screen used to start the process.
View Rapid Read Results
To view Rapid Read results:
1. Tap Rapid Read from the Home or Menu screen.
2. Tap Start to start the rapid read inventory operation.
3. Tap Stop to stop the inventory operation.
NOTE: Thescan trigger on the device can also start and stop the inventory operation. Press
the trigger to start, continue to hold and release to stop.
Progressing to another screen does not halt the operation. However, attempting to make changes or
perform another operation while rapid read is in process results in an error.
31

123RFID Mobile Application
Inventory
Once tags begin reading, the tag details populate the Inventory screen.Tag reading starts and stops on
this screen as well as on the Rapid Read screen. When the process starts, tag information displays on the
screen.
NOTE: When the tag does not have printable ASCII data when in ASCII mode, a yellow
highlighted background displays on the Inventory screen.
View Inventory Results
To view Inventory results:
1. Tap Inventory from the Home or Menu screen.
2. Tap Start to start the rapid read inventory operation.
The Start button changes to Stop.
3. Tap Stop to stop the read inventory operation.
NOTE: Thescan trigger on the device can also start and stop the inventory operation. Press
the trigger to start, continue to hold and release to stop.
4. To filter information by type, tap the Memory Bank dropdown menu and select User, Reserved, TID, or
EPC.
32
123RFID Mobile Application
5.
The tag ID selected can be used to locate, set pre-filters and tag write.After selecting a tag, tap and
select Locate Tag, Pre Filters, or Tag Write.
Progressing to another screen does not halt the operation. However, attempting to make changes or
perform another operation while this operation is in process results in an error.
NOTE: Tags are fullyconvertible to ASCII format. ASCII mode may be enabled by selecting
Settings > Application Settings > ASCII Mode.
33


123RFID Mobile Application
Inventory Screen Features
The following table provides information on various metrics that can be captured using the Inventory
feature.
Item Description
Tags
Tap Memory Bank to select one of the following memory bank options from the
drop-down menu:
• None - Defaults to EPC.
• User - Allows reading user memory bank data when the tag is inventoried.
• Reserved - Allows reading reserved memory bank data when the tag is
inventoried.
• TID - Allows reading TID memory bank data when the tag is inventoried.
• EPC - Allows reading EPC memory bank data when the tag is inventoried.
When the next inventory operation starts, the details from the selected
memory bank displays. This menu is inactive if there is an ongoing operation
on the connected reader.
• Default Display - None.
Search Tap the Search icon and enter a tag ID. Tags that match the entry display in the
content area.
Power Management Icon indicates if Dynamic Power is on. Tap the Power Management icon to open
the Battery Status screen.
Content Area
(select a tag)
Tapping a Tag ID highlights the tag. The highlighted Tag ID is populated on the
Tag Location text area as well as the Tag Pattern area in the Access Control
screen. Tap Start to start searching for the tag.From this screen, return to the
Menu or go to the Home screen and select Locate Tag.
Content Area
(select a tag)
The tags displayed in this area are based on the option selected from RFID >
RFID Advanced Settings > Tag Reporting.Tapthe tag ID to expand details about
the tag.Tapthe tag ID again to collapse details.
Table 1Inventory Screen Features
35

123RFID Mobile Application
36

123RFID Mobile Application
Tag List Match Mode Operation
When Tag List Match Mode is checked on the Application Settings screen, the application identifies
tags from a given set of tags in csv tag list format (comma-separated values file). Browse to choose the
csv file.The contents of the csv file displays on the Inventory screen. By default, the application displays
friendly names from csv files, if Tag List Match Mode is enabled.If you do not want to show friendly
names, the setting can be disabled in Settings to show only EPC.
Tag List Color Mode
First, the Brand ID tag will be identified and the tag ID text color changes accordingly. Second, the non-
Brand ID tag will be identified and the tag ID text color changes accordingly.Last, if Match Mode = Enable,
then the text color changes accordingly to Match, Expected, or Unknown.
37

123RFID Mobile Application
Brand ID Tag
• Blue:ASCII = Enable or ASCII = Disable,Tag List Match Mode = Disable.
Normal Tag (Brand ID = Disable)
Read both Brand ID and Non-Brand ID tags
• Black: ASCII = Enable or ASCII = Disable,Tag List Match Mode = Disable
Sample Contents of Taglist.csv File
The csv file should contain only alphanumeric characters in the tag column. If there are any special
characters, the row is discarded.When entering data into the Taglist,Column A of the csv file should match
the EPC tag ID, Column B should include the friendly name or a description of the tag to display when
reading.
The following displays a sample Taglist csv:
38

123RFID Mobile Application
Before the inventory starts, the count is zero. After the inventory starts, the tag list is imported into either
the inventory or RapidRead screen. The tag list can be sorted using the menu choices. Select an option to
display the type of tags to show when the inventory starts.
If Tag List Match Mode is enabled, the text color changes accordingly:
• Matching = Green
• Missing/Expected = Red
• Unknown = Gray
Sample 1 Inventory List: Tag List Enabled; Matching Tag Option Selected
When inventory starts, the application only displays the tag reads that match the tags in the taglist.csv file.
Matching tags display in green. Select any tag read to show the matching tag details in the csv file.
Sample 2 Inventory List: Tag List Enabled, Missed Tag Option Selected
When inventory starts, the application only displays the tag reads that are missed and included in the
taglist.csv file. Missed tags display in red. Select any tag to show the missed tag details in the csv file.
Sample 3 Inventory List: Tag List Enabled, Unknown Tag Option Selected
When inventory starts, the application only displays tags that were read but not included in the taglist.csv
file, Unknown tags display in gray. Select any tag to show the unknown tag details.
39

123RFID Mobile Application
Sample 4 Inventory List: Tag List Enabled, All Tag Option Selected
When inventory starts, the application displays the tags for all the options:
• Tag reads that match the tags in the taglist.csv file. Matching tags display in green. Select any tag read
to show the matching tag details in the csv file.
• Tag reads that are missed and included in the taglist.csv file. Missed tags display in red. Select any tag
to show the missed tag details in the csv file.
• Tags that were read but not included in the taglist.csv file. Unknown tags display in gray. Select any tag
to show the unknown tag details.
Sample 5 Tag List Matching Selected; Show Friendly Names
When inventory starts, the application displays the tags for selected options from All, Matching, Missing, or
Unknown. Application shows friendly names (i.e. Tag details instead of EPC) on screen.
Sample 6 Exporting Data - Tag List Matching Selected
The application settings sceen has the option to Export Data. If the option is checked, data is exported
when the inventory stops. The tag content area is exportable to a file. For example, when Matching is
selected from the menu to display only matching tags in the tag content area, the matching data can be
exported to a file. The exported csv file includes the matching, missing, and unknown tag count.
Unique Tag Reporting
When Report Unique Tags is enabled on the Tag Reporting screen, the reader reports unique tags based
on the options below.
NOTE: The reader beeps when a unique tag is observed.
• When the Matching option is selected (See Sample 1 Inventory List: Tag List Enabled; Matching Tag
Option Selected) the tag count cannot exceed one because the unique tags are only reported once.
• When the Matching option is not selected, the list displays unique and total reads. The tag count cannot
exceed one because the unique tags are only reported once.
To export data, from the bottom navigation bar, tap Settings > Application and enable Export Data or tap
> Settings > Application and enable Export Data.
Exported files are saved under /sdard/inventory/RFID_2022-01-24_15-59-38.131.csv
Each exported file is named using the date and timestamp.
40

123RFID Mobile Application
NXP BrandID Check
When Check BrandID is enabled on the Tag Reporting screen, the reader reports only tags based on the
brand options below.
• Brand ID
• EPC Length
After enabling the Check BrandID settings, you can start the inventory. If the tag has a matching brand ID,
the inventory list displays tag data in blue.
41
123RFID Mobile Application
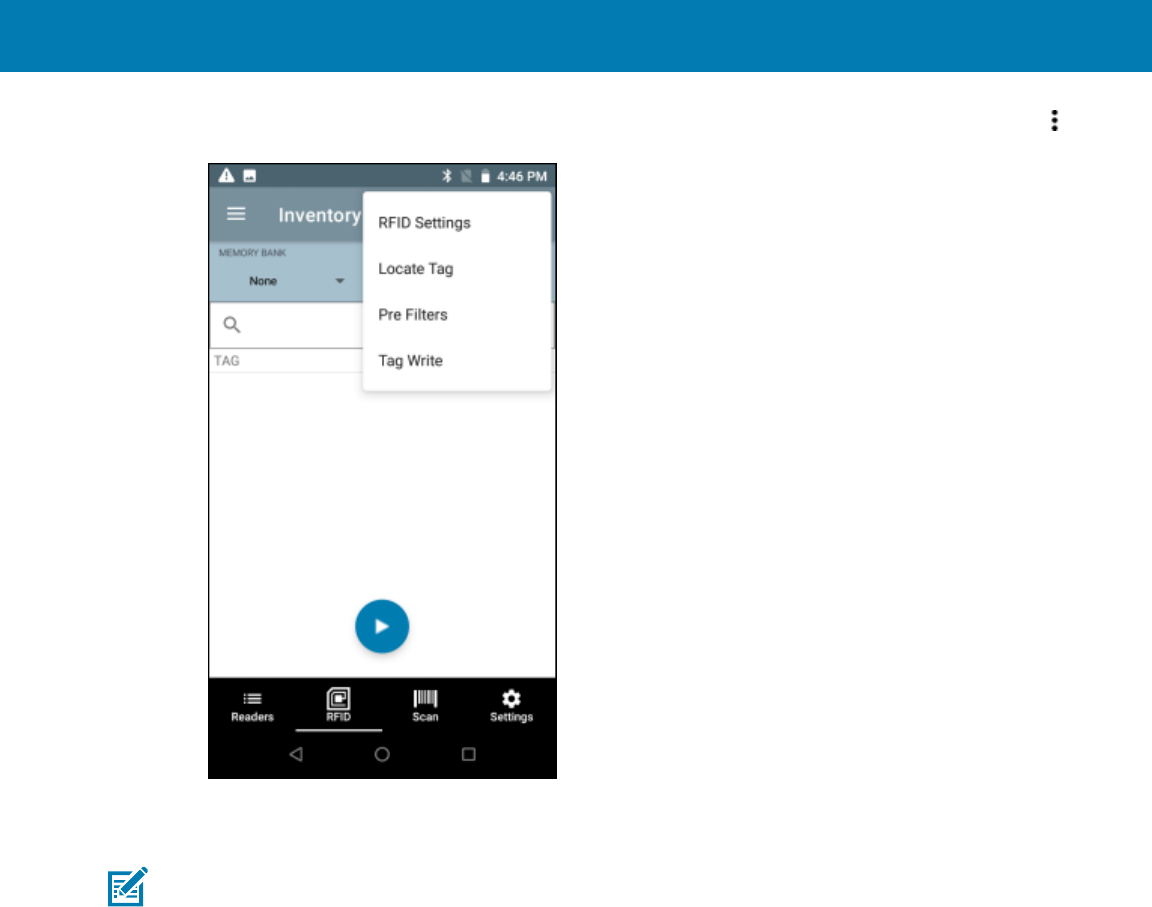
Locate Tag
Use Locate Tag to locate a single tag or multiple tags (Multi Tag). From the Inventory screen, tap and
select Locate Tag.
Locate a Single Tag
To locate a single tag:
1. Tap Locate Tag from the Home orMenuscreen.
2. Enter the Tag ID in the text area or select a tag from the Inventory screen to pre-populate the Tag ID to
search.
3. Tap Start to start the locate tag operation.
4. Tap Stop to stop the locate tag operation.
NOTE: Thescan trigger on the device can also start and stop the locate tag operation. Press
the trigger to start, continue to hold and release to stop.
The Locate Tag screen displays a color bar graph showing the proximity percentage (relative distance) of
the tag. Thepercentage provides the relative distancefrom 0% to 100% where the tag is. The higher the
percentage, the closer the tag is to the scanner.
42

123RFID Mobile Application
Progressing to another screen does not halt the operation, until Stop is selected. However, attempting to
make changes or perform another operation while the locate tag operation is in process results in an error.
Locate Multiple Tags (Multi Tag)
Locate multiple tags by importing a csv file.
NOTE: Multi Tag Locate supports ASCII mode. Enable ASCII mode from Settings > Application >
Global Settings > Enable ASCII Mode.
To locate and track multiple tags:
1. Tap Locate Tag from theHomeorMenuscreen.
2. Select the Import csv file on the Multi Tag panel.
The csv file holds the EPC ID and RSSI value. The default RSSI for the EPC will be -33.
3. Select the file containing the specific tag information from the file manager to bring the file into the
application.
4. Tap the Reset Data icon to reset the tag count and RSSI proximity %.
43

123RFID Mobile Application
5. Tap the Add Tag ID icon to add the EPC value of interest to the dynamic list of EPC's. It can only add
the value which is present in the imported csv file.
6. Tap the Remove Tag ID icon to remove the EPC value of non-interest from the dynamic list of EPC's. It
can only remove the value which is present in the csv file.
NOTE: Once you re-access the MultiTag Locate screen, the entire tag list from the csv file
displays, if values were deleted dynamically.
Basic Pre Filters
1.
From the Inventory screen, tap and select Pre Filters.
2. Select Basic.
3. Slide the Offset and Length to select the different portions of the tag to filter from while performing an
inventory.
44

123RFID Mobile Application
4. Select Enable Filter.
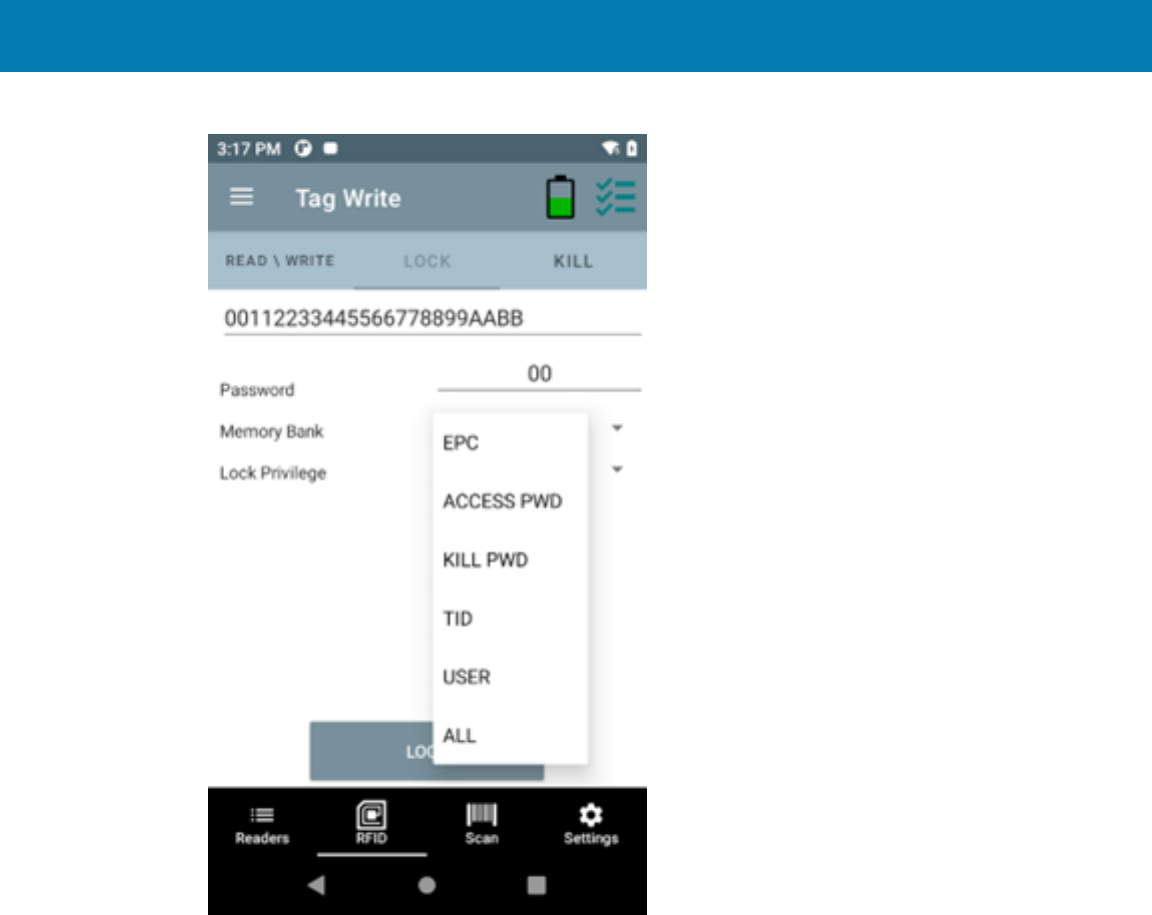
Tag Write
1.
From the Inventory screen, tap and select Tag Write.
2. Select Read/Write tags
Read/Write
The Tag Pattern area is automatically filled in when a tag is selected in the Inventory screen. The Read/
Write access operation is simplified with offset and length fields are hidden. The user can tap the more/
advanced options icon to see offset and length fields. Tap the icon again to hide the advanced options.
Memory Bank options now have extended menu options to choose directly interested area of memory
bank. This avoids typing of offset and length etc.
NOTE: SDK 2.0.49 enabled with the Write + 1 retry feature, improves the efficiency during the
Tag Write operation.
Read/Write options are:
• Tag ID and Password values are in hex. Tag ID is edited.
45

123RFID Mobile Application
• Memory Bank options - EPC, TID, USER, PC and CRC, Access Password, Kill Password.
• Offset and Length values are in 16-bit words. This is only available after tapping the Advanced Options
icon. To toggle visibility, tap AdvancedOptions again.
• Access operation screen maintains edited tag ID.
NOTE: The user can read/write to/from tags in ASCII mode.
Figure 1Read/Write Basic
46

123RFID Mobile Application
Figure 2Read/Write Advanced
Lock
NOTE: U9 NXP tags are not supported.
Lock privilege options are as follows:
• Read and Write
• Permanent Lock
• Permanent Unlock
• Unlock
47

123RFID Mobile Application
Kill
Permanently renders the tag unusable. A Kill Password must be provided.
48

123RFID Mobile Application
Settings
To access Settings, tap Settings from the bottom navigation bar or tap > Settings. Settings are divided
into four types:
• General -allows you to configure settings on the device.
• RFID -allows you to configure specific reader and antenna settings.
• Application -allows you to make changes to the 123RFID Mobile Application settings.
• SCAN - allows you to configure settings for the scanner.
49


123RFID Mobile Application
The General Settings screen options include:
• Firmware Update -Update the firmware on the reader.
• Factory Reset -Reset file settings on the reader to factory defaults.
• Enable Logging -Enable the logging of tag reads.
• Device Info -View information such as friendly name, serial number, and RFID/scan settings.
• Battery Settings -View Information about Battery, such as Manufacturing Date, Battery Model, Battery
ID, State of Health, Charge Cycles, Battery Temperature.
• Share File - Share a file with a paired device.
• Trigger Mapping -Change the mapping for the upper and lower trigger and designate the Upper
Trigger for RFID decode and the Lower Trigger for Host Scan or the Upper Trigger for Host Scan and
the Lower Trigger for RFID decode.
NOTE: Tap the battery icon in the top right corner of the screen to view battery statistics.
See Also
Firmware Update
Factory Reset
Enable Logging
Device Info
Battery Statistics
Share File
51

123RFID Mobile Application
Trigger Mapping
Update the Device Firmware
To update device firmware:
1. Tap Update Firmware.
Go to zebra.com/support to download the latest firmware.
2. Ensure that the terminal is connected to the device.
3. Copy the .DAT file to /SD card/.
Do not use the folder shortcut.
4. To access Firmware Update, from the bottom navigation bar, tap Settings > General > Firmware
Update or tap > Settings > General > Firmware Update.
5. Select the firmware version to be loaded onto the device.
52

123RFID Mobile Application
6. The update path displays starting from firmware to newly selected version. The update percentage
increases as the sled device updates.
Factory Reset
Performing a factory reset clears any saved settings and restarts the reader. The region needs to be set
again.
1. To reset to factory defaults, from the bottom navigation bar, tap Settings > General > Factory Reset or
tap > Settings > General > Factory Reset.
53

123RFID Mobile Application
2. Select one of the following:
a) FactoryReset to perform a factory reset.
b) DeviceReset to perform a device reset, which reboots the device.
54

123RFID Mobile Application
3. Tap RESET.
Enable Logging
1. To enable logging, from the bottom navigation bar, tap Settings > General > Enable Logging or tap
> Settings > General > Enable Logging.All the enabled logs are captured in logcat which can be
retrieved through RxLogger.
55

123RFID Mobile Application
2. Specify the following:
• Tap Enable real time Logs to toggle on or off.
• Tap Enable NGE Error Logs to select.
• Tap Enable NGE Event Logs to select.
• Tap NGE packet Logs to select.
• Tap RETRIEVE LOGS FROM RAM or RETRIEVE LOGS FROM FLASH.
• Tap Enable Debug logs to toggle on or off.
Device Info
To access Device Into, from the bottom navigation bar, tap Settings > General > Device Info or tap >
Settings > General > Device Info.
Device Info displays the following:
• Model Number
• Serial Number
• Firmware
• RFID Radio
• Manufacture Date
• Application Version
56

123RFID Mobile Application
• SDK Version
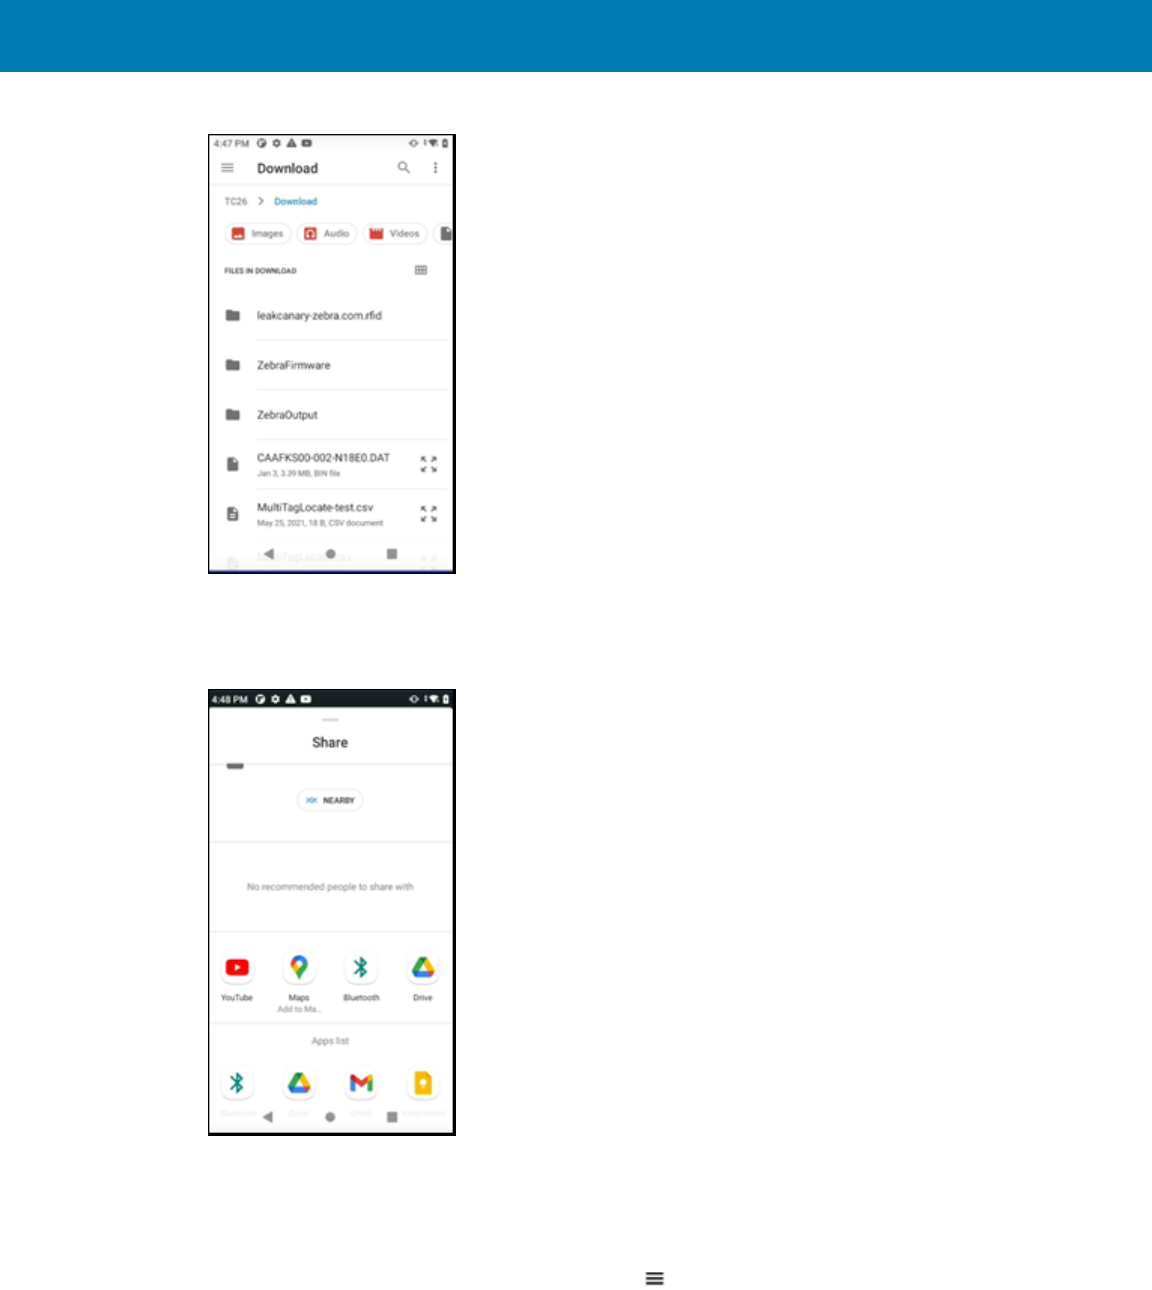
Share File
1.
To share a file, from the bottom navigation bar, tap Settings > General > Share File or tap > Settings
> General > Share File.
File Explorer opens.
57
123RFID Mobile Application
2. Select a single file or multiple files.
User has an option to share the file(s) to a nearby device via Bluetooth or any other file sharing
supported app.
3. Select from the provided options.
Trigger Mapping
To map a trigger:
1.
Tap Settings > General > Trigger Mapping or tap > Settings > General > Trigger Mapping.
58

123RFID Mobile Application
2. Select one of the following options for each trigger:
• RFID Start/Stop - start and stop RFID decode operations.
• Sled Scanner - barcode decode from the sled.
• Terminal Scanner- barcode decode from the mobile computer. Feature support is determined by
the mobile computer being used with the sled.
• Scan Notification- scan trigger press notification.
• No Action-No action when the trigger is pressed.
3.
RFID Settings
To access RFID Settings from the bottom navigation bar, tap Settings > RFID or tap > Settings > RFID or
from the Rapid Read or Inventory screens, tap > RFID Settings.
RFID Settings include:
• Profiles -Displays Fastest Read, Cycle Count, Dense Readers, Optimal Battery, Balanced Performance,
User Defined and Reader Defined profiles.
• Advanced Reader Settings -Antenna, Singulation Control, Start/Stop Triggers, Tag Reporting, Power
Management, and Save Configuration.
• Regulatory -Allows selection of region and available channels.
59

123RFID Mobile Application
• Beeper -Provides the option to change the volume of both the host and sled device.
• LED -Enables or disables Terminal/Host tag read LED for inventory indications.
• Charge Terminal - Enables or disables charging the mobile device using the I/O pins on the adaptor.
Profiles
To display the list of profiles, from the bottom navigation bar, tap Settings > RFID > Profiles.
• The currently selected profile is highlighted in orange.
• Tap a profile item to expand the profile and view applicable configurations.
• Profiles can be selected or disabled by using the slider switch to the right of the profile name.
NOTE: If Power Level, Link Profile, Session, or Dynamic Power are modified from each respective
screen, then the currently selected profile changes to User Defined profile, and profile item
values are modified with the same values.
60

123RFID Mobile Application
Profile setting options include:
• Fastest Read - Read as many tags as fast as possible.
NOTE: By default, the fastest read profile is selected and configures the reader for the
maximum power level allowed based on the read profile. However, the dBm can be limited
due to the regulatory requirements of the specified region in which the sled is being used.
61

123RFID Mobile Application
• Cycle Count - Read as many unique tags as possible.
NOTE: This profile uses a Singulation S2 setting that puts tags to sleep for a period of time, so
the application can focus on unseen tags. use caution when using this profile.
62

123RFID Mobile Application
• Dense Readers - Use when there are multiple readers within close proximity.
63

123RFID Mobile Application
• Optimal Battery - Provides optimal battery life.
64

123RFID Mobile Application
• Balanced Performance - Maintains balance between performance and battery life.
65

123RFID Mobile Application
• User Defined - Custom profile used for custom requirements.
66

123RFID Mobile Application
• Reader Defined - Maintains reader configurations.
NOTE: Profile settings in orange are enabled.
Advanced Reader Options
To set advanced reader options, from the bottom navigation bar, tap Settings > RFID > Advanced Reader
Options.Advanced Reader Options include:
• Antenna
• Singulation Control
• Start/Stop Triggers
• Tag Reporting
• Save Configuration
• Power Management
67

123RFID Mobile Application
See Also
Antenna
Singulation Control
Start/Stop Triggers
Tag Reporting
Save Configuration
Power Management
Antenna
To access the Antenna screen, from the bottom navigation bar, tap Settings > RFID > Advanced Reader
Options > Antenna.The Antenna screen displays the following:
• Power Level - Displays the current selection and a text box for available power levels (as reported by
thedevice). The default setting is 27.0 dBm (shown as 270; the value displayed is in units of tens of
dBm). Japan units are set to a different default power level depending on the SKU type. The minimum
power level when DPO is enabled is 3.1 dBm. When DPO is disabled, the minimum power level is 0
dBm.
• Link Profile - Displays the current selection and includes a drop-down list of available link profiles
(reported by thedevice). Link Profile display format is as follows: Return link bit data rate in bis per
second (e.g., 60000 -> 60 Kbs); Miller Value (e.g., MV_4 -> Miller 4); thus profile name M4 240K (240K
becomes BLF) modulation type (PR ASK is the only one supported).
• PIE - This value has no units and is either 1500 and 2000 minimum.
• Tari - The applicable Tari value in thousands of microseconds (e.g., 6250 -> 6.25 microseconds).
68

123RFID Mobile Application
NOTE: The Antenna Power Level and Link Profile are blank when there is no connection to the
reader.
Singulation Control
To access Singulation Control,from the bottom navigation bar, tap Settings > RFID > Advanced Reader
Options > Singulation Control.View or configure the singulation control settings for each antenna.
• Session - The drop-down list includes the available session options (S0, S1, S2, S3).
• Tag Population - A numeric value of the estimated number of tags in the Field of View (FOV). Values
shown are 30, 100, 200, 300, 400, 500, 600.
• Inventory State - State A, State B, AB Flip.
• SL flag - ALL, DEASSERTED, ASSERTED.
69

123RFID Mobile Application
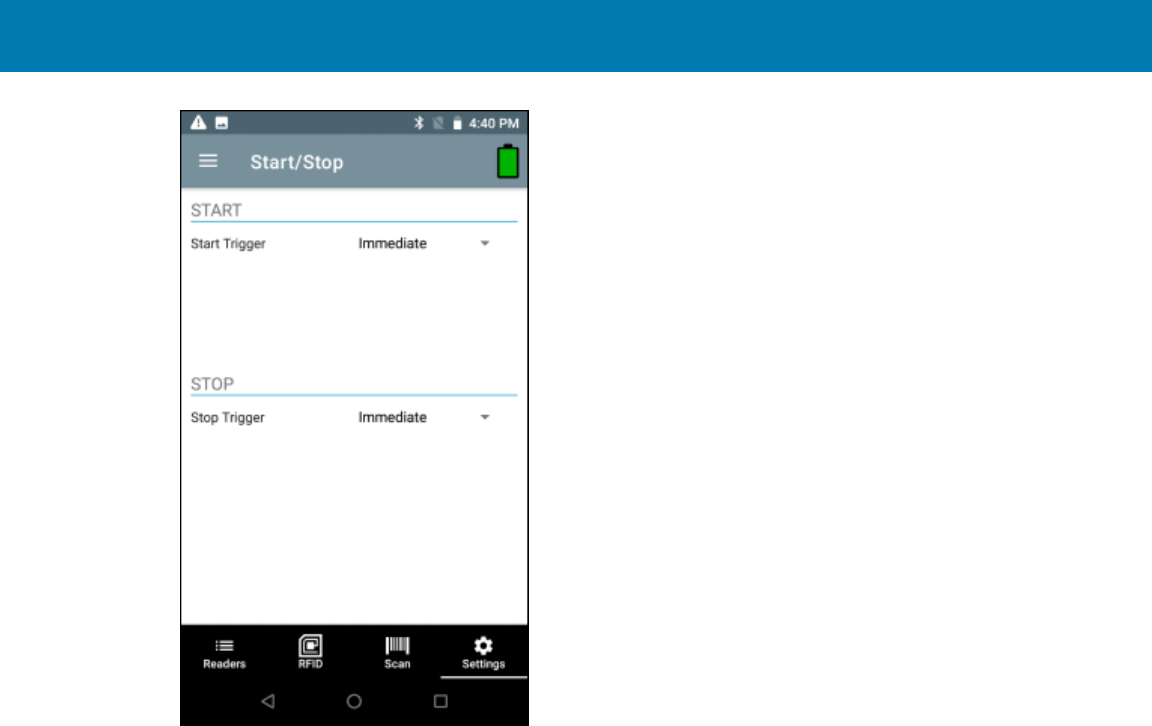
Start and Stop Triggers
To access the Start and Stop Triggers screen, fromthe bottom navigation bar, tap Settings > RFID >
Advanced Reader Options > Start/Stop Triggers.
Start TriggerPeriodic displays the Period input box (in milliseconds).
The Stop Trigger Duration, Tag Observation and N attempts display numeric value input boxes.
All time entries are in milliseconds, and all required details for saving triggers to the reader must be
entered, or the application does not save the trigger settings to the reader.
Required input for Start/Stop Trigger settings are as follows:
• Start Trigger
• Immediate (default)
• Handheld - Select either the Trigger Pressed or Trigger Released check box.
• Periodic - Enter the period of time in milliseconds.
• Stop Trigger
• Immediate (default)
• Hand-held - Select either the Trigger Pressed or Trigger Released check box along withTimeoutin
milliseconds.
• Duration - Enter duration in milliseconds.
• Tag Observation - Enter the tag count along with timeout in milliseconds.
• N Attempts - Enter the number of attempts along with timeout in milliseconds.
70
123RFID Mobile Application
If the Start Trigger type is set to Hand-held trigger (pressed or released), the application sets the repeat for
the operation to ensure the use case if repeated operations can be demonstrated.
If any trigger is defined as Hand-held, the application does not act on immediate trigger type for a hand-
held trigger action.
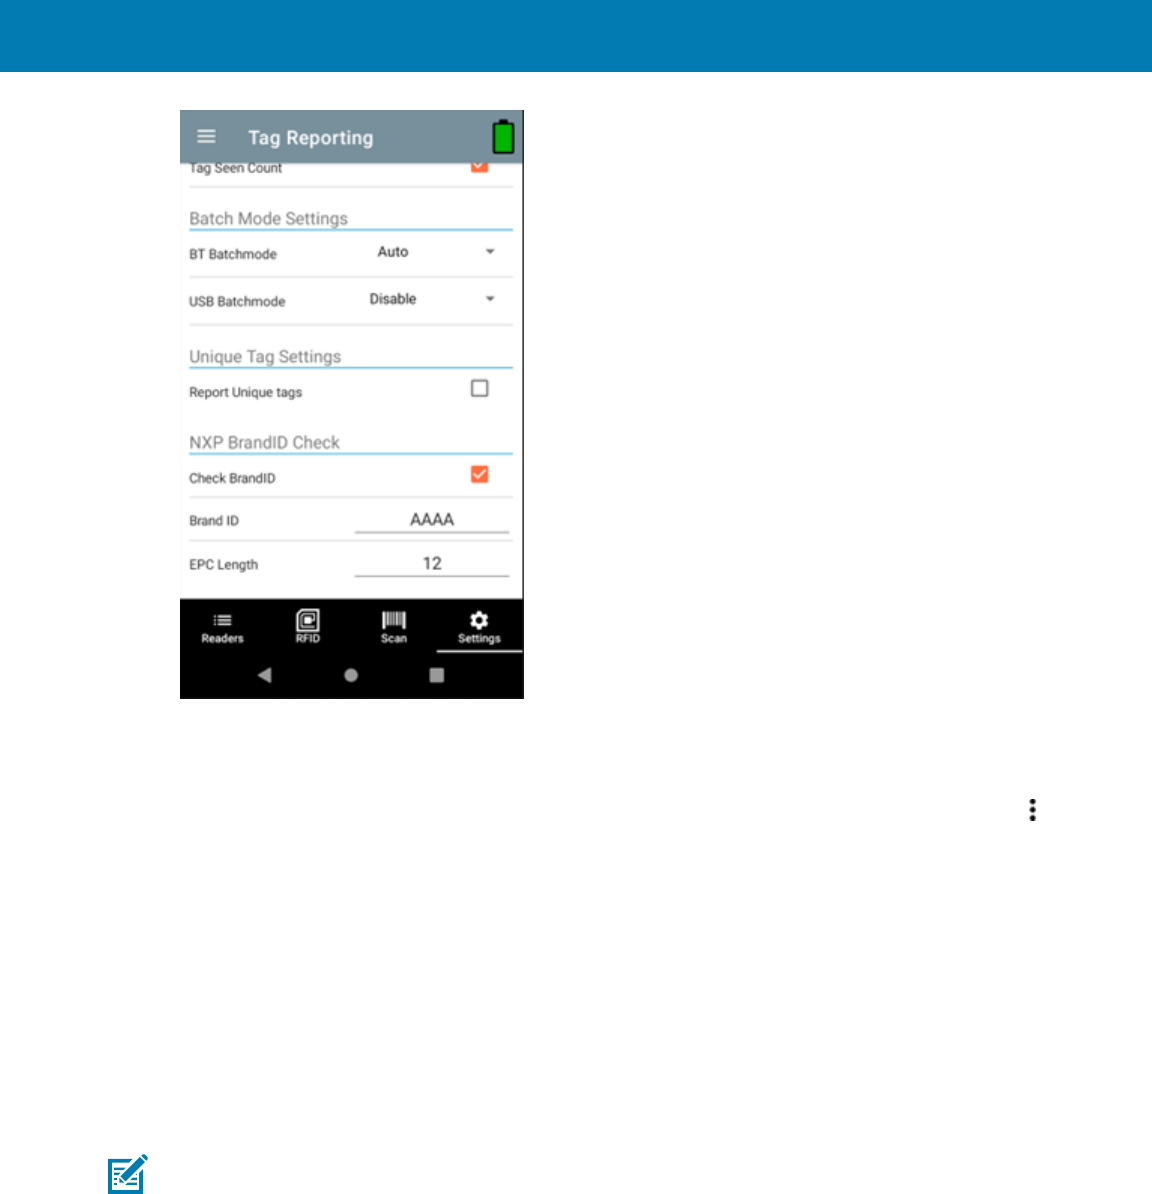
Tag Reporting
To access Tag Reporting,from the bottom navigation bar, tap Settings > RFID > Advanced Reader
Options > Tag Reporting.
Tag Reporting screen options include:
• PC -Select to allow reporting the PC as part of the Tag Data.
• RSSI -Selection indicates whether or not the RSSI (Received Signal Strength Indication) is reported as
part of the Tag Data.
• Phase -Select to indicate whether or not the Phase is reported as part of the Tag Data.
• Channel Index -Select to indicate whether or not the Regulatory Channel Index is reported as part of
the Tag Data.
• Tag Seen Count -Select to indicate whether or not the Tag Seen Count is reported as part of the Tag
Data.
• BT Batchmode -Select to enable Bluetooth batchmode.
• USB Batchmode -Select to enable USB batchmode
• Report Unique Tags -When this option is enabled, the reader reports only unique tag reads. The
Unique Tag reporting feature can be enabled when using Tag List Match mode.
71

123RFID Mobile Application
• Check BrandID -Check box to enable the Brand ID option.
• Brand ID -Perform NXP BrandID check (supported only on NXP U-Code 8 and above tags that supports
this functionality). Brand ID check can be initiated by enabling BrandID. Reader performs an inventory
operation with additional verification on whether or not thetag inventoried matches the BrandID and
reports.
• EPC Length -The EPC length provided will consider the length of EPC data to be matched for Brand ID
tags from offset 0.
Save Configuration
To access Save Configuration, from the bottom navigation bar,tap Settings > RFID > Advanced Reader
Options > Save Configuration.
The settings are saved on the device until a reset to factory defaults is performed on the device.
Save provides an overview of all current settings on the device.
72

123RFID Mobile Application
Power Management
To access Power Management from the bottom navigation bar,tap Settings > RFID > Advanced Reader
Options > Power Management.
EnableDynamic Power Optimization (DPO)to enhance battery life during inventory operations.
73

123RFID Mobile Application
Setting a Charge Terminal
To set Charge Terminal options:
74

123RFID Mobile Application
1. Tap Settings from the bottom navigation bar.
75

123RFID Mobile Application
2. Enable or disable the Charge Terminal option from the checkbox.
Regulatory
1. To set regulatory options, from the bottom navigation bar, tap Settings > RFID > Regulatory.
WARNING: Select only the country in which you are using the reader.
2. Select the region from the drop-down list.
76

123RFID Mobile Application
3. Select from the available channels.
Beeper
1. To set beeper options, from the bottom navigation bar, tap Settings > RFID > Beeper.
2. Enable/disable the beeper on the sled.
3. Enable/disable the beeper on the host.
77

123RFID Mobile Application
4. Select the volume:
• High
• Medium
• Low
LED
1. To set LED options, from the bottom navigation bar, tap Settings > RFID > LED.
78

123RFID Mobile Application
2. Enable/disable the LED on the host.
Application Settings
To access Application Settings, from the bottom navigation bar, tap Settings > Application or tap >
Settings > Application.
The Application Settings screen includes:
• Auto Reconnect Reader -When checked, the device connects to the RFID service which manages the
connection to the reader.
• Reader Connection Notification -When checked, the application notifies the user when the reader is
connected or disconnected.
• Reader Battery Status Notification -When checked, the application notifies the user when the battery
has reached specific critical states.
• Export Data -When checked, the application writes the inventoried RFID data to a file when the
inventory operation stops. On Android platforms the file is saved in a fixed directory. Check the files in
file browsing in the Inventory directory (Sdcard/inventory/<files>). The files may be copied to a PC.
When Profile is set to Cycle Count and Export Data is enabled:If you start/stop inventory multiple times
from the same screen, it will append cycle count data to existing data and generate a csv file (delete old
csv) rather that creating a new csv file on each start/stop.
• Tag List Match Mode -Check to enable matching mode.
• Show Friendly Names -Check to show the tag's friendly names instead of EPC ID. Show friendly names
is only available when Tag List Match Mode is enabled.
79

123RFID Mobile Application
• ASCII Mode -Displays tag ID in ASCII format. If the full tag ID or memory bank data is convertible to
ASCII format, then the application only shows the same. Inventory, Locate, Access, and Pre Filters show
ASCII mode represented data in respective sections.
Enabling SGTIN-96
To enable SGTIN-96 tag format:
1. Tap Settings > Application from the bottom navigation bar.
80

123RFID Mobile Application
2. Select the corresponding checkbox to enable SGTIN-96 Mode.
81

123RFID Mobile Application
3. Next, run the inventory to confirm that the changes were implemented successfully.
U9 Tags
82

123RFID Mobile Application
1. Run the inventory and select the U9 tag.
83

123RFID Mobile Application
2.
Tap and select Tag Write.
84
123RFID Mobile Application
3. Select all from the Memory Bank drop-down menu on the Lock tab.
4. Click Lock to lock the tag permanently.
85

123RFID Mobile Application
Scan Settings
To access Scan Settings, from the bottom navigation bar, tap Settings > SCAN or tap > Settings >
SCAN. Scan Settings options include:
• Beeper -Provides the option to change the scanner beeper volume to high, medium, or low.
NOTE: Available only on sleds with an imager.
• Symbologies -Allows users to select/enable specific barcode types. Supported symbologies include
UPC-A,UPC-E,UPC-E1,EAN-8/JAN8,EAN-13/JAN13,Bookland EAN,Code 128,GS1-128,Code 39,Code
93,Code 11,Interleaved 2 of 5,Discrete 2 of 5,Chinese 2 of 5,Codabar,MSI,Code 32, Data Matrix,
PDF417,ISBN,UCC Coupon Extended Code,ISSN EAN,ISBT 128,Trioptic Code 39, Matrix 2 of 5,
Korean 3 of 5,GS1 DataBar-14,GS1 DataBar Limited,GS1 DataBar Expanded,MicroPDF417, Maxicode,
QR Code, Aztec,Han Xin Code, Australian Post, US PLANET, US POSTNET, Netherlands KIX, USPS
4CB, UK Postal, Japan Post, UPU FICS, MicroQR, Composite C, Composite AB, TLC39, Dot Code.
• Picklist Mode - Toggle to turn picklist mode on or off. The default is Off.
• Aim Guide - Provides an aimer light that can be switched on or off.
86

123RFID Mobile Application
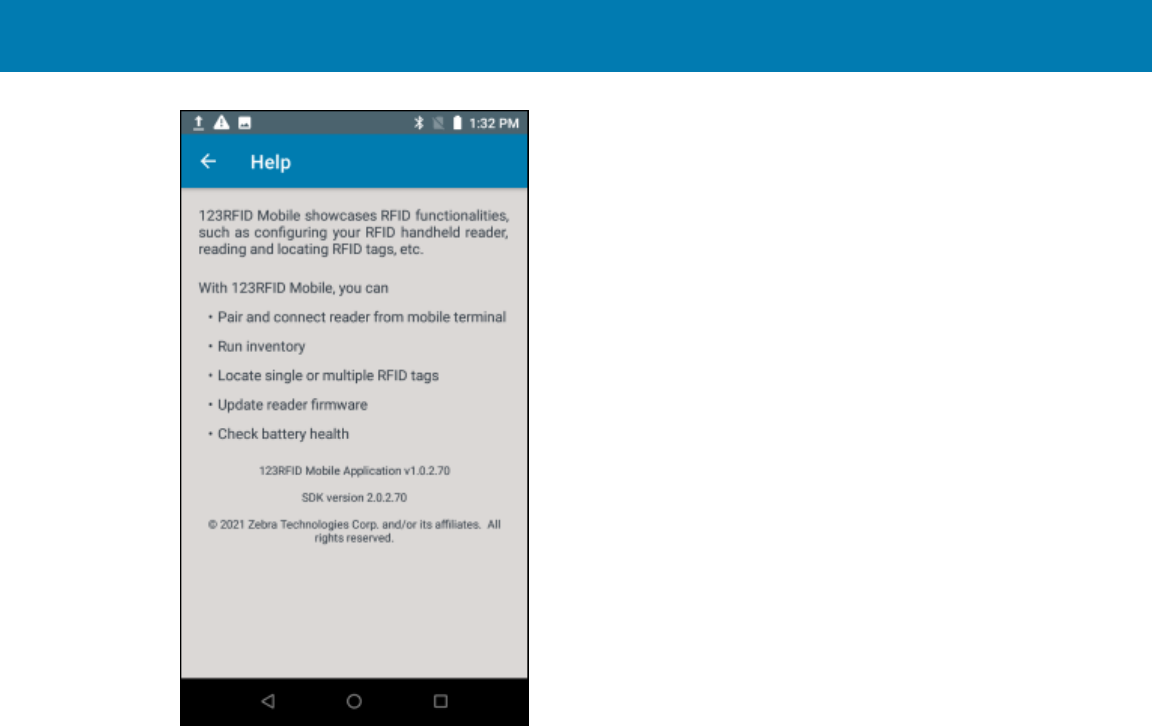
Getting Help
On-screen help is available within 123RFID Mobile Application.
To access the Help screen, tap > Settings > Help or when available, tap the question mark icon in the
upper right screen.
87
123RFID Mobile Application
88

www.zebra.com
