
Manage your forms and your data: Link your KoBo account to a Google sheet Page 1 | 9
LINK YOUR KOBO ACCOU NT T O A GOOGLE SHEET
Table of contents
I. Installation ............................................................................................................. 2
II. Authentication ....................................................................................................... 5
III. Importing the data ............................................................................................... 7
IV. Google sheet Pivot table example ......................................................................... 8
Linking your Kobo account to a Google sheet is a very convenient way to share the data
collected during a survey. Giving access to a shared Google sheet will allow more people to
read and work with your Kobo dataset without giving direct access to your Kobo account.
It also offers the possibility to perform advanced analyses unavailable in the KoboToolbox with
the latest data collected, such as producing pivot tables, compiling data from different surveys
in one single Google sheet…
The import of the Kobo dataset into a Google spreadsheet described in this tutorial is based on
a third-party procedure that can be found here: https://github.com/pcurrier/KoboToolbox-
GoogleApps-Scripts
Even though it works with most of the datatypes, there may be cases where additional support
is required.
The operation worked when using Google Chrome and Mozilla Firefox. It is recommended
to use one of these browsers for the entire process (the import did not work using
Internet Explorer).
Some of the steps described involves the manipulation of scripts/coding therefore it may
be suitable only for users at ease with IT.

Manage your forms and your data: Link your KoBo account to a Google sheet Page 2 | 9
I. Installation
To share/export data from your Kobo database to a Google spreadsheet, you will need to
create a Google account (if you don’t have one yet), then:
Run https://drive.google.com/drive/my-drive
Click on “My Drive” then “Google Sheets” and “Blank spreadsheet”
The blank spreadsheet will open automatically. Rename it (e.g. Kobo_Google). Space or
underscore can be used. Avoid any other special character.

Manage your forms and your data: Link your KoBo account to a Google sheet Page 3 | 9
Select the “Tools” menu and click on “Script editor…”
Several scripts are required for the operation to work. They are available for download
in the following link https://github.com/pcurrier/KoboToolbox-GoogleApps-Scripts
The scripts can be found in the folders “demo” and “src” but it is recommended to
download all (Download ZIP) by clicking on “Clone or download”:
In the event you can’t access the aforementioned link, here is the zipped folder (as of
February 14
th
2018, files may evolve over time):
KoboToolbox-Goog
leApps-Scripts-ma ster.zip
Unzip the folder to have access to the files

Manage your forms and your data: Link your KoBo account to a Google sheet Page 4 | 9
In the Script editor page of your blank Google spreadsheet, you will need to add all
the scripts of the package. To do so, you first have to create New blank scripts and
paste the content of the scripts downloaded into the newly created scripts. Here are the
steps more in details: File > New > Script file
Name each script file with the names used in the package (e.g. KoboToolbox.gs,
Main.gs, etc.). Keep the same spelling and letter case (including the extension).
If you don’t have one, download and install a software to read .gs files (e.g.
Notepad++)
Open each file in the package and copy-paste their entire code into the script created in
the Google sheet (e.g. the “Code.gs” code from the package should be copied and
pasted into the new “Code.gs” script that you created in the script editor, etc.).
The same operation should be performed with the two html files: File > New > Html
file, name them the same way including the extension (e.g. “UploadForm.html”), then
copy-paste their respective code from the two html files in the package.

Manage your forms and your data: Link your KoBo account to a Google sheet Page 5 | 9
II. Authentication
There are two working methods to have the Google sheet being authenticated when accessing
the Kobo account:
1) The basic authentication: the script will require the Kobo account username and
password
2) The token authentication: the script will require the token value corresponding to your
account
A third method is the OAuth2 authentication, but it is still under development.
To avoid displaying your username and password inside the script, it is recommended to use
the token authentication:
Open the script “Code.gs” of your Google project
By default, the Token-based authentication is activated in the script (the lines should
not be greyed out).
Edit the baseURL that is used for Humanitarian organizations:
baseUrl: 'https://kc.humanitarianresponse.info'

Manage your forms and your data: Link your KoBo account to a Google sheet Page 6 | 9
Find the value of your authToken by entering the following URL in your browser:
https://kc.humanitarianresponse.info/your_kobo_username/api-token
Your Kobo account needs to be open before requesting the Token
Copy the API token, then paste it into the value of the authToken configuration
parameter in the Code.gs script:
Save all the changes (File > Save all) and close the window.

Manage your forms and your data: Link your KoBo account to a Google sheet Page 7 | 9
III. Importing the data
Once all the scripts have been prepared according to the procedure, you can import the data
from your Kobo database:
Reload the Google sheet to ensure that the scripts and changes are loaded.
Make sure that the sheet is empty. You can also add a new blank sheet with the
“+” symbol at the bottom of the spreadsheet.
A new menu should have appeared: “KoboToolbox” (there is a small delay until it
appears):
Select this new menu and click on “Import KoboToolbox Data into Sheet”. When
running this script for the first time, Google will ask for a permission to access your
spreadsheet data. Once validated, the script will open the following window:
Select the Kobo survey that you want to import (tick the box) as well as the google
sheet where you want the data to be imported and click on “Import Survey Data”.
It is possible to select more than one survey to import if their database structure (names
and number of columns) is the same.
Each time you run the script, it will import ALL the data from Kobo (it is not an update
function). If you re-run this process on a sheet that already contains Kobo survey data, it
will append the rows at the end of the sheet each time. To avoid duplicates, it is
recommended to use a blank sheet before importing it all.
Manage your forms and your data: Link your KoBo account to a Google sheet Page 8 | 9
IV. Google sheet Pivot table example
Once the Google sheet link with Kobo is up and running, the data collected can be accessed by
other users depending on the authorization given by the Google account owner (view, edit,
comment).
On top of that, other typical Google sheet functions are available to handle the dataset.
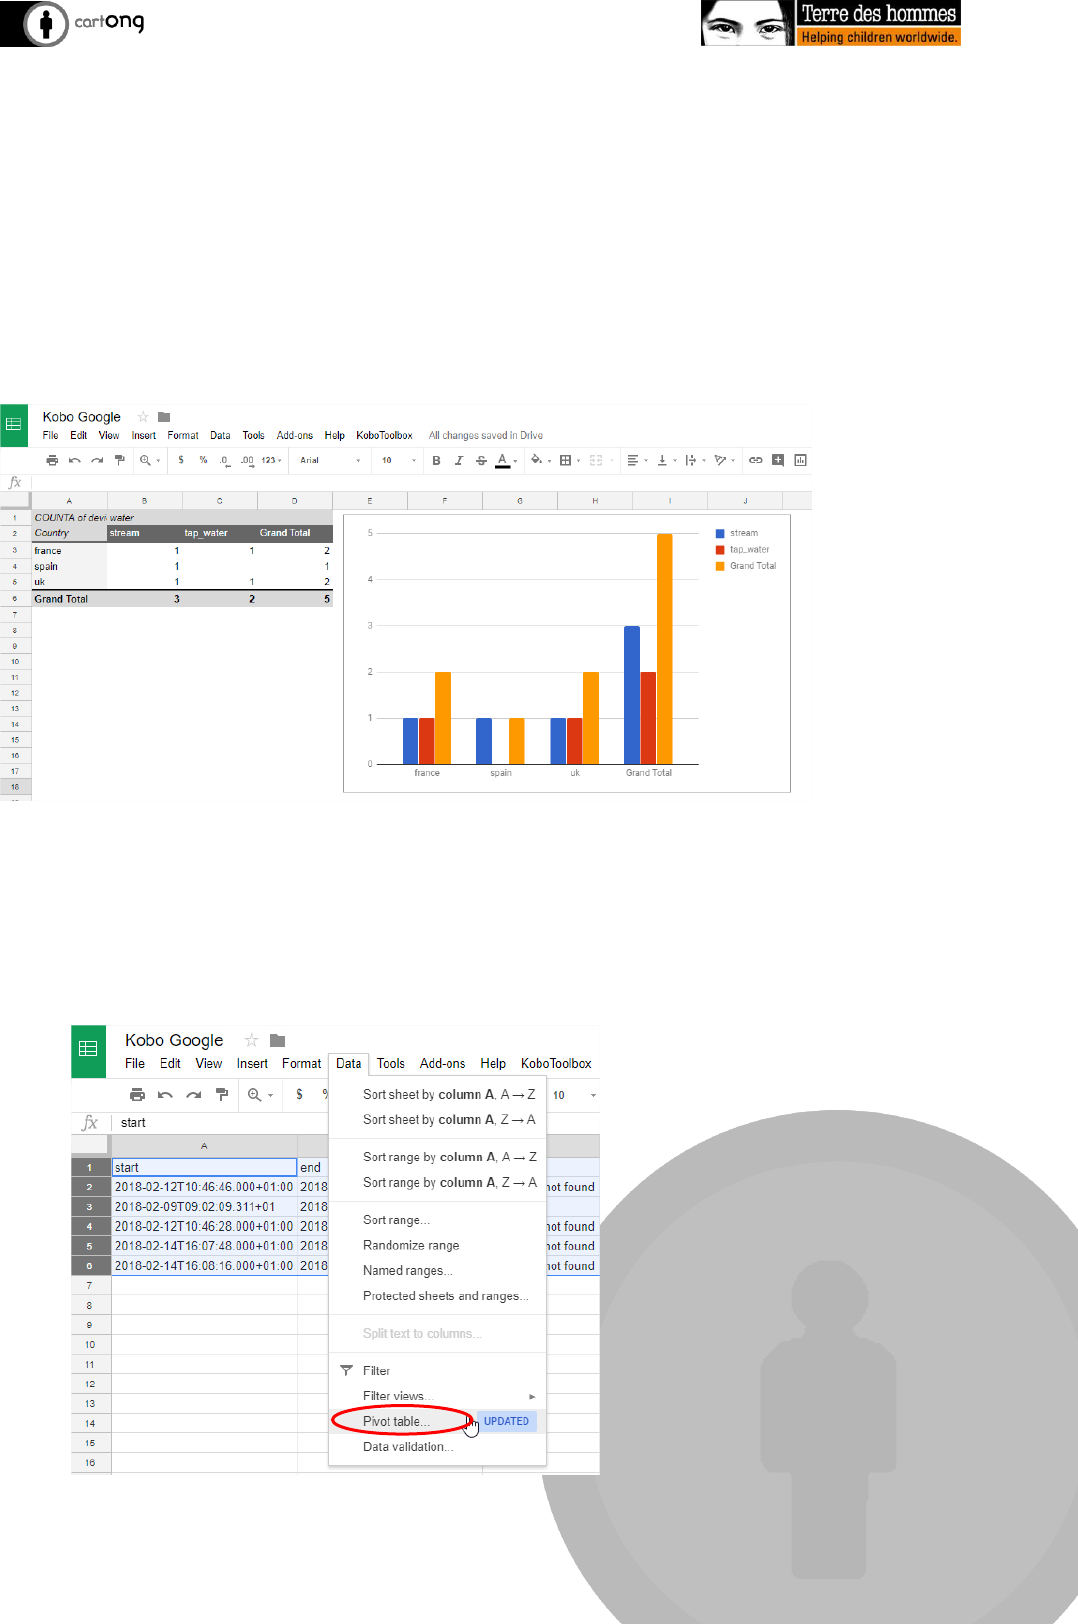
The pivot table function helps visualize data in a certain way, by grouping and summarizing
them according to your needs. Charts can also be produced based on the pivot table:
Here are the few steps to use this function in Google sheet:
Open your Google sheet
Import the data from KoboToolbox (see previous chapter): KoboToolbox > Import
KoboToolbox Data into Sheet
Select the menu “Data” and click “Pivot table…”

Manage your forms and your data: Link your KoBo account to a Google sheet Page 9 | 9
If you haven’t selected your data before clicking “Pivot table…”, Google will ask you
which data you want to include.
A new sheet will then automatically appear at the bottom of your spreadsheet
Select which data to put in Rows, Columns, Values and/or Filters with the pivot table
editor:
To update your data, delete it all (main sheet) and re-run the import process. When you
empty the data sheet, the pivot table linked to this dataset will automatically be empty. It
will update itself automatically as new data are added (provided that the dataset has the
same structure). If you want your pivot table to include newly imported data, remember
to include the new rows in your pivot table editor.
